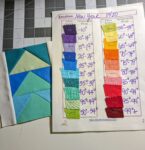
One of the quilts I am making for the 2024 Temperature Quilt QAL is an orange peel quilt. However, I’ve never made an orange peel block before!! But that’s what I love to do, learn new techniques. Even if I mess up, I can at least say I tried, right?
Two ways to make orange peels.
There are two ways to make an orange peel block. You can either use a template that cuts out three pieces per block, and then sew them together using the curved piecing technique. Like this template from CutRite, although they call it a melon. I have done a little curved piecing while making a quilt for myself, that’s still in progress. But I couldn’t imagine myself making 378 curved piecing blocks!! That’s 366 days for this year + 12 blocks for in between the months.
The second way to make an orange peel block is to cut the orange peel and applique it onto a square of fabric. My applique skills definitely need some improvement, so I decided this would be the way to go for this temperature quilt. I think it’ll be fun to see the progression of my skills from the January 1st block all the way through the December 31st block!
What fusible to use?
There are sooooooo many fusible interfacings out there to choose from! Which one is the right one for the orange peel blocks? Well, just as there are a ton of different choices, there are also a ton of different opinions. Ask in any quilt store, Facebook group or message board, and you will get as many different answers as there are products available.
I wanted to use Mistyfuse since I have a ton of it that I haven’t used yet. I also like the way it doesn’t add any extra bulk to an applique. The only problem I thought I might have is that I’ve never seen anyone use it to do turned edge machine applique. There was no way I was going to hand sew them on, and my Juki is a straight stitch only machine, so no satin stitching available.
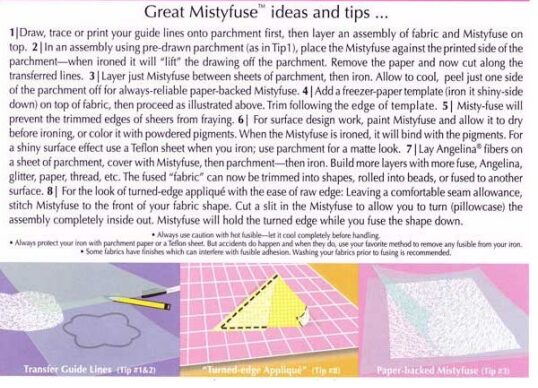
I thought I had seen something from Mistyfuse themselves about being able to do this, so off to Google I went. And yes!! I found this tip sheet from Mistyfuse! Tip number 8 was exactly what I was looking for.
Preparing the orange peels for applique
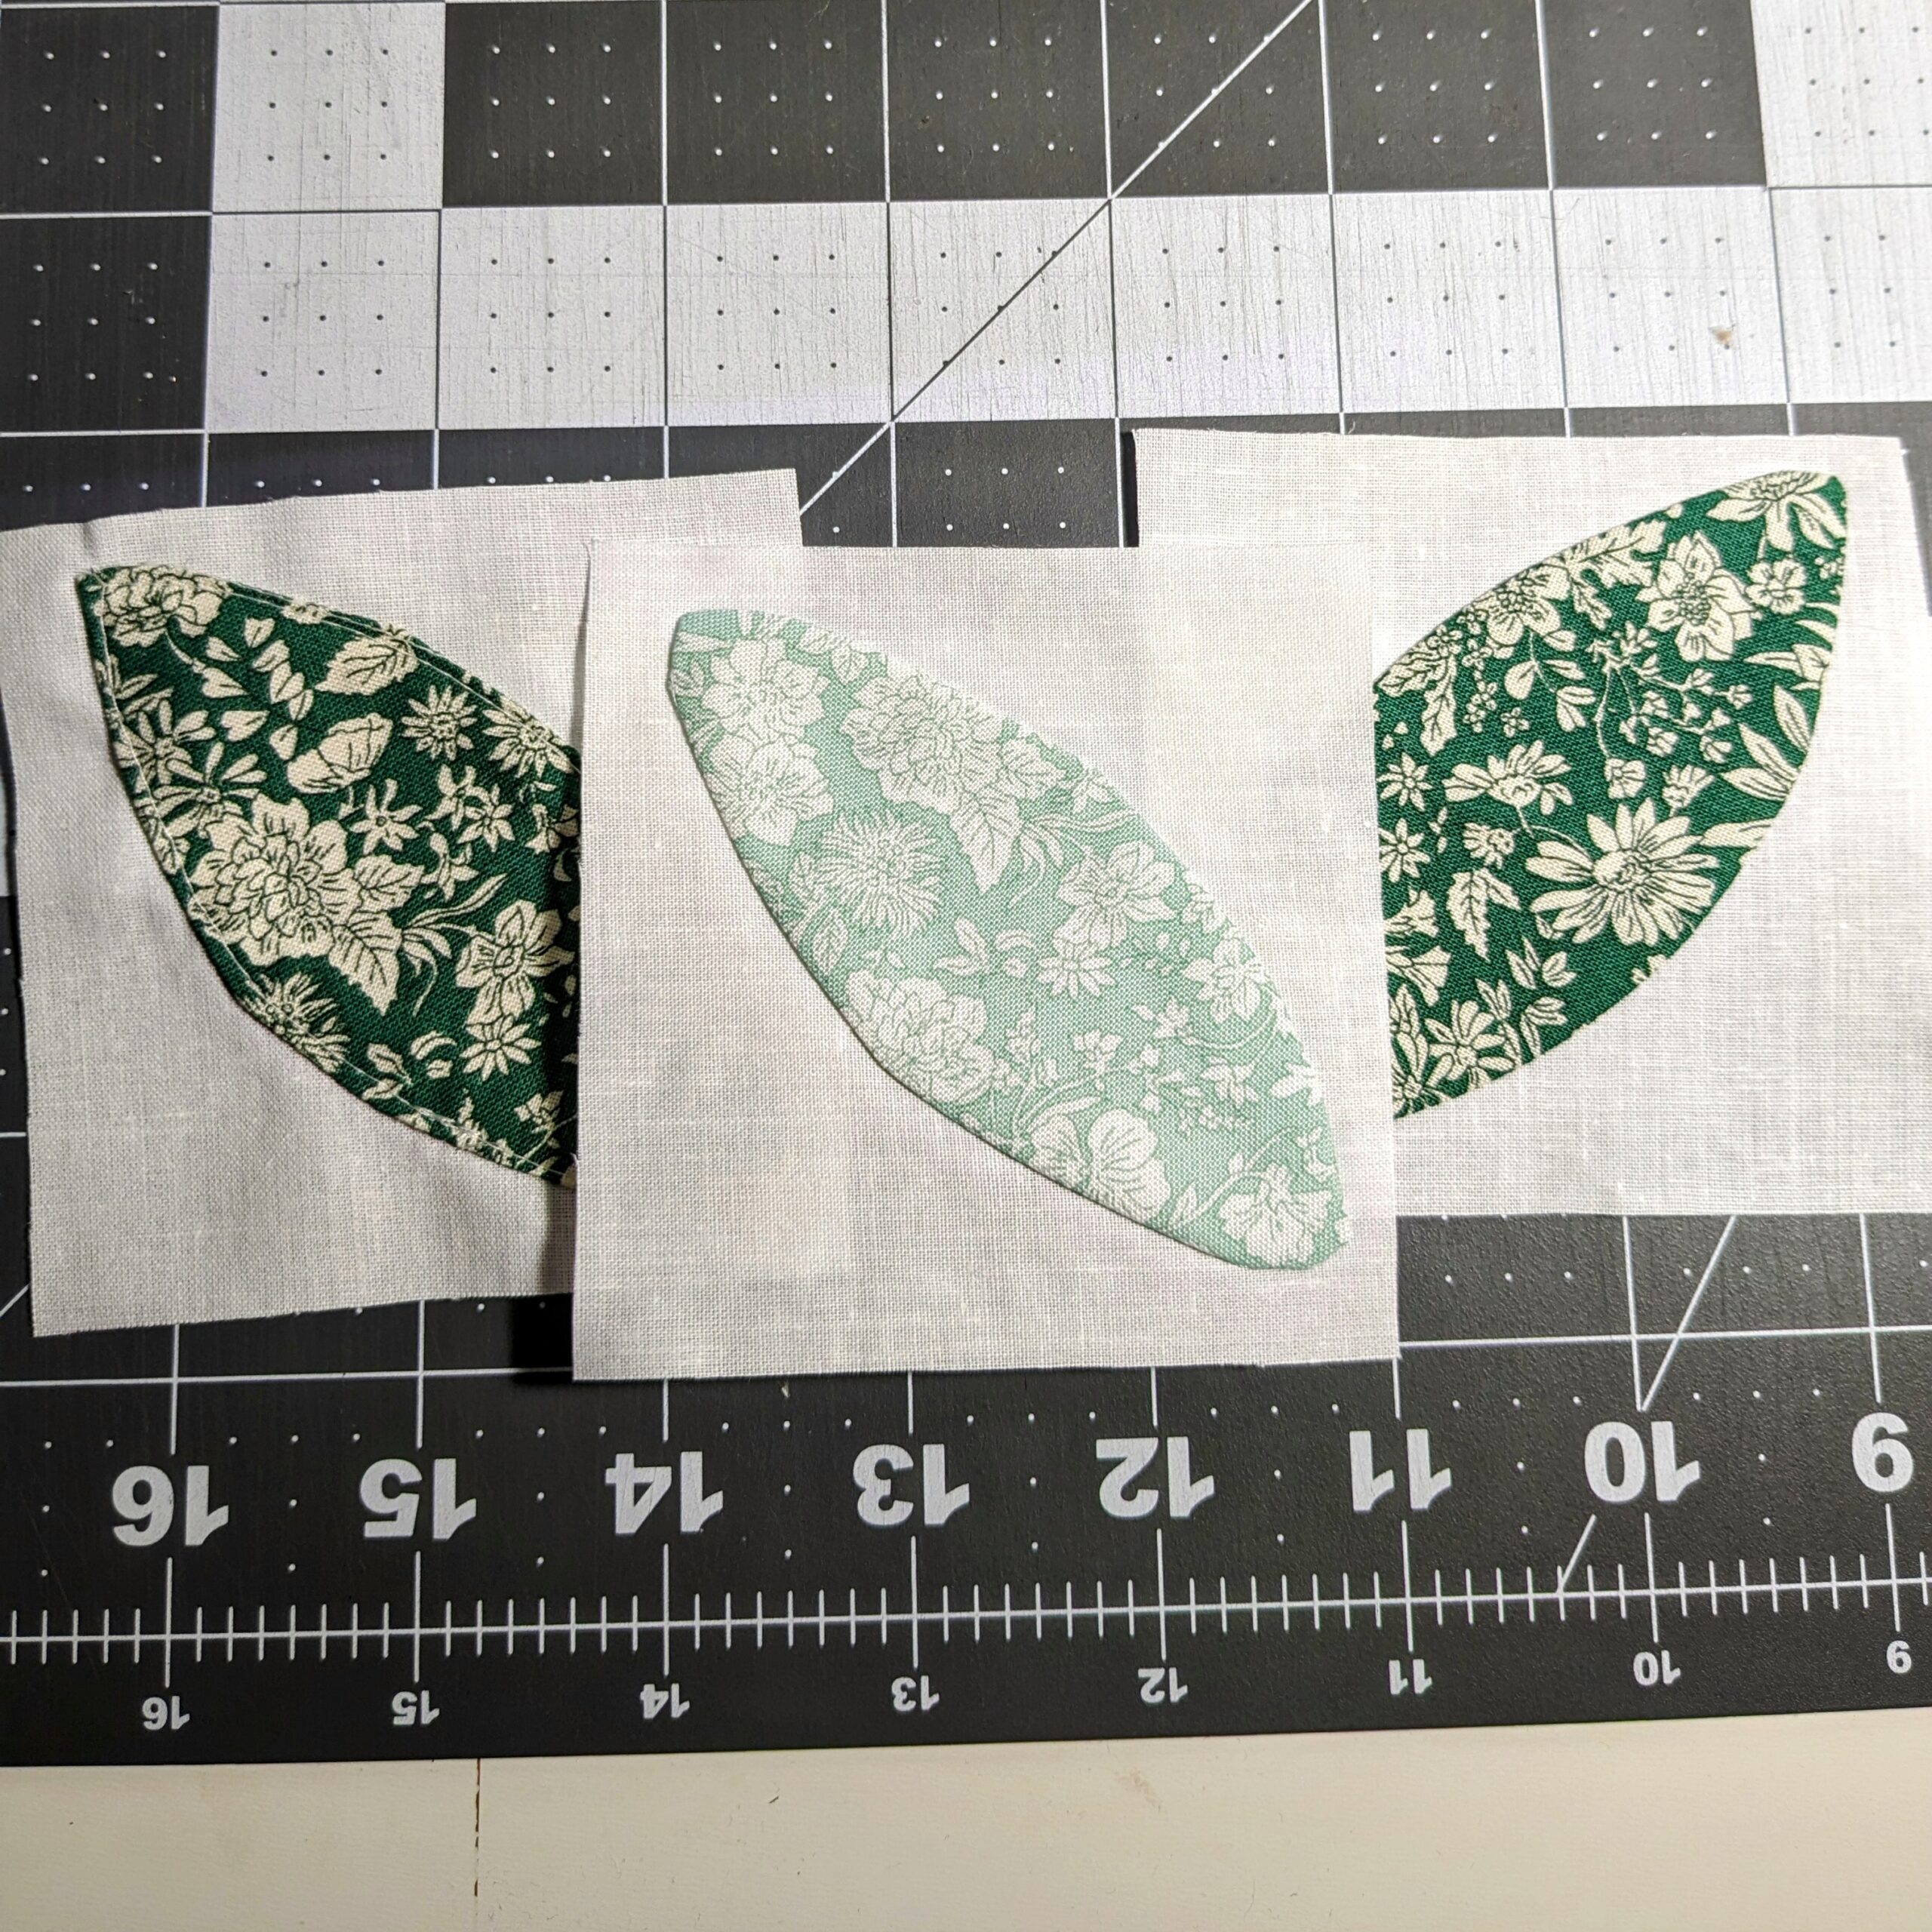
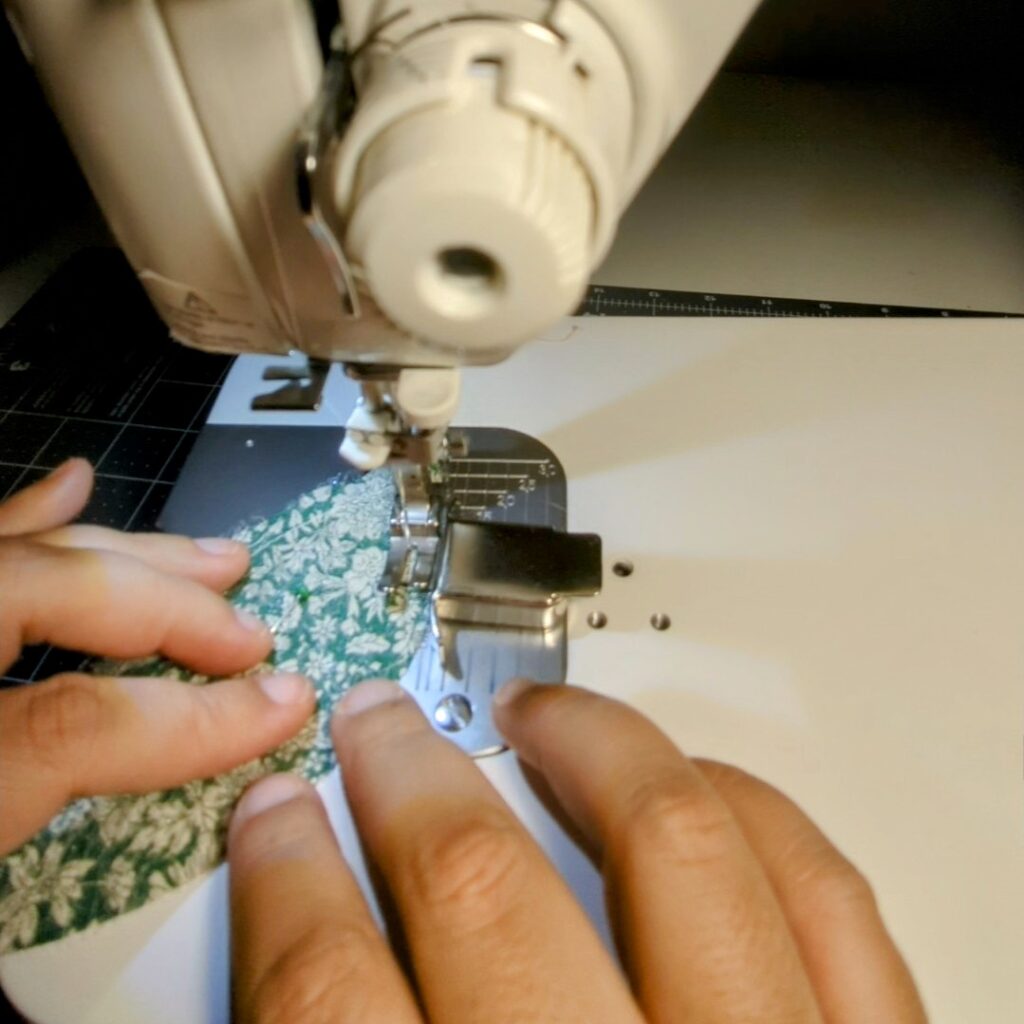
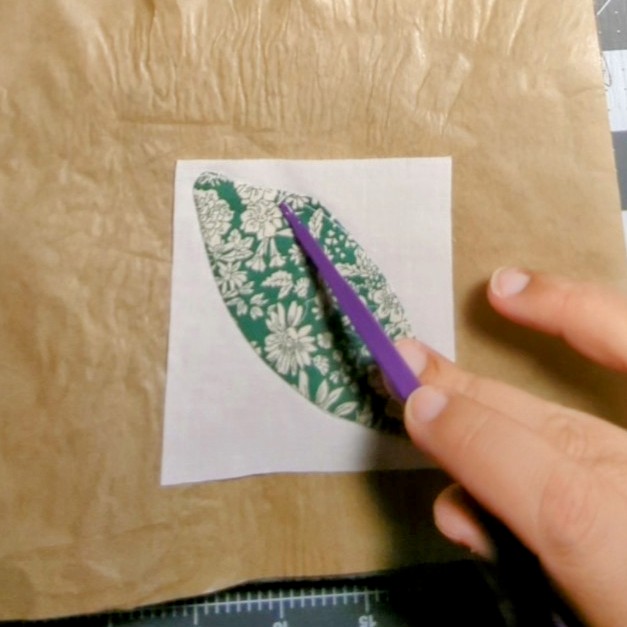
Now, I’m sure you could cut out the fabric and the Mistyfuse at the same time, but I know that I’m not that coordinated. I cut the fabric first using a template I created in EQ8 for my orange peels.
Then I used the fabric as a template for rough cutting the Mistyfuse, then I trimmed it up. All of my pictures for this post were extracted from a video I’m making that I’ll post to YouTube sometime this weekend. So some of them came out blurry, sorry!
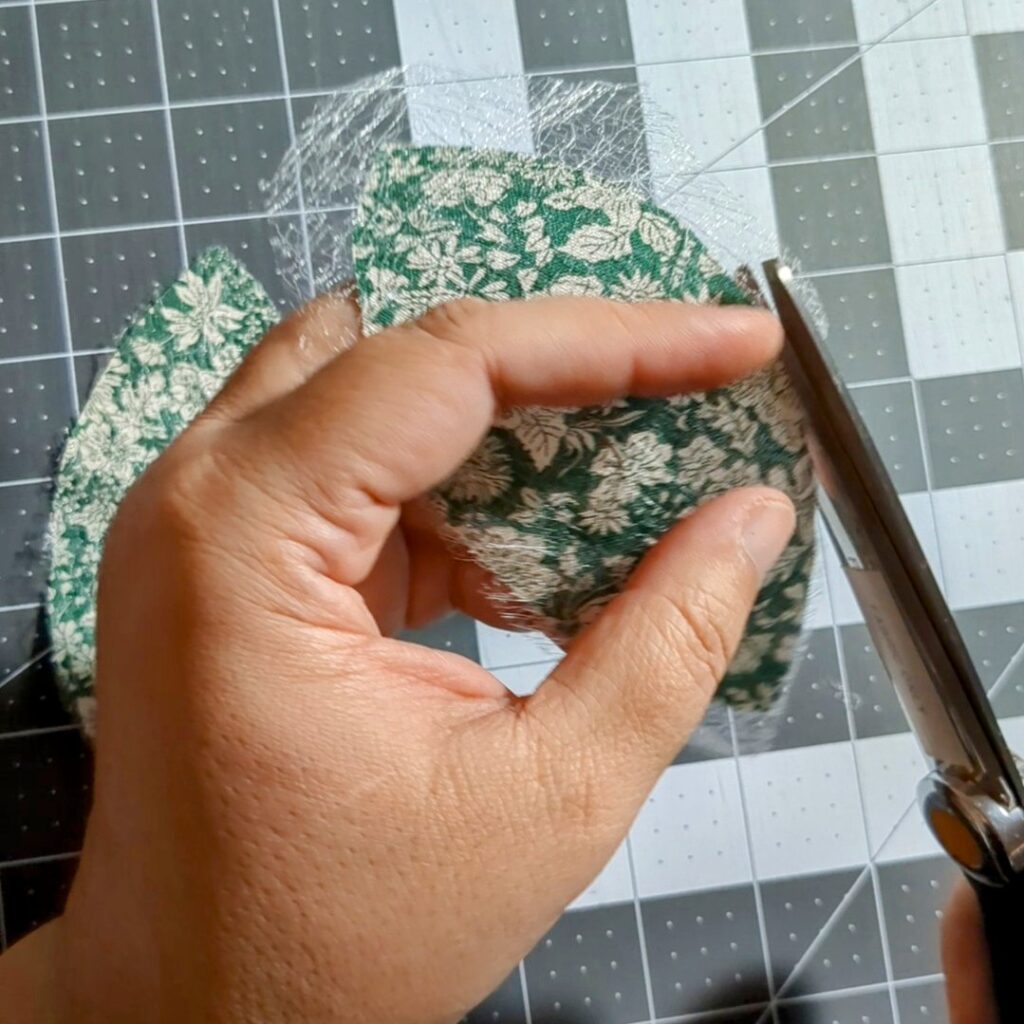

I pinned the Mistyfuse to the orange peel so that it wouldn’t slide around. Then I sewed them together using a 1/4″ seam allowance.
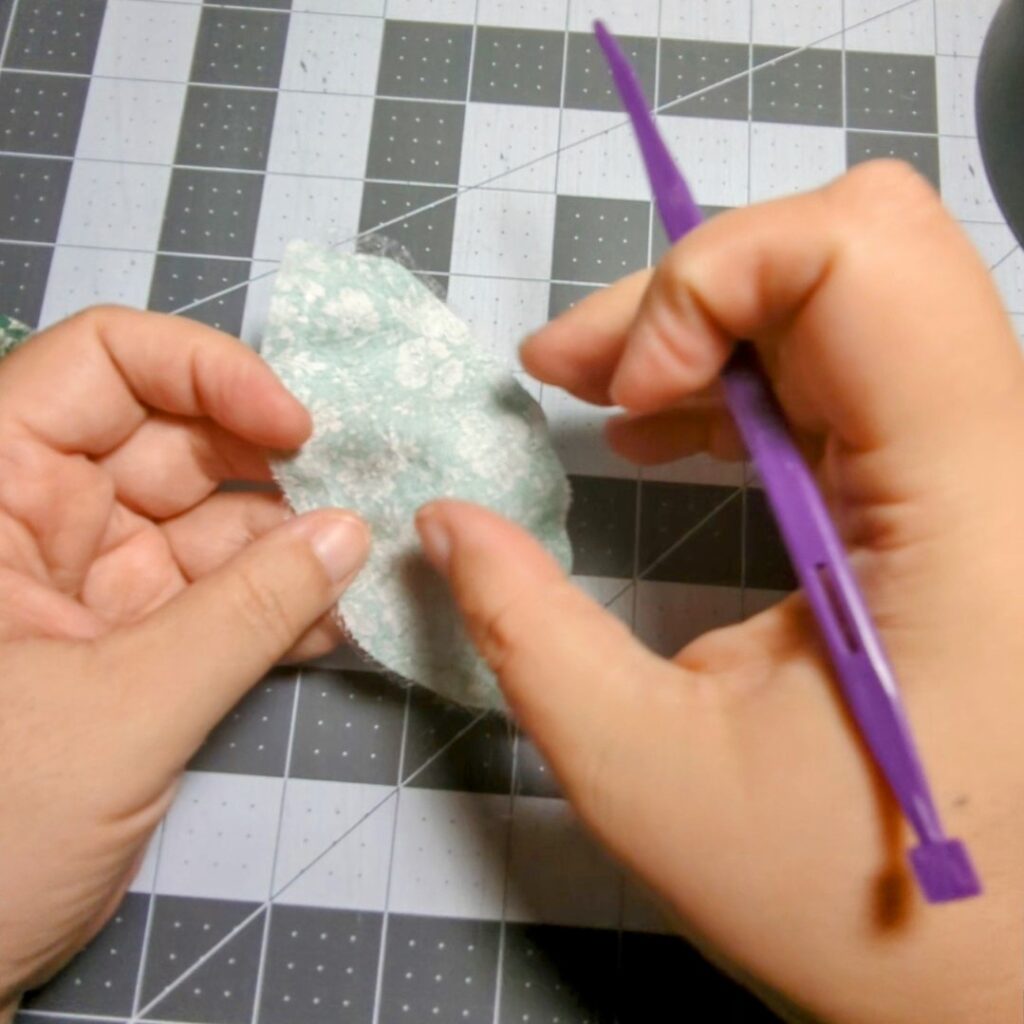
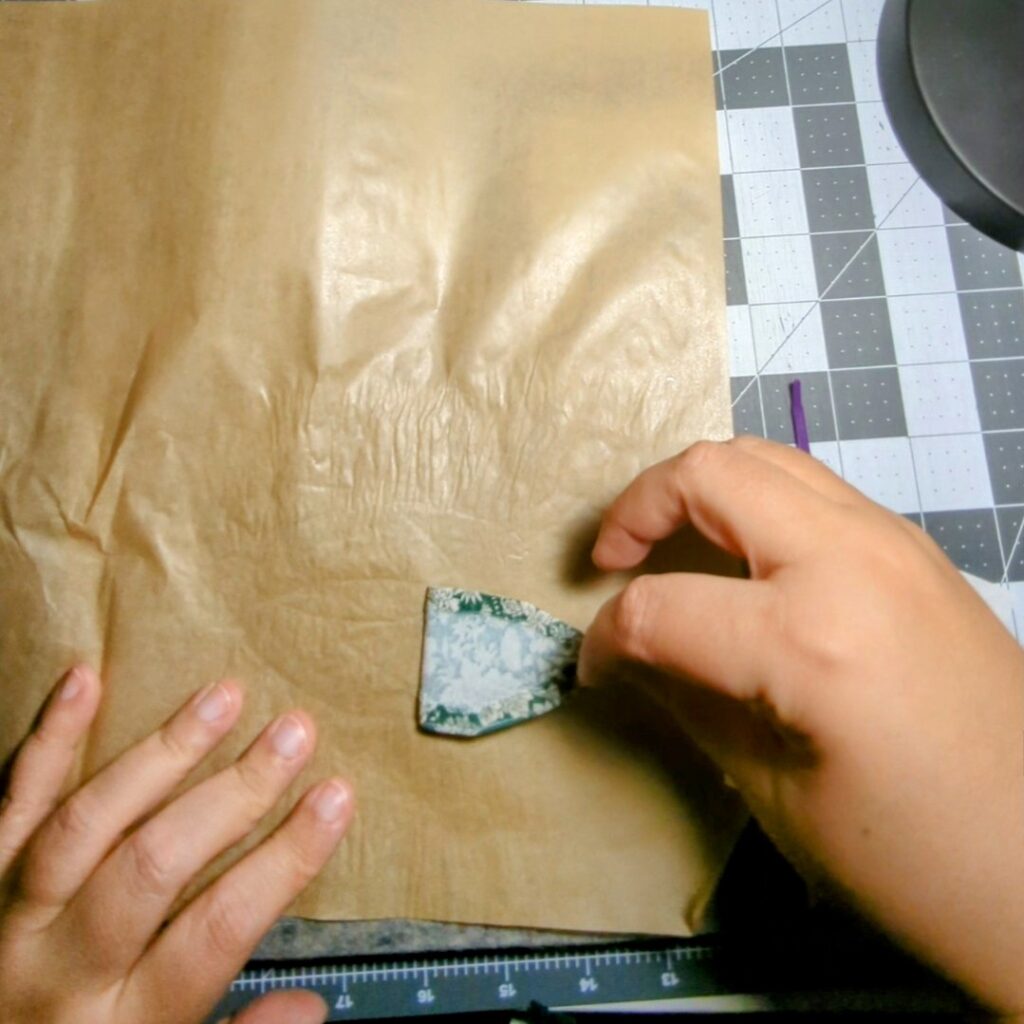
After sewing, I cut a slit in the Mistyfuse and turned them right side out. I used the purple thang to help, but be careful because you can (and I did) poke through the Mistyfuse. It isn’t too big of a deal since it’s a webbing type fusible anyway, but I tried to make sure I didn’t do it again!

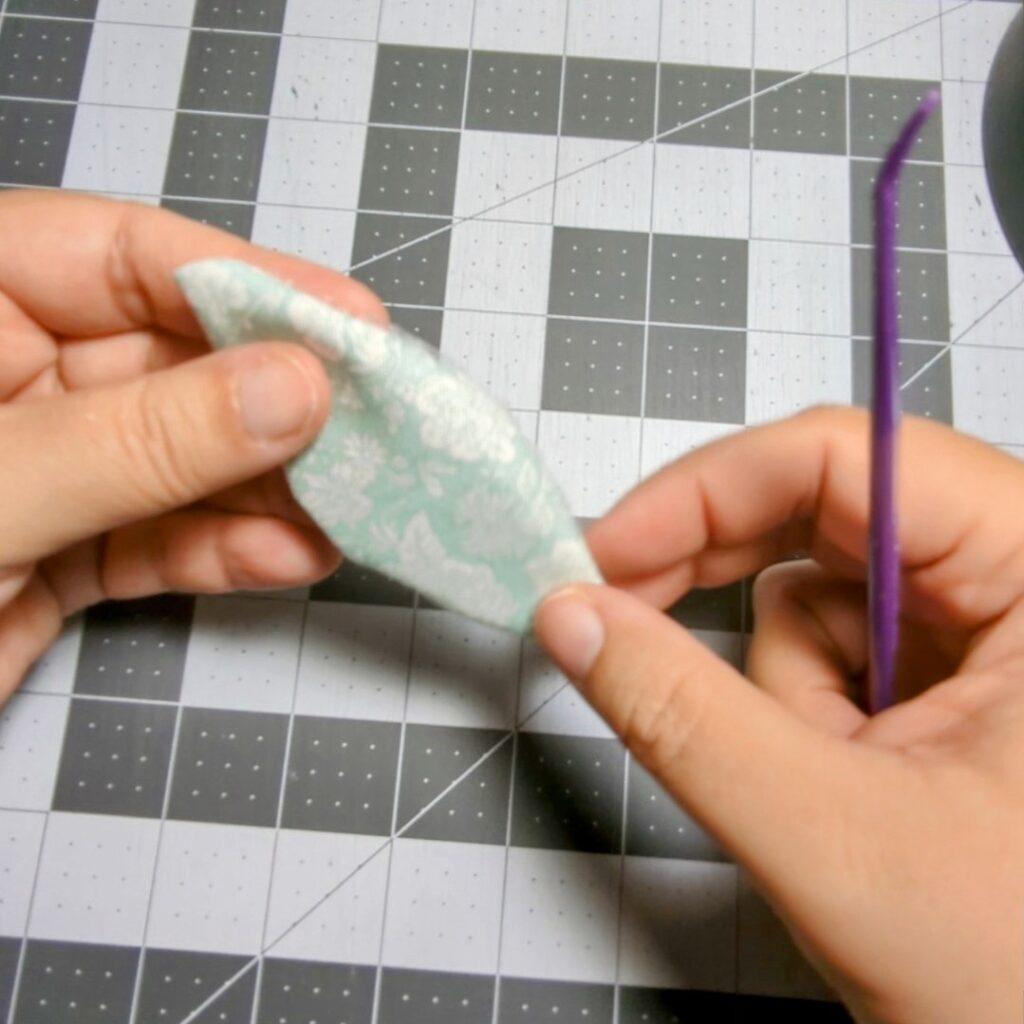
All turned and ready for fusing!!
Fusing the orange peels to the background squares
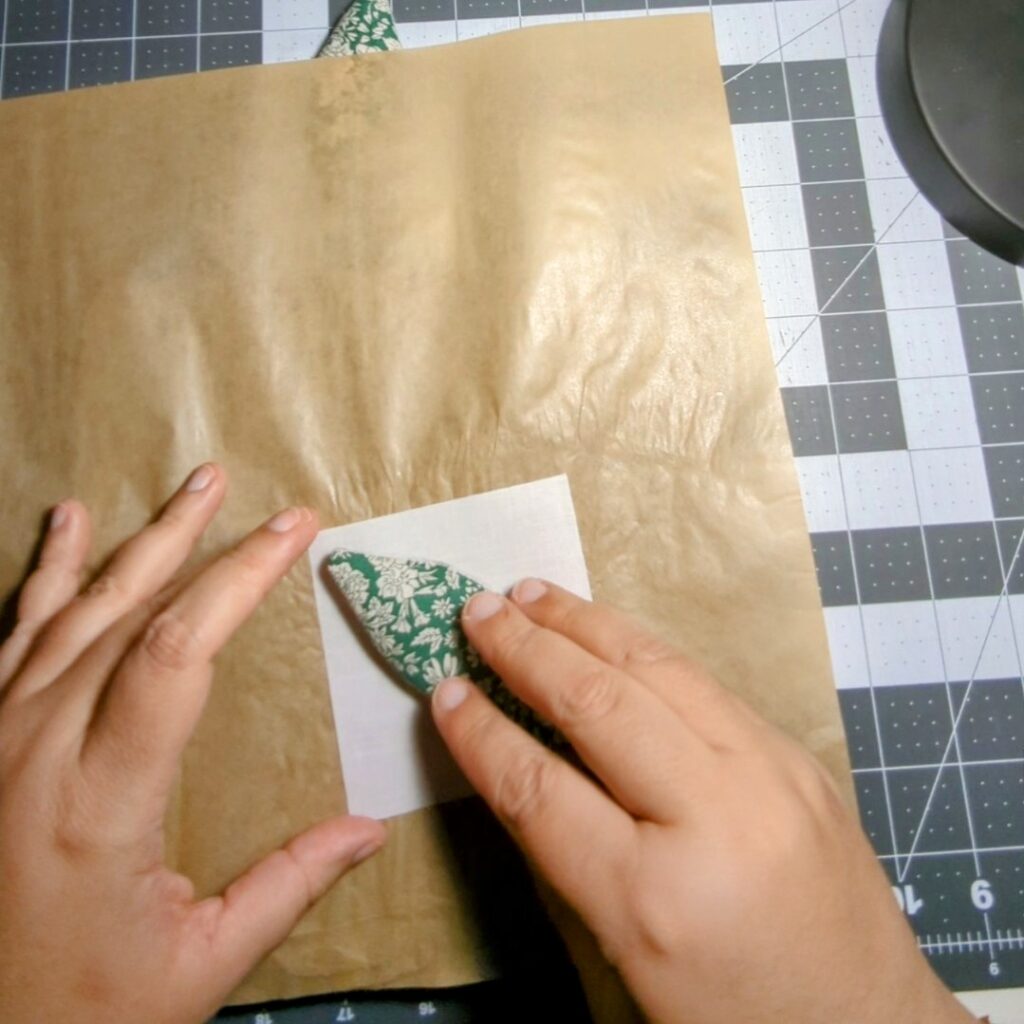
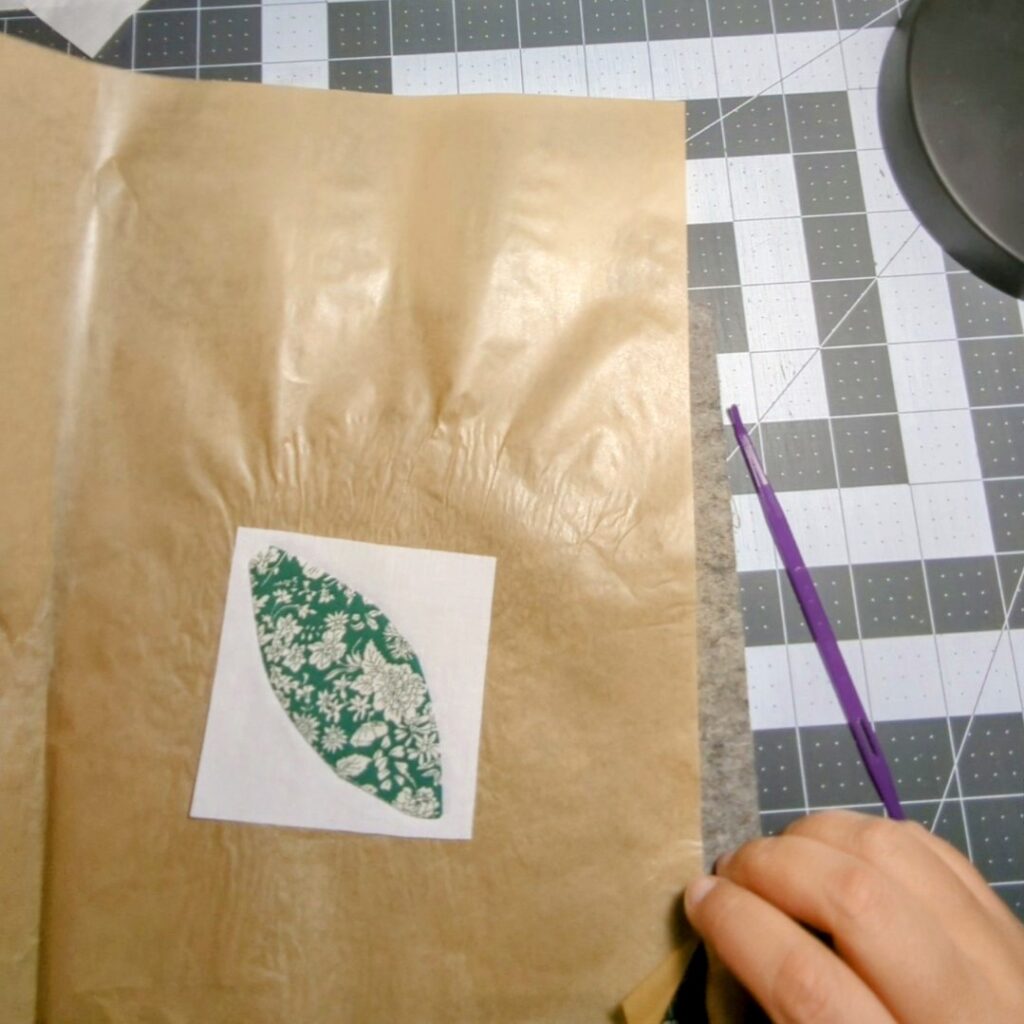
I tested out two ways to make the use the Mistyfuse with the blocks. First after I turned the orange peel right side out, I immediately fused it to the background square. I used a large piece of parchment paper to protect my iron and wool mat.
I found I didn’t like doing it this way as I don’t have much control over the orange peel. It was a bit puffy when I started, and even though I pressed it down some, some of the seam allowance ended up peeking out.
The second way is to fuse the Mistyfuse to the orange peel first. I did that with the other two blocks I was making. Once you fuse the fabric to the Mistyfuse, you can just peel it right off of the parchment paper.
Then I placed the orange peel on the background square and pressed. It fused beautifully to the background!!

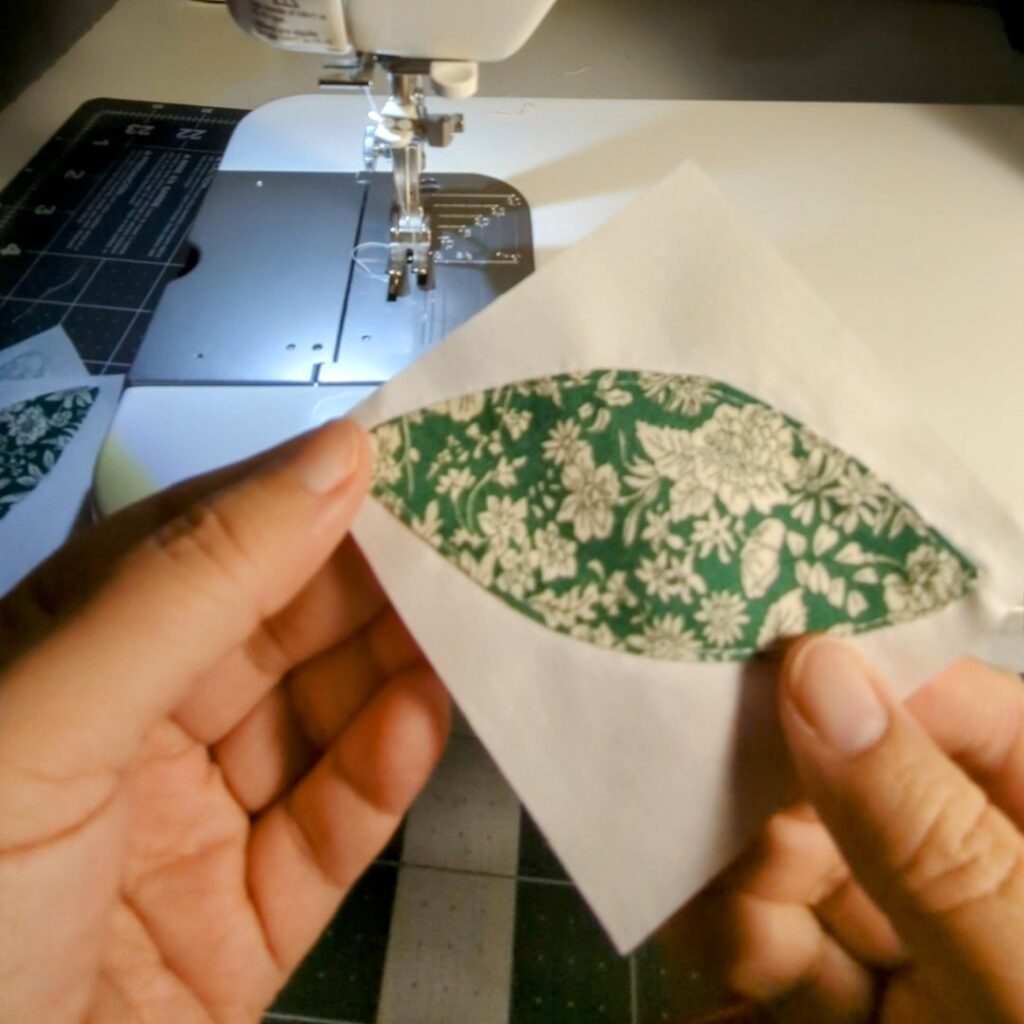
Finishing up the block!
Now you just have to top stitch the orange peel to the background fabric. I normally stitch with a white thread, but I feel it matched my orange peels well since they have white flowers on them. If I end up with a fabric that has different color flowers, then I’ll make sure I use a different colored thread.
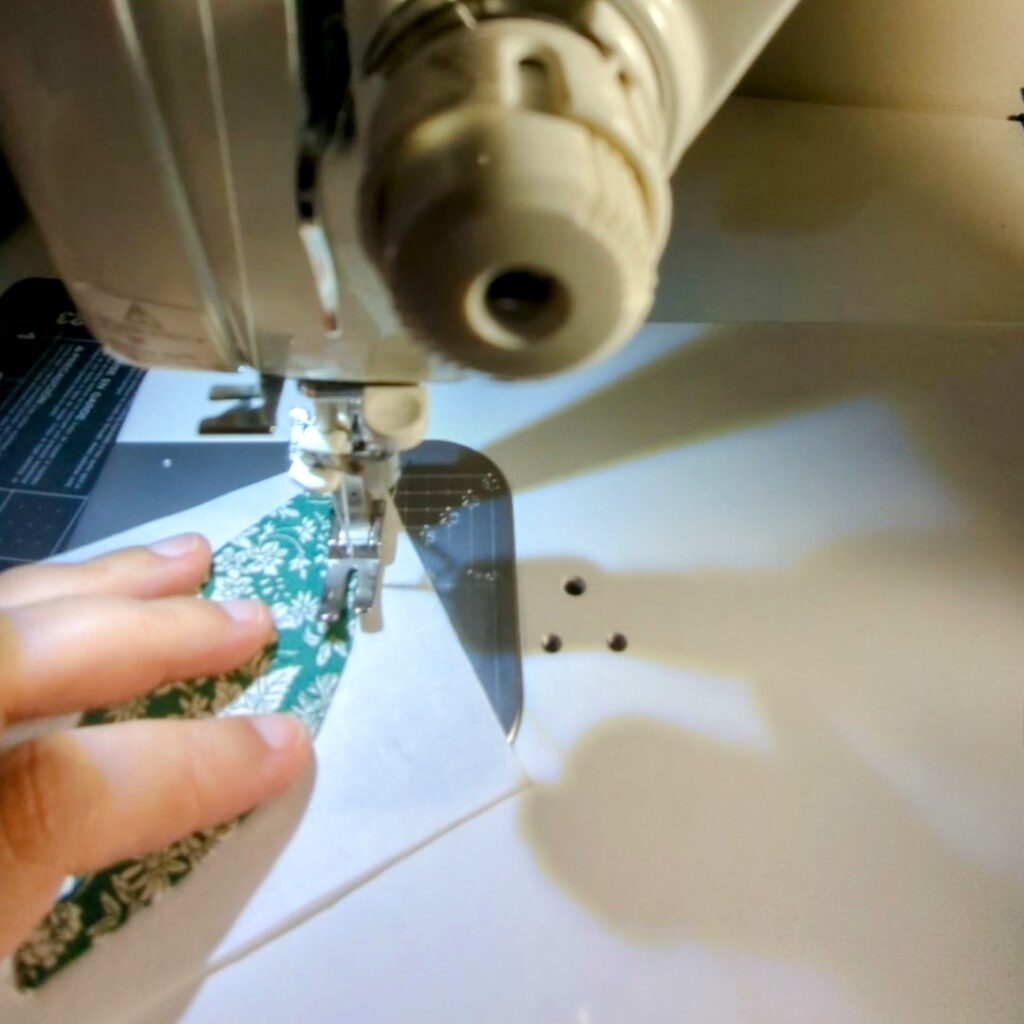
Here is one of the blocks all done! I am really happy with how they turned out. The orange peels feel very firmly attached to the background fabric. The best part is that the Mistyfuse is so thin and fuses so well, that the block doesn’t feel bulky. It just feels like there are two pieces of fabric together!

I’m really excited to see how these orange peel blocks come together for a finished temperature quilt!!
Want more information on the 2024 Temperature Quilt QAL? Check out this page that has all my blog posts about the QAL!
Happy Quilting!!