It’s the end of May, which means it’s graduation season! My husband’s friend has two daughters graduating this year. One is graduating from high school and the other is graduating from college. Their joint party is this weekend, and I knew I wanted to make their gifts.
Once I found out their favorite colors, I enlisted my husband’s help in choosing patterns from Sweet Pea Embroidery for handbags. I’ve made a couple of their handbags before, and knew that there directions are clear and their embroidery files stitch out beautifully! I wanted his help to try and find bags that would be a good fit for their personalities.

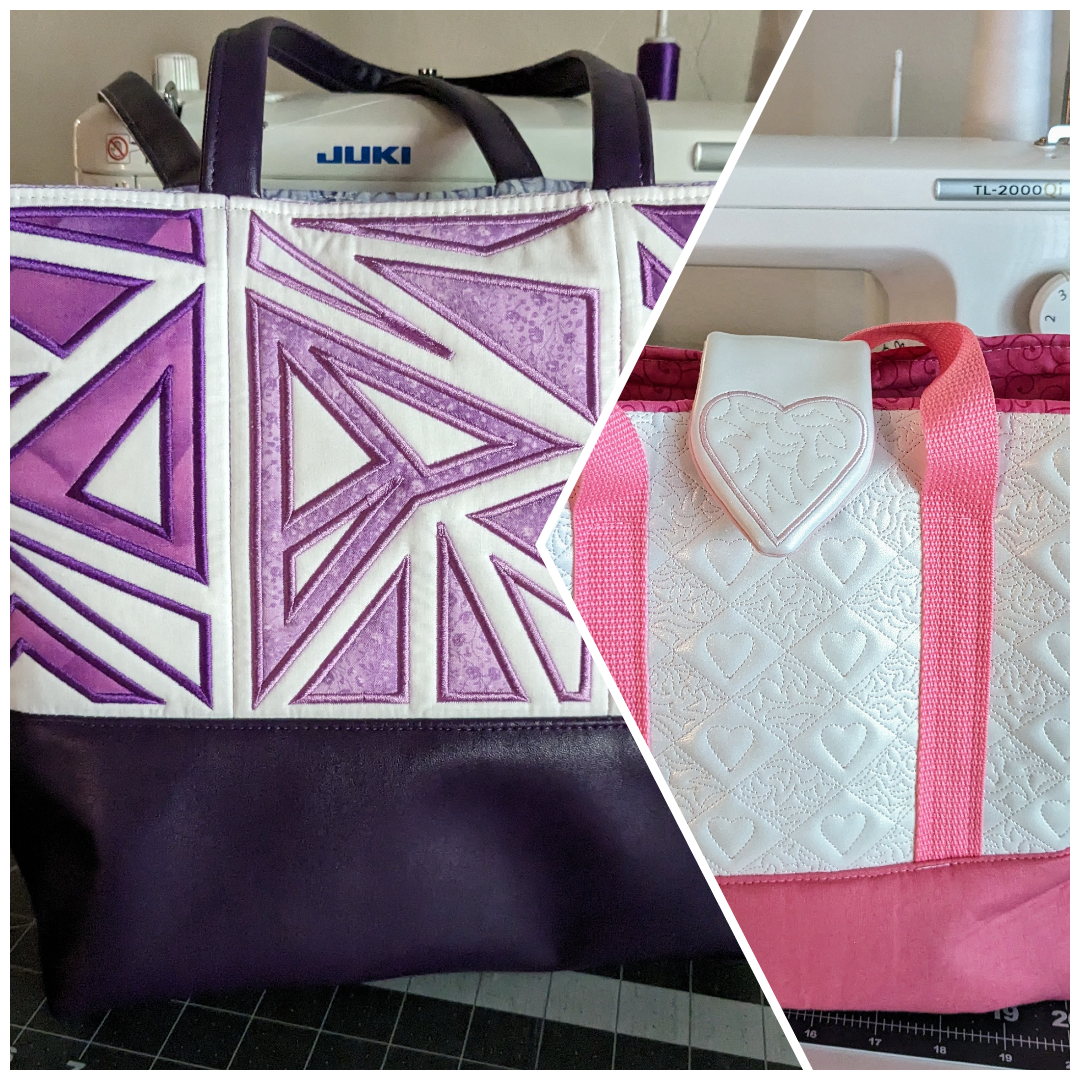
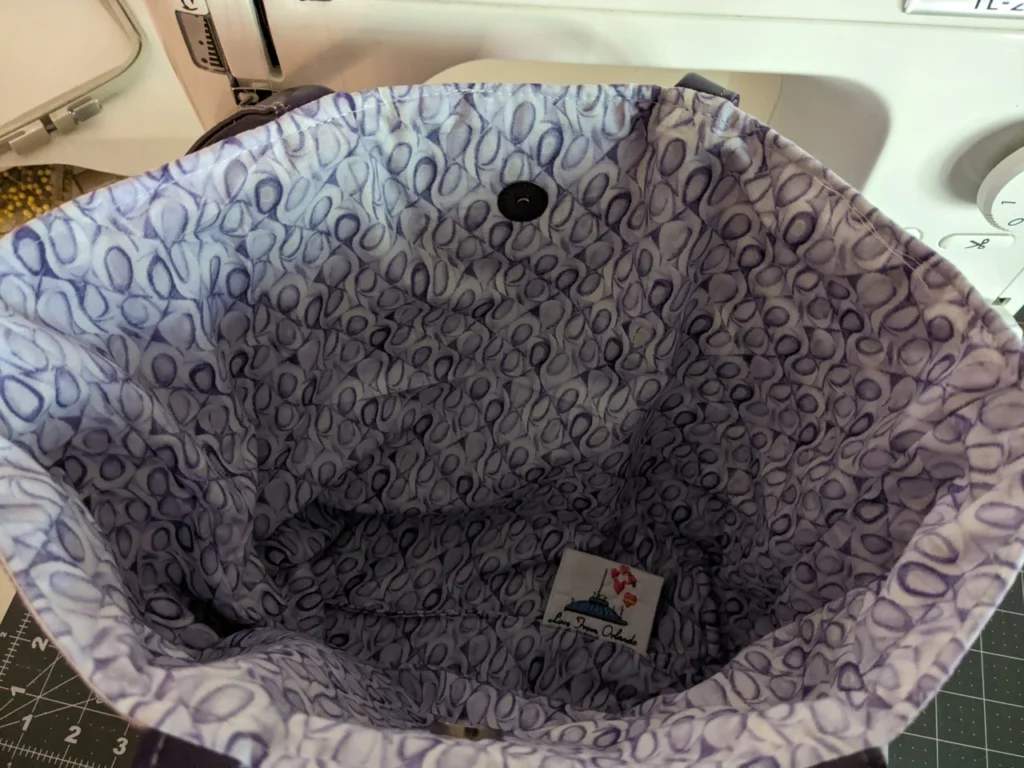
The Purple Bag
First was the purple handbag. I had this pattern saved to my favorites on the Sweet Pea website, and knew I wanted to make it in purple. As soon as I found out that purple was the favorite color of one of the young ladies, I knew I had to make this specific pattern! The pattern is called Triangle All Shapes Tote Bag, and is available from their website here.
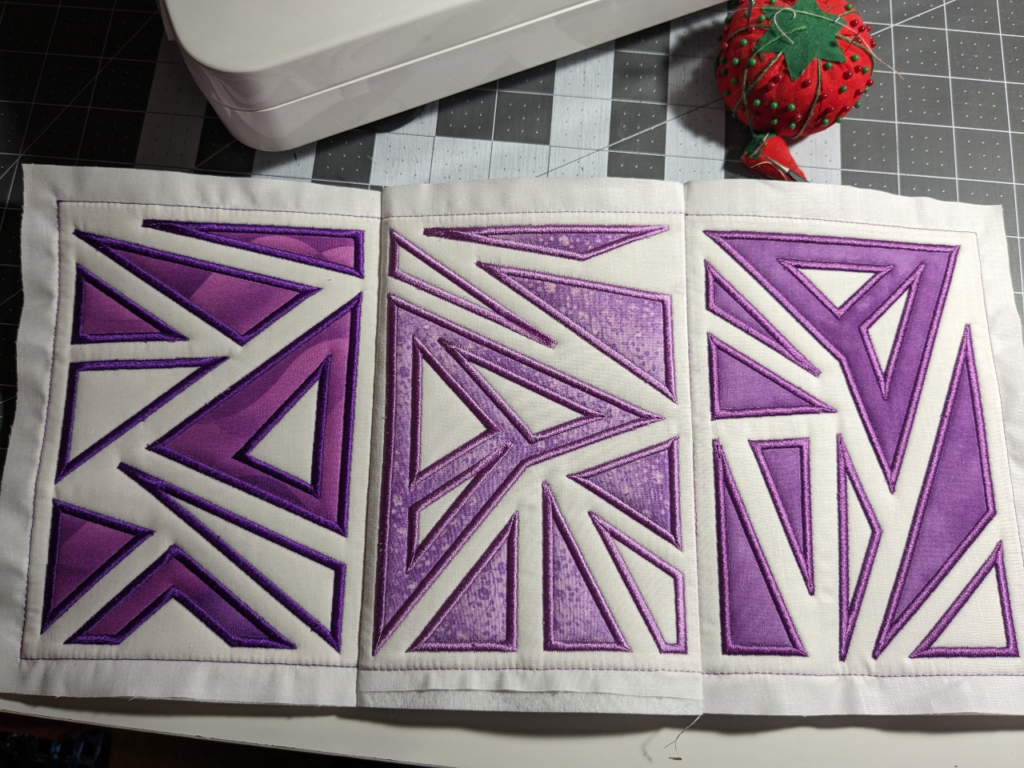
For this bag I used white linen fabric for the background, and 3 different purple fabrics for the applique. For purple being my favorite color, I had to really had to search through my scrap stash for enough purple fabric for this bag! I was so happy I finally found enough of these three different fabrics. I used faux leather in a deep purple color for the straps and the base of the bag.
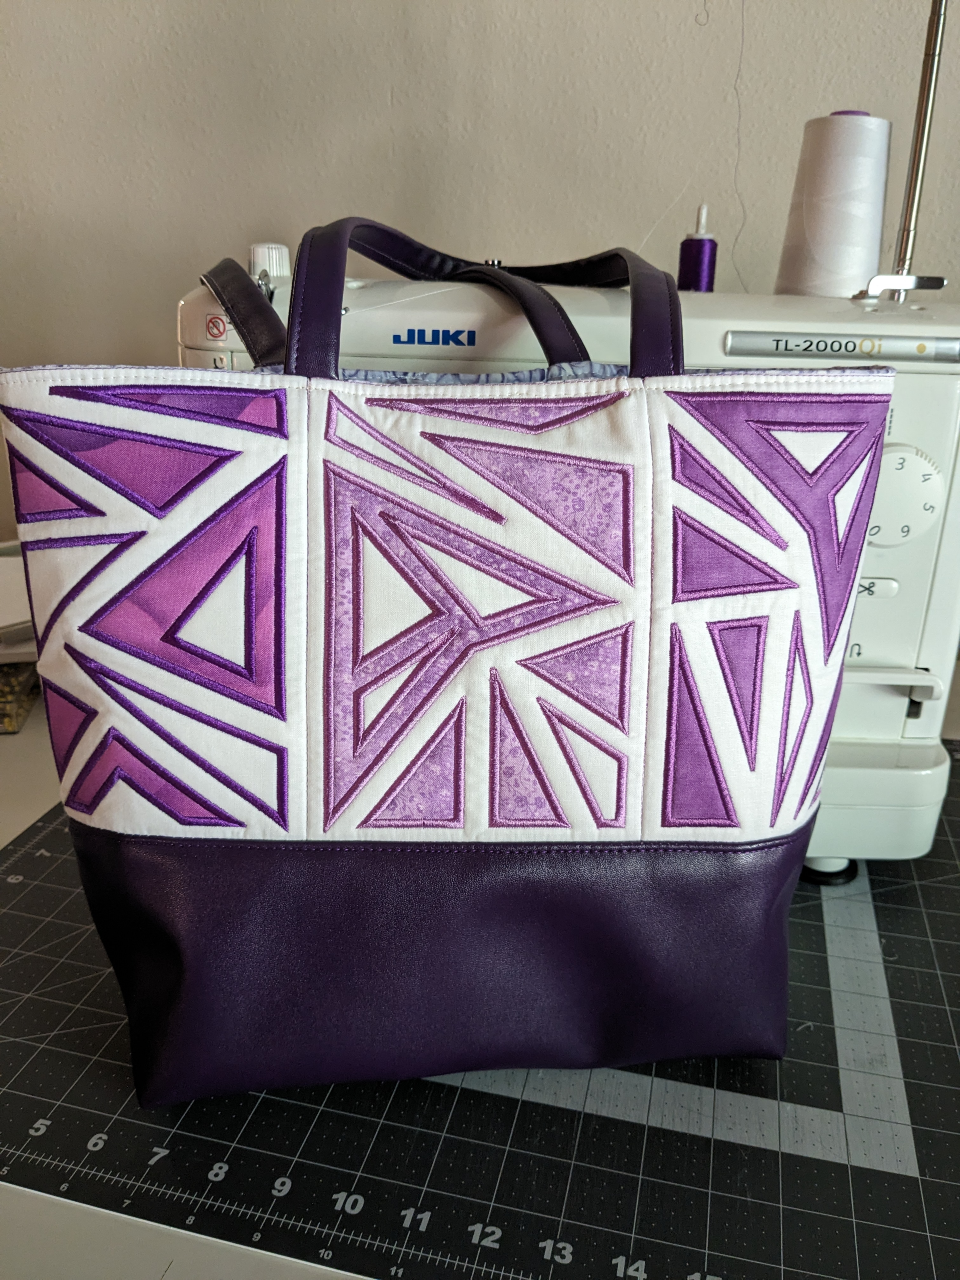
My embroidery machine is limited to a 5″ x 7″ hoop as the largest hoop I can use. The last bag I made ended up coming out so small because of this. This time I made sure that the bag base was larger than recommended in the pattern so the bag wouldn’t be so small. Learning more lessons from my first bag, I also made sure to use a denim needle in my sewing machine when sewing all pieces together.
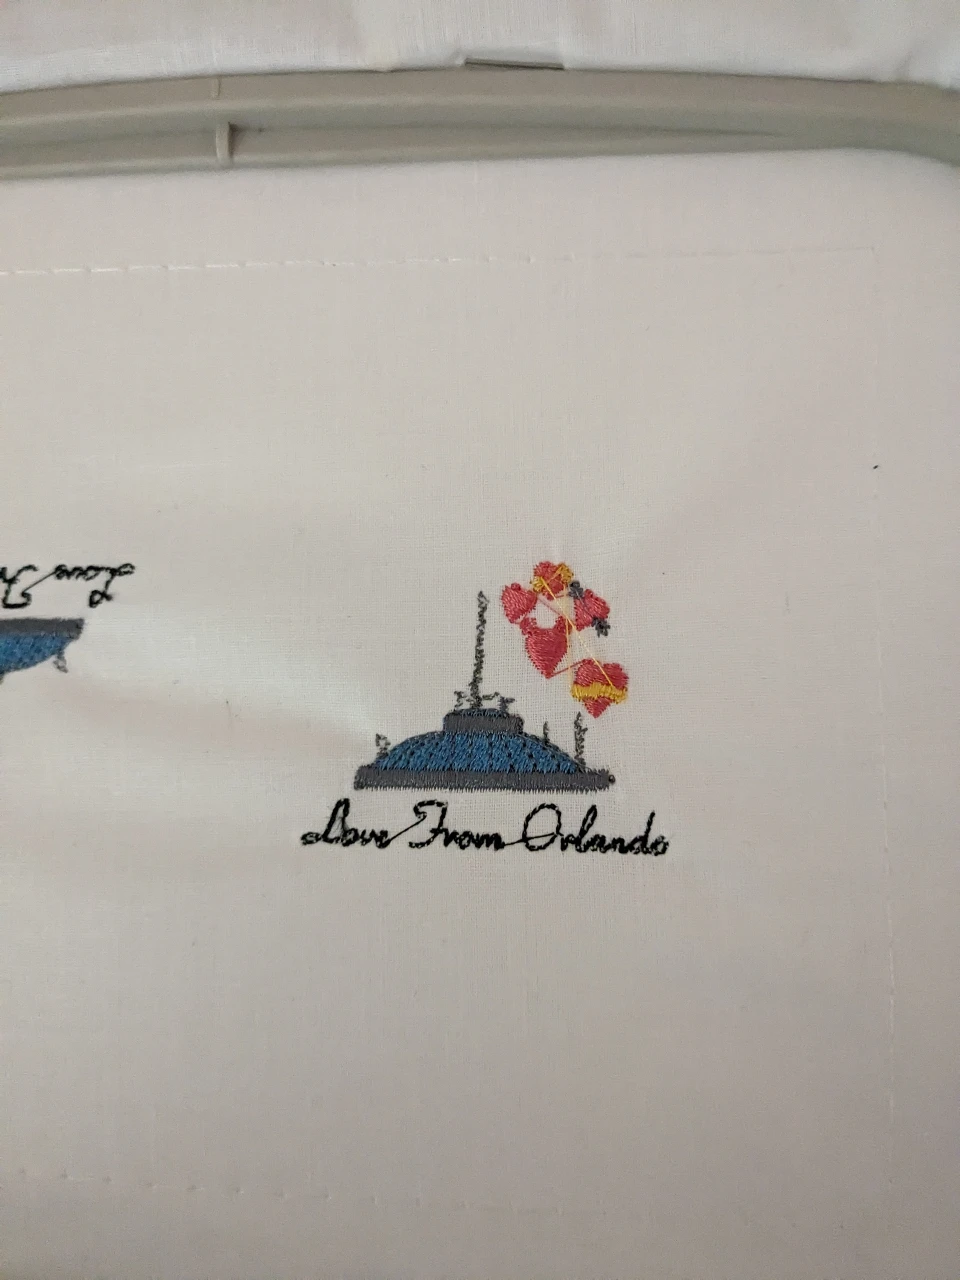
I actually had a little less than a yard of this purple fabric, and it was perfect for the lining of this bag! At the last minute I remembered that I had wanted to add in an embroidered label into the project. I quickly embroidered my logo on some linen fabric and folded it over for a label. For this handbag, I sewed it into the lining when sewing up the bottom seam.

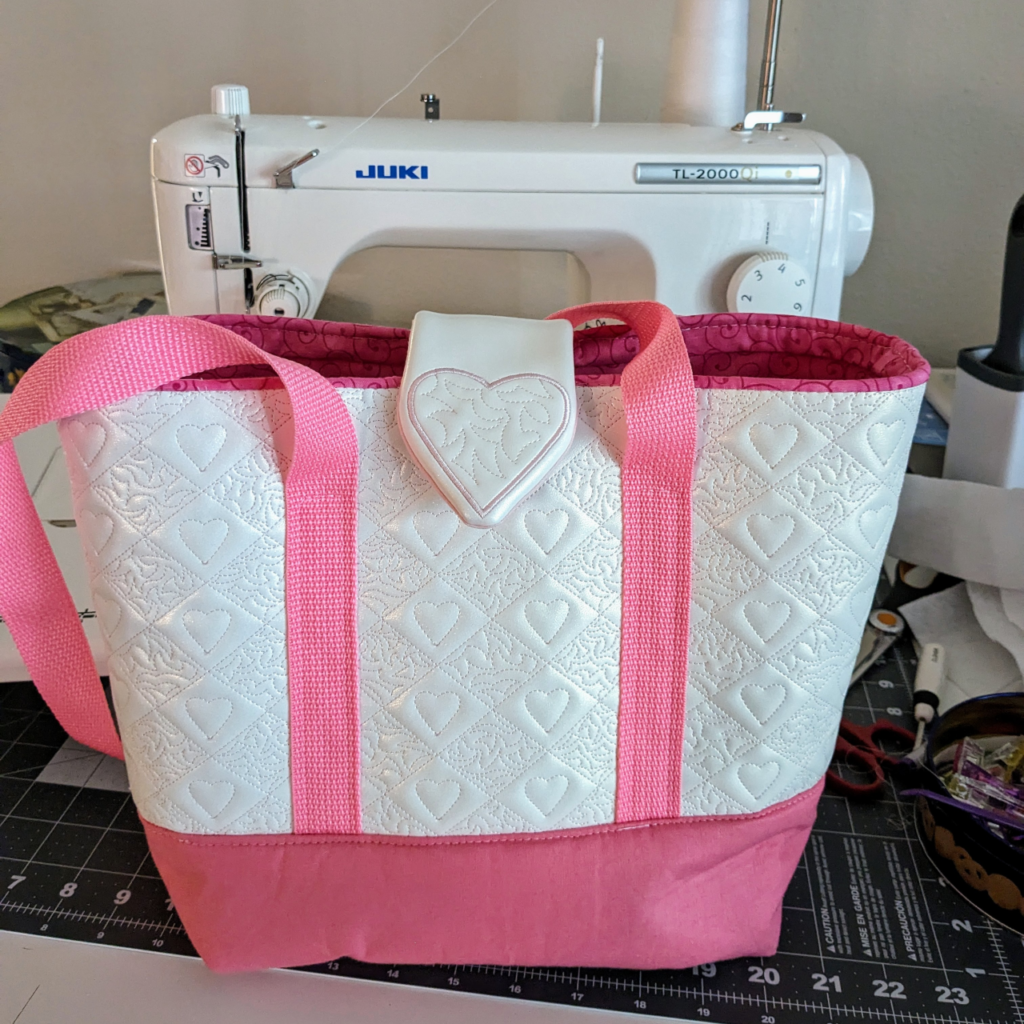
The Pink Bag
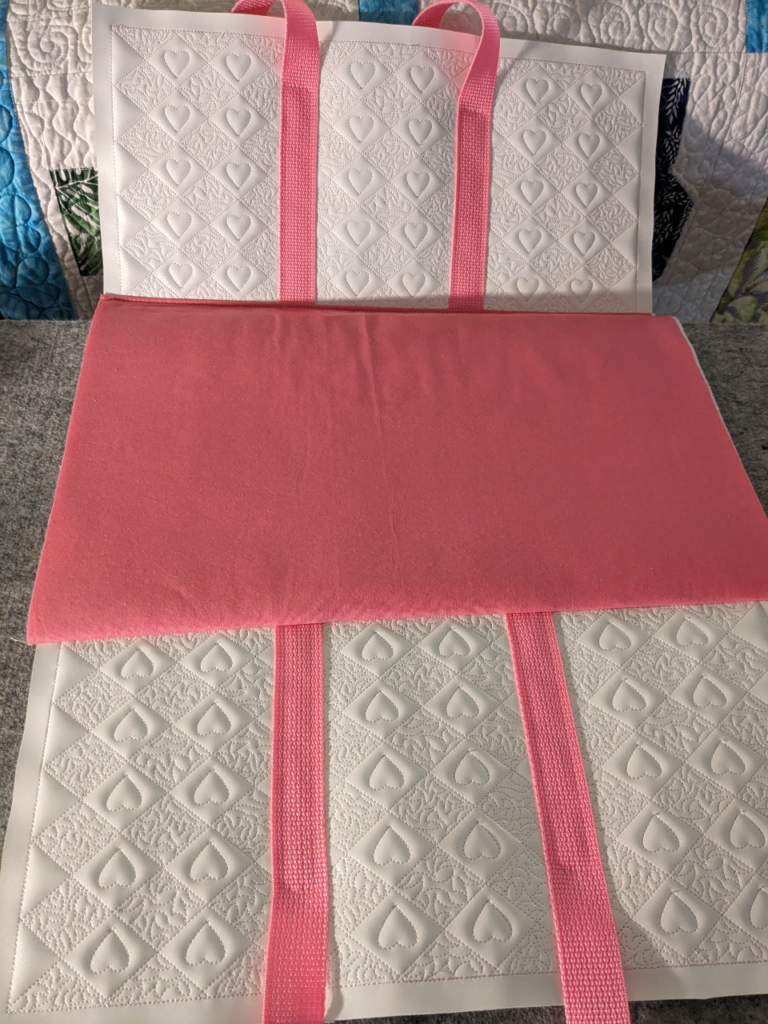
For the pink bag, my husband agreed that the Quilted Diamonds & Hearts Bag was perfect! The pattern is available here from Sweet Pea Embroidery. For the embroidered panels, I used faux leather I had ordered for another project and had a lot left of it. It’s Moonlight Shimmer by Sallie Tomato. It has a tiny hint of a sheen to it, and is so pretty! The panels stitched out really well and again I just knew I needed to make the base of the bag larger so that the overall bag would come out a little larger.
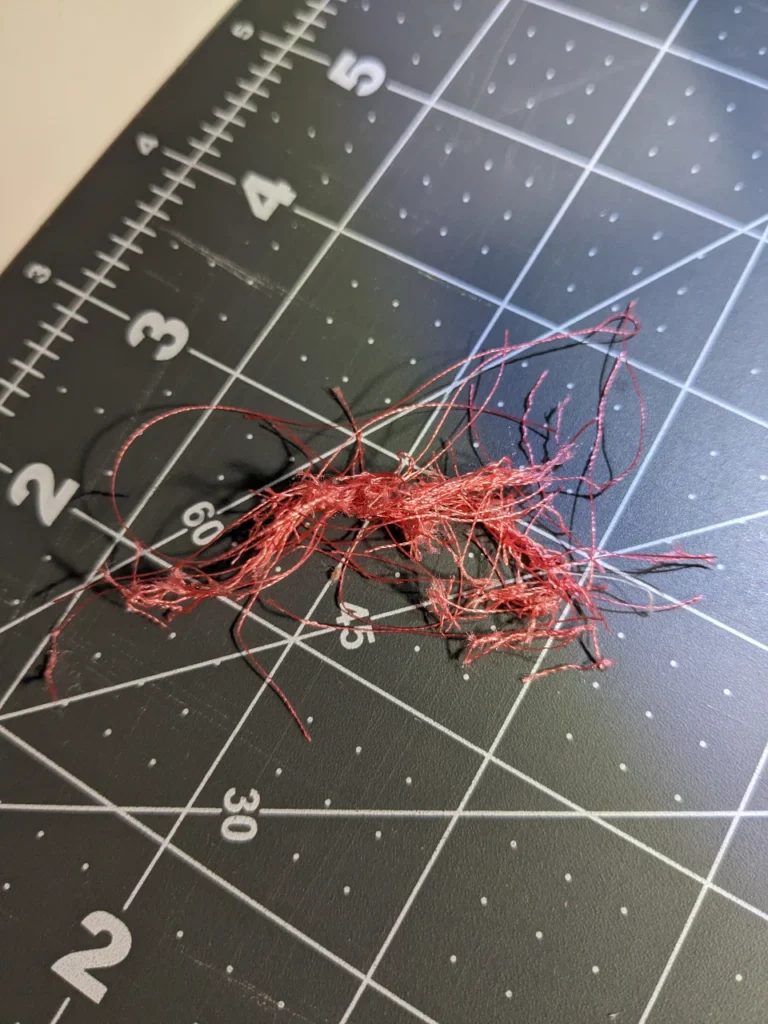
The next step was to add the bag straps. I initially tried to make straps out of fabric that had fusible fleece fused to it. It ended up being too thick to sew through, and since I was also trying to use pink embroidery thread to sew it on, it didn’t come out very well! I ended up with a bird’s nest on the back.
So, instead of admitting defeat, I decided to use webbing for the straps for this handbag instead! I ended up buying pink webbing from Country Brook Design and it was sooooo much easier to sew the straps on!
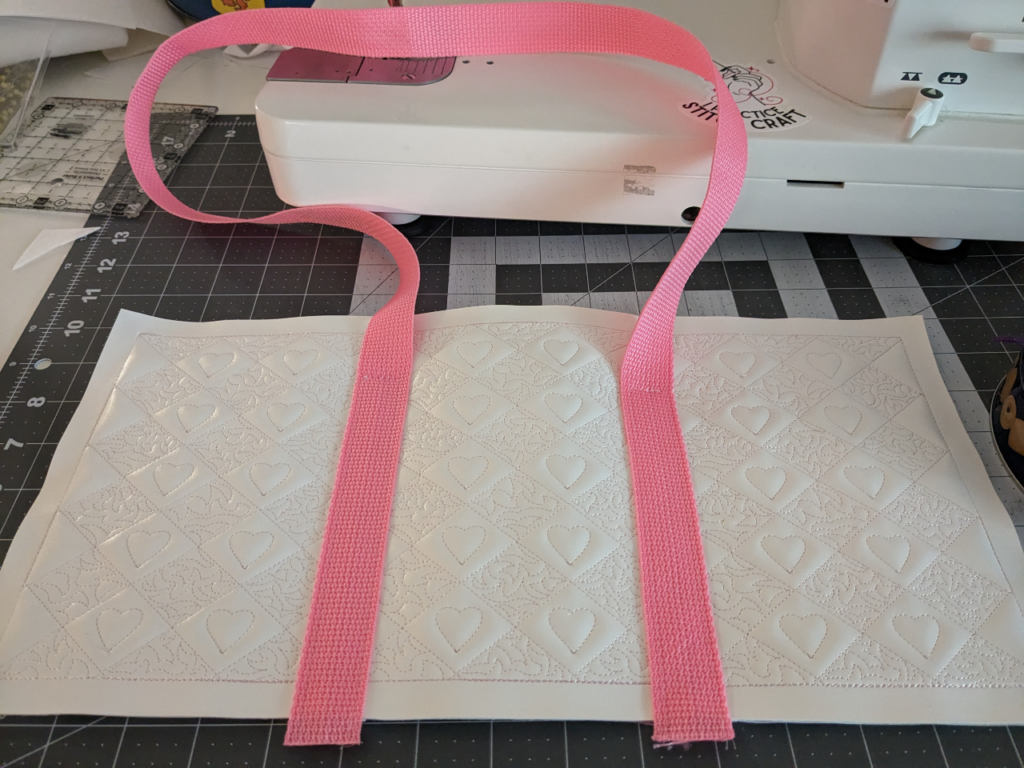
The webbing didn’t match the pink fabric I had initially selected for the bottom of the bag, so I pulled some more fabrics from my stash and used this one instead! I think it matched the webbing much better than what I had initially planned on using.
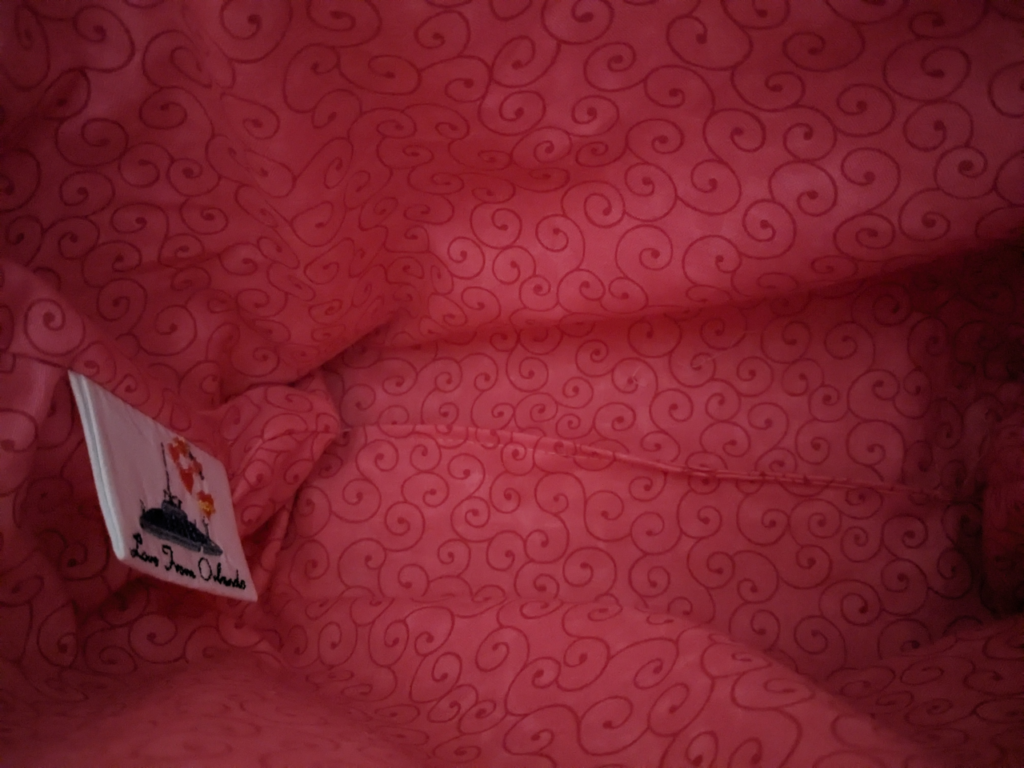
I ended up using the fabric I had planned for the bottom of the bag for the lining. This time, I remembered to sew my embroidered label into the side seam of the lining, and I think I like the placement of it here better. I’ll just have to remember for my next handbag.
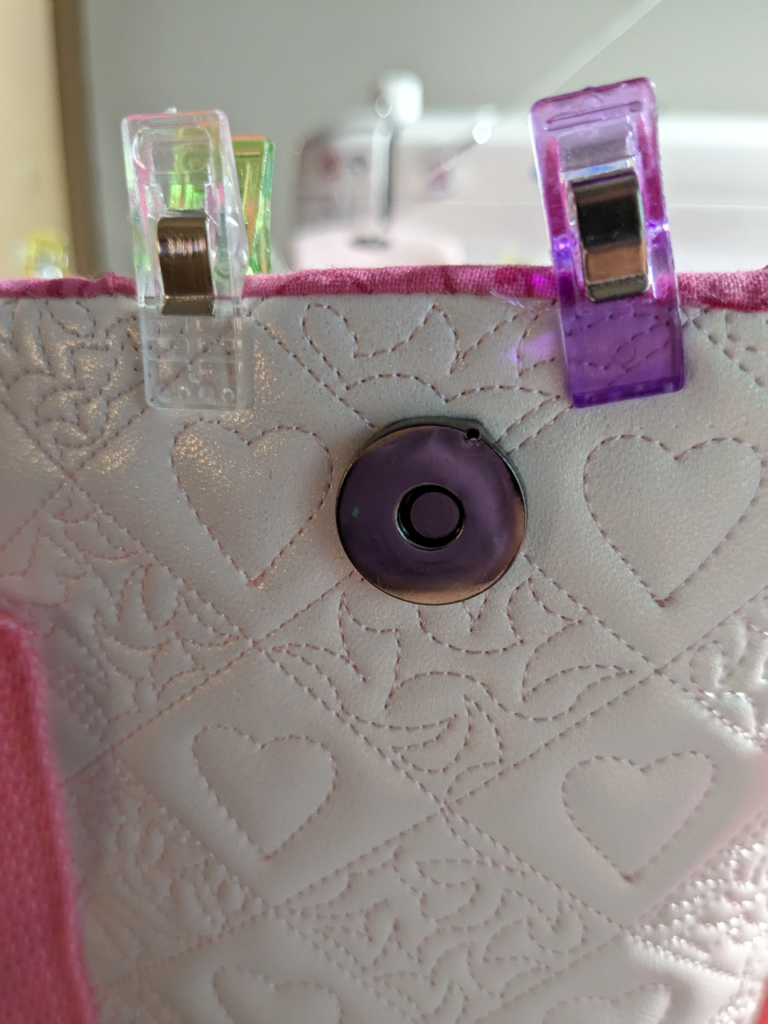
I also need to remember to be more careful of where I place the magnetic snap!! Even with this hole in the snap, the denim needle I was using didn’t break! It was too late to replace the snap, but you can’t see the hole with the handbag closed, so hopefully the gift recipient won’t mind.

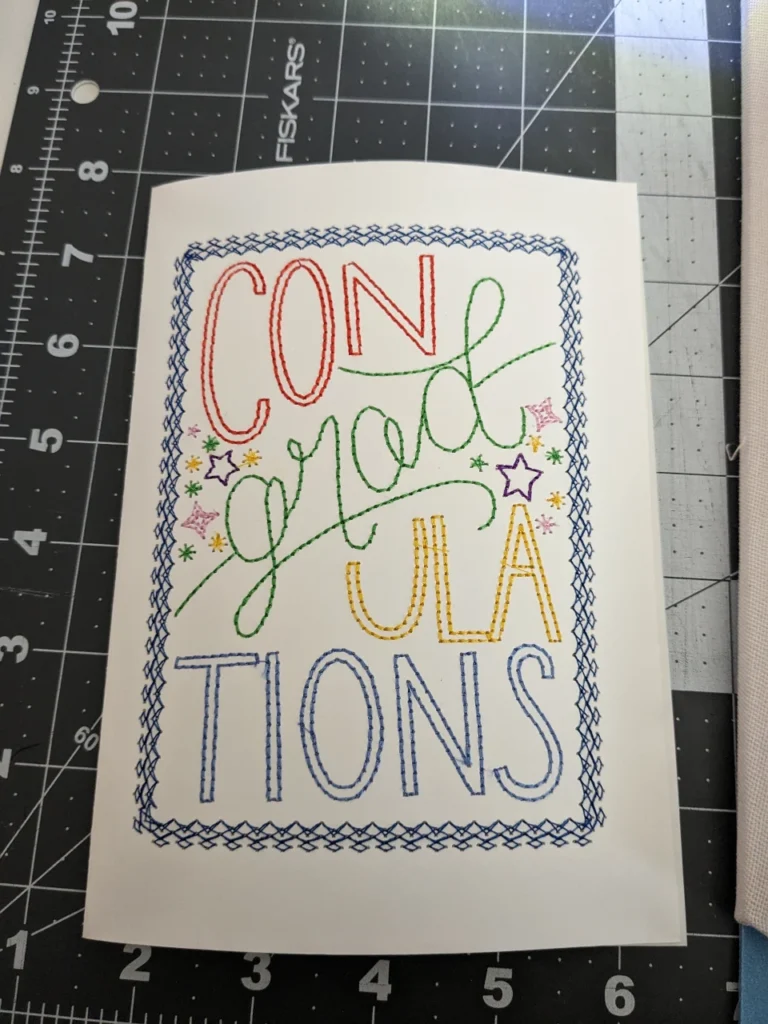
Embroidered Cards
When you take the time to embroider gifts, you really want to make the cards that go with them special too! I have been wanting to try out embroidering cards, but I was a little afraid of it. Which is odd for me, since I’m usually not afraid of anything and always willing to try new techniques!
I purchased the Graduation Greeting Cards from Designs by JuJu. There are two different cards in the download, which was perfect since I needed two cards!
For the first card I used heavyweight cutaway stabilizer in the hoop. The first stitching is the placement line for the card. The card might not be centered perfectly but I’m still happy with how the card came out.
For the second card, I realized that I had some Sulky Sticky + stabilizer with lines on it. The lines made it a ton easier to center it in the hoop. Once the placement line was stitched, I took a pin and drew an x in the middle of the paper side of the stabilizer. The paper peeled off really easily and then I was able to place the card down on the sticky surface.
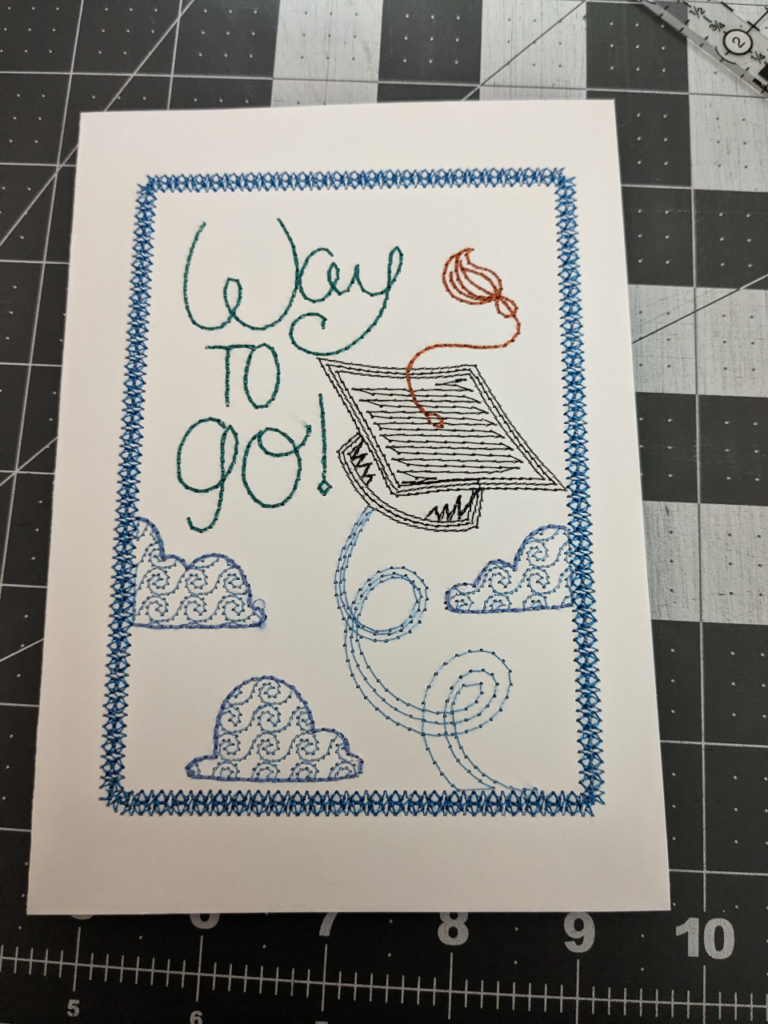
I think the second one came out much better, and I’ll save the rest of the sticky stabilizer for future cards!

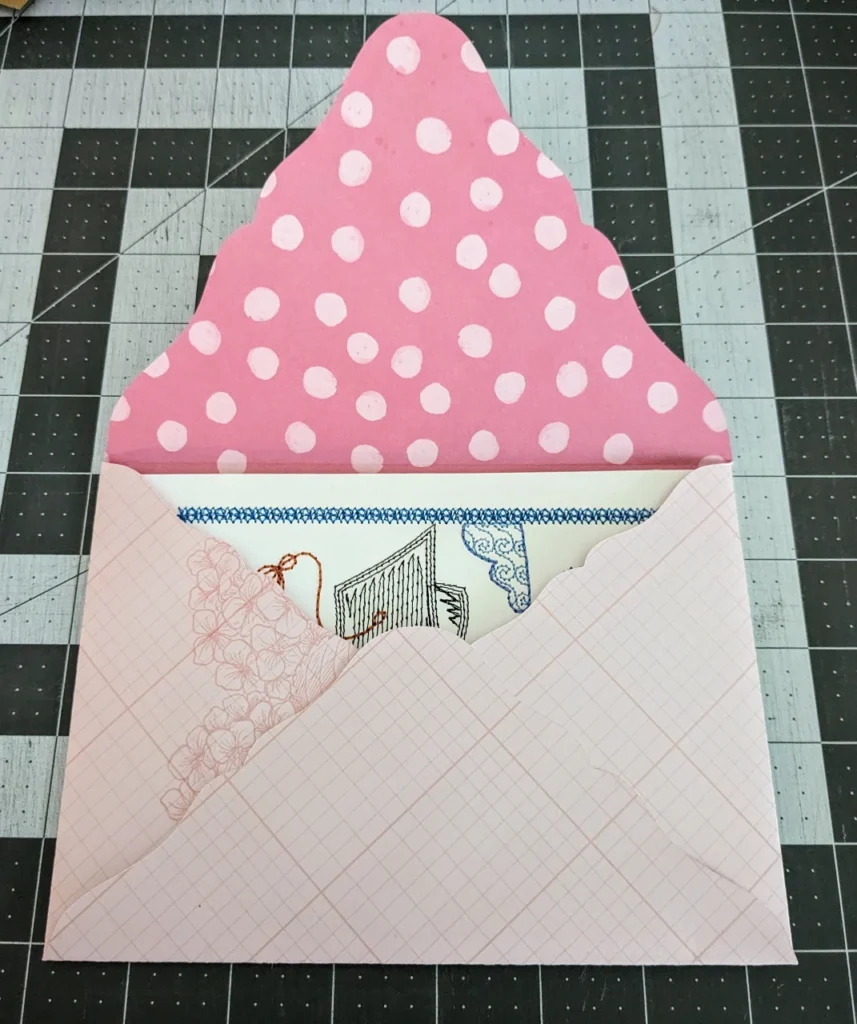
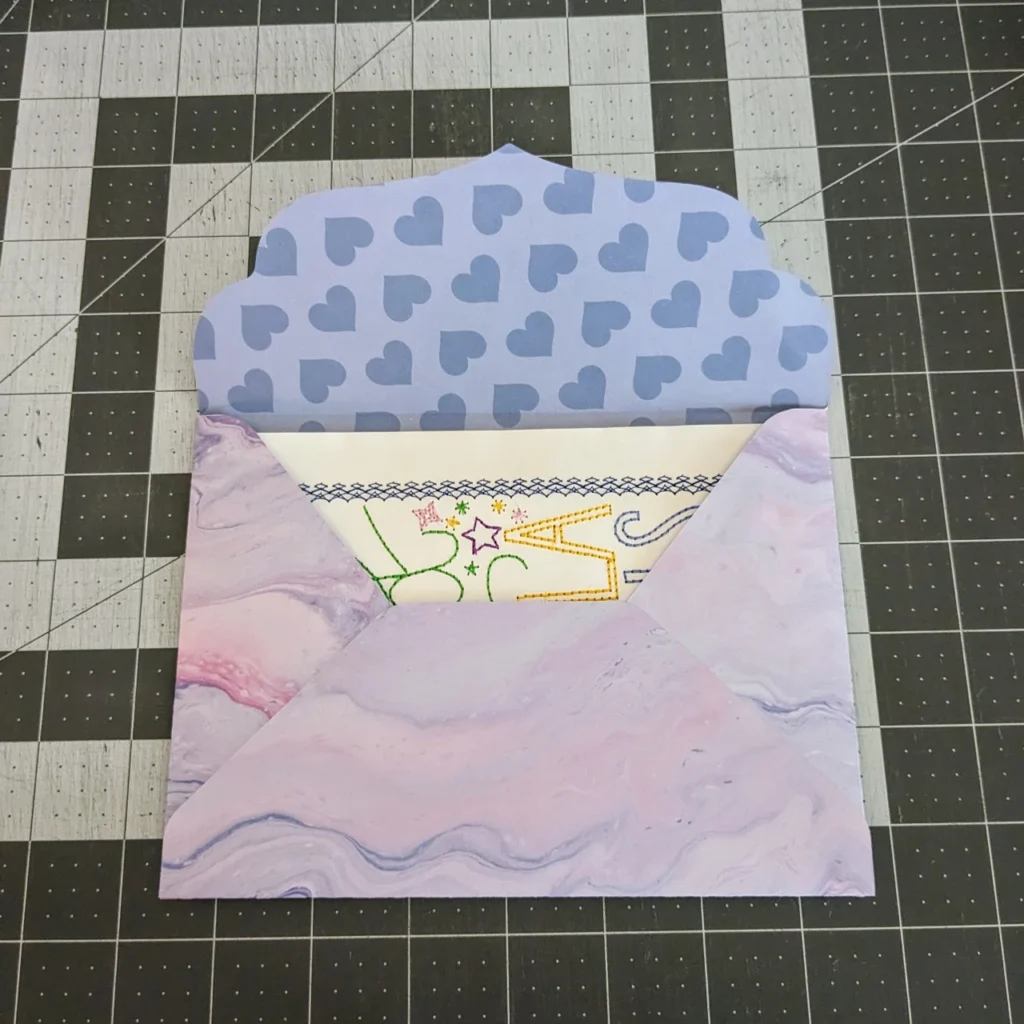
Envelopes
Handmade cards deserve pretty envelopes, right? I found some really cute scrapbook fabric at Joanne’s. Then I downloaded some cute envelope cutting templates on Etsy for my Cricut.
Here’s both cards in their pretty envelopes!
What’s up next?
My next big project is to clean and reorganize my sewing/craft room. I’ve let it get really messy as I have had some time sensitive projects I’ve been working on. I decided it’s time for a huge overhaul of the entire room. I’m hoping to work on it over the long weekend. Hubby already said he would help me to move the furniture around and get it organized.
I hope you have a great long weekend. Happy quilting!
Didi