I’ve been accused before of only liking Foundation Paper Piecing (FPP). It made me think about it, I do find that I like more modern quilts. Most of the modern patterns, especially ones that to me seem fun and unique are made with the FPP technique.
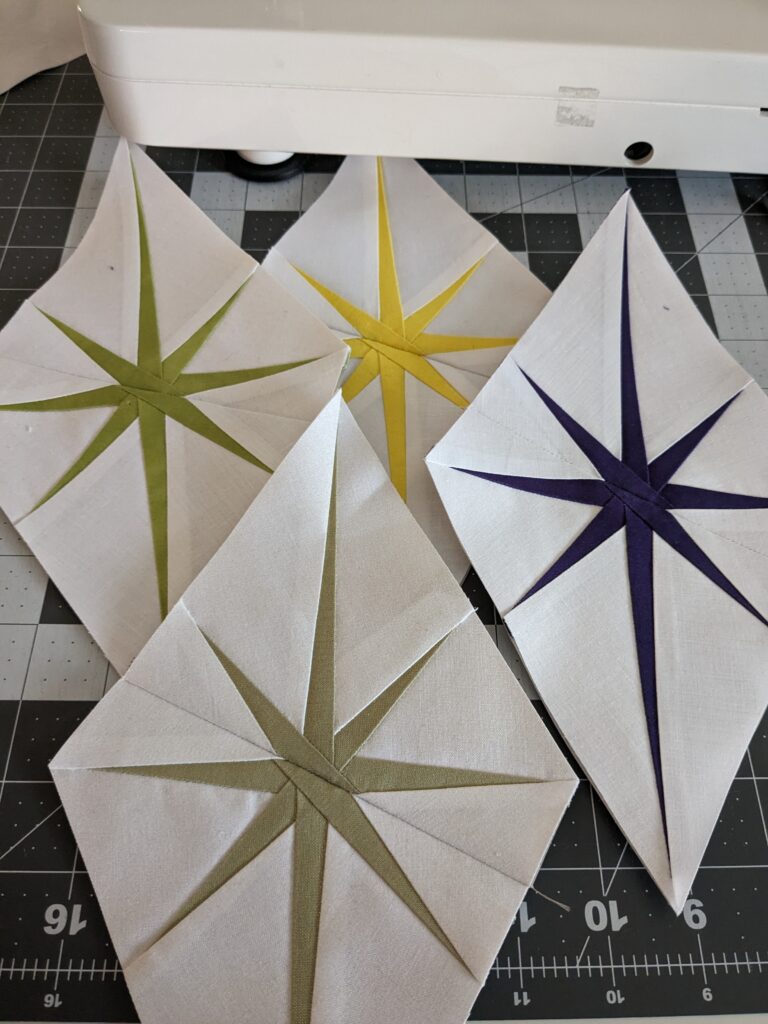
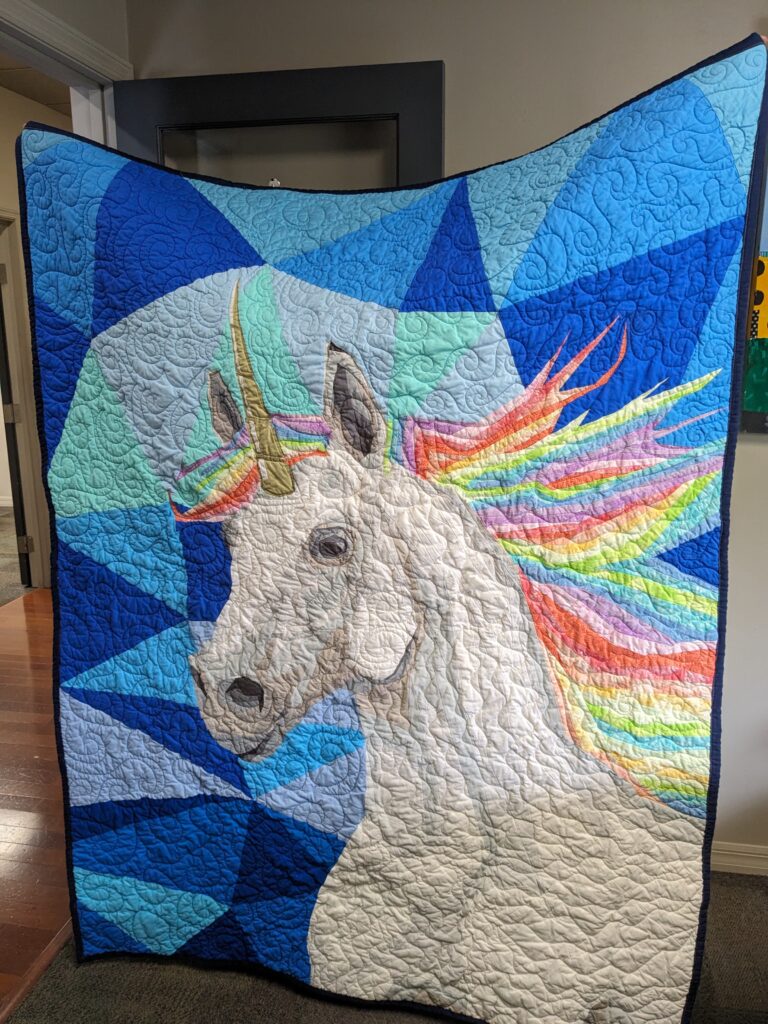
I have made a lot of FPP quilts/projects! Here’s a few of the starbursts that I’ve made so far for the Atomic Starburst by Violet Craft that I’m making. I love love love this pattern and how the FPP starbursts are coming out!
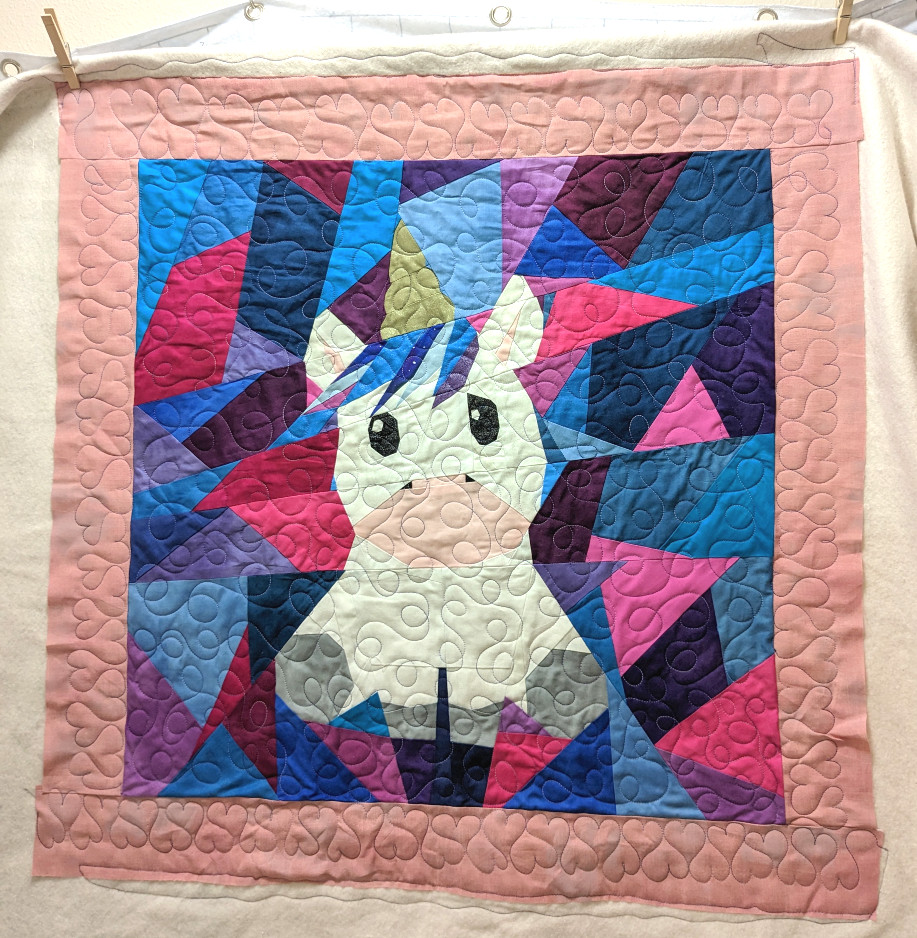
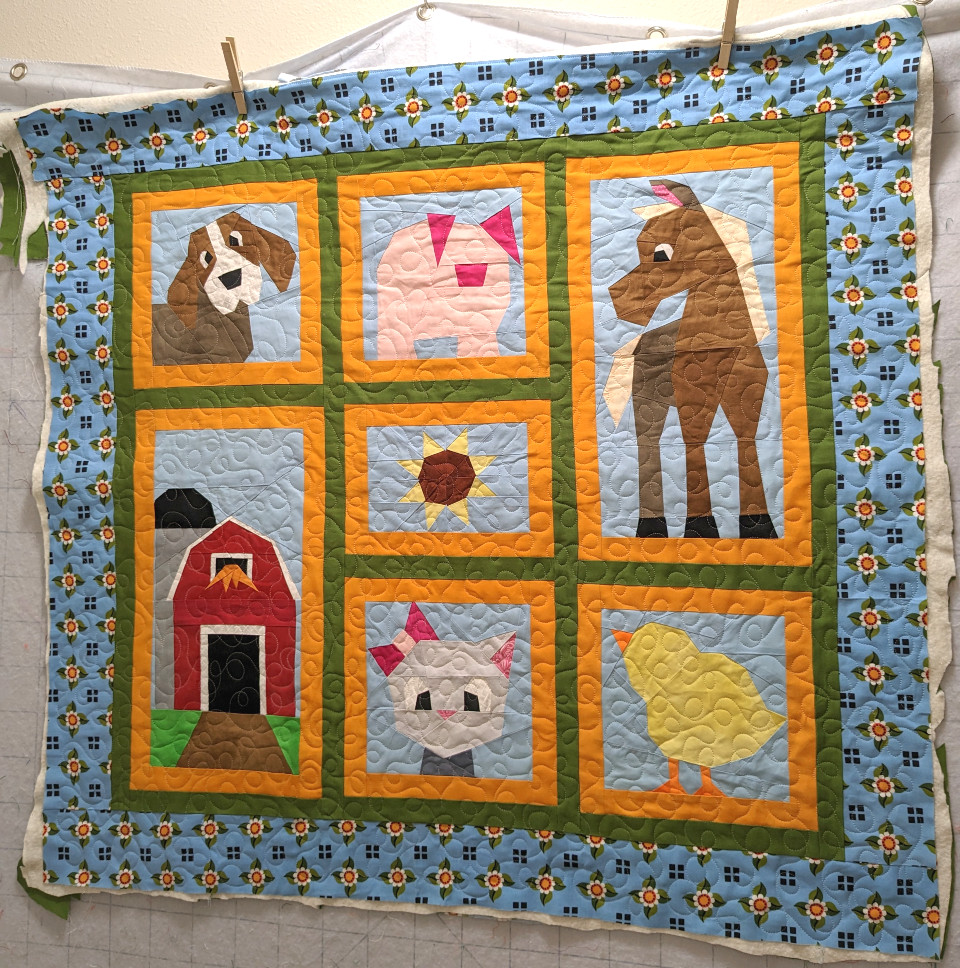
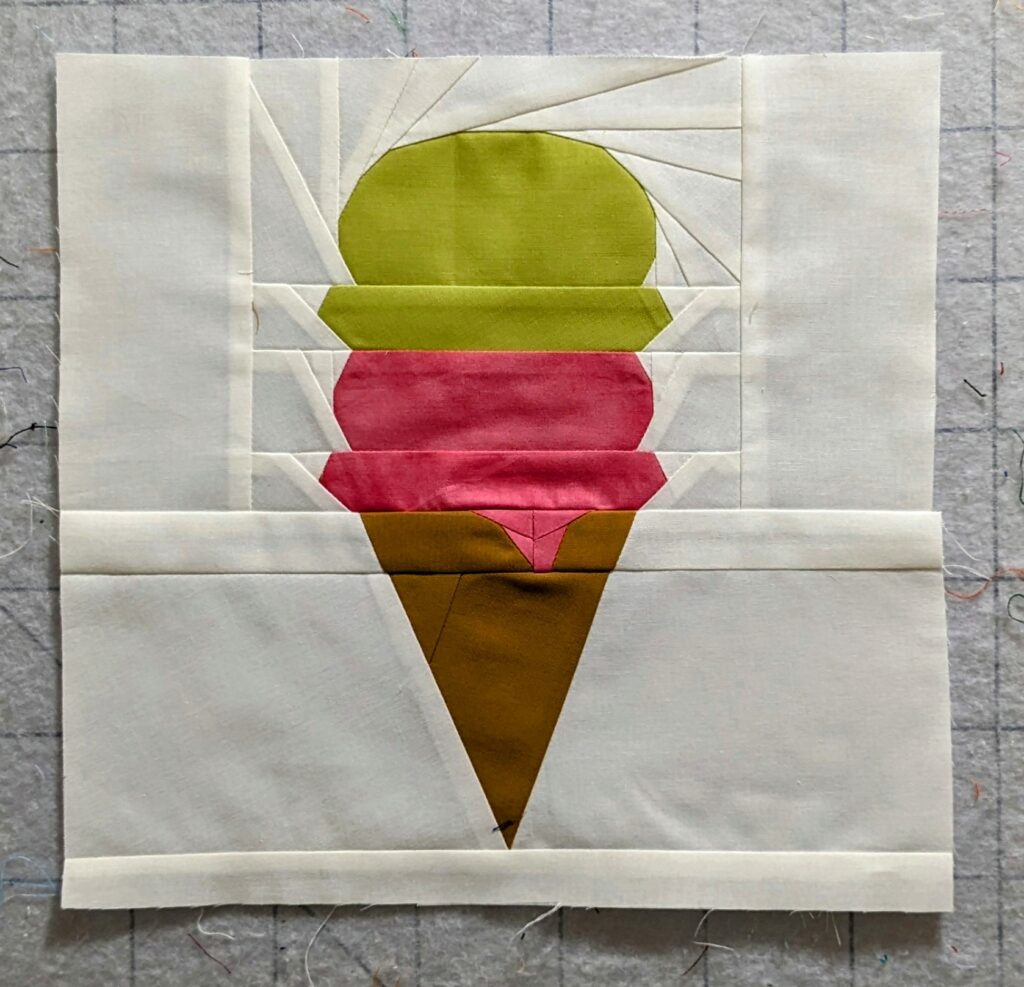
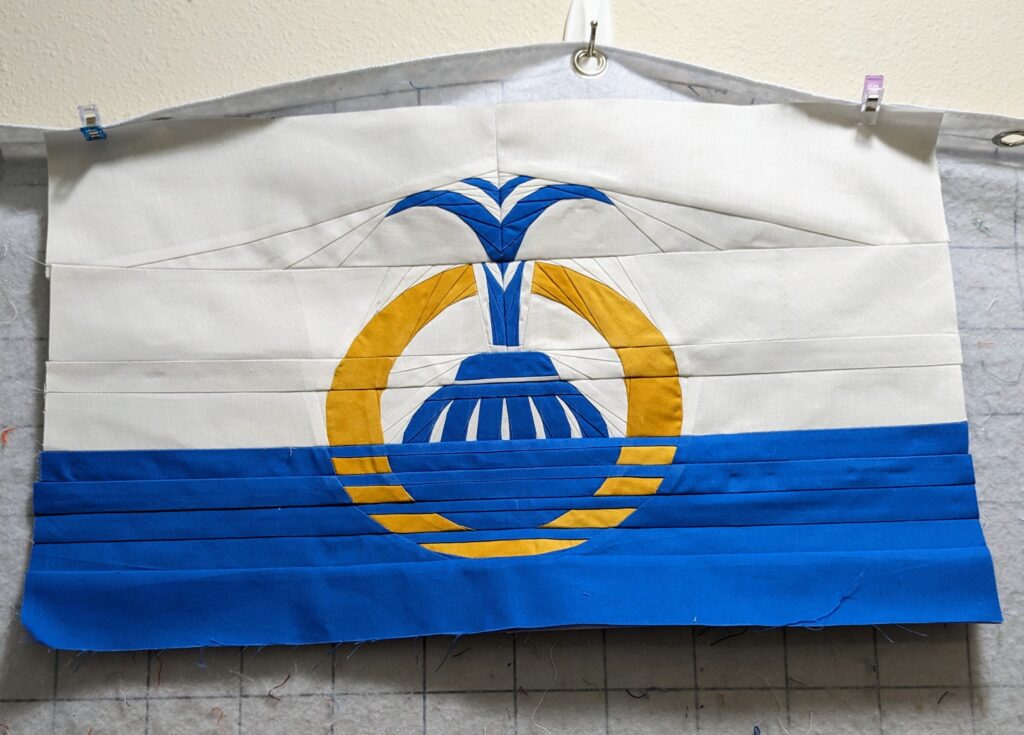
Other FPP Projects
Here are some of the other FPP projects I’ve made. I have quite a few others that I’m planning to make this year that I can’t wait to share!


FPP Flying Geese
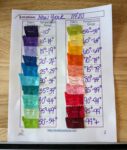
For the 2024 Temperature Quilt QAL, I decided to try three different technique. I’ve already discussed how I am using Mistyfuse to make my orange peel blocks for the Berea temperature quilt here. For the New York City/Queens temperature quilt I am making flying geese. Since I knew that I didn’t want to deal with the measuring/cutting and frustration that I had experienced before with making flying geese. Especially since it can be hard to get your points perfect. So…. why not just make it as an FPP block?
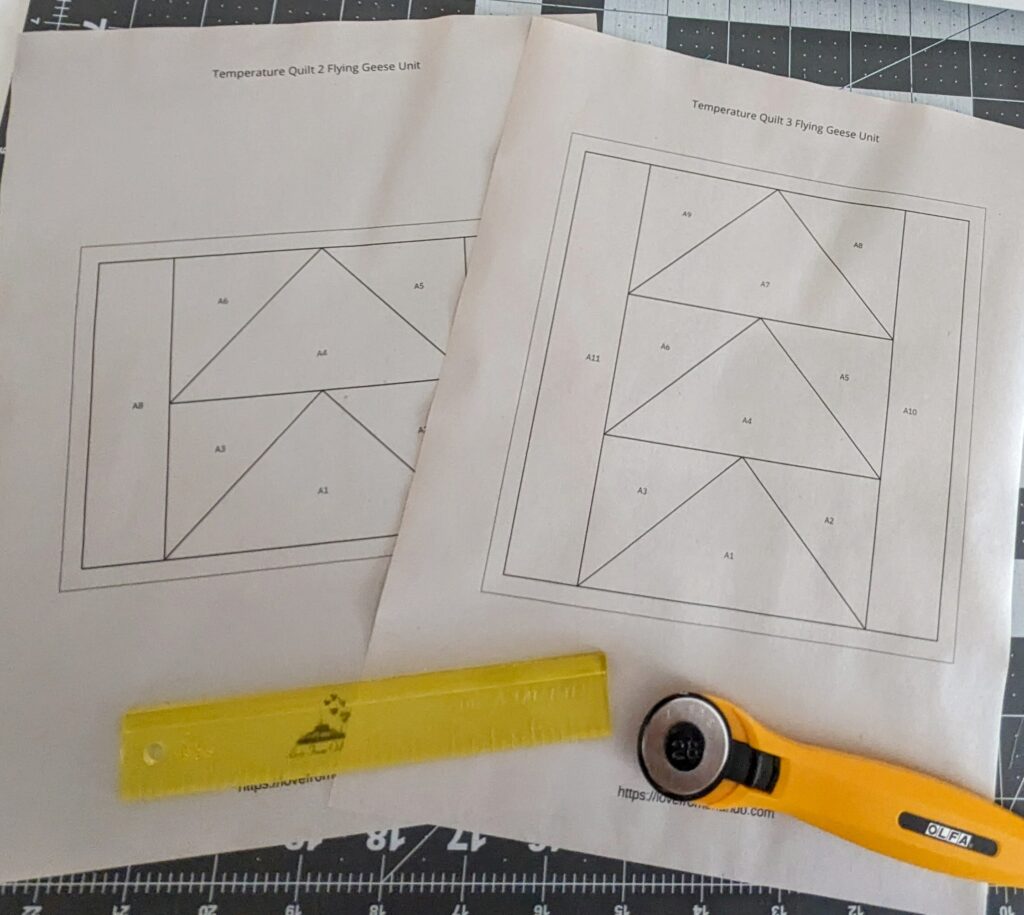
Because I have EQ8, and knew it would be so easy to make this an FPP pattern from the program. I made a 2 block unit and a 3 block unit so it would be easy to make 31/30 or 29 geese per month for the temperature quilt. If you would like the free pattern for the blocks, you can get it here.
My Way – Not the Only Way
I say this because we all know that there are quilt police. Yes, those people who will tell you that you are doing it wrong, that you aren’t doing it their way, or that it’s not the “right” way to do something. So, I’m letting you know, this is how I make these flying geese FPP, but it’s not the only way. Look over my notes, and find YOUR way that you feel comfortable making this FPP pattern. I don’t always follow these steps, it depends on the complexity of the FPP pattern, and the pattern itself. If you come up with something easier/better/yours let me know in the comments!
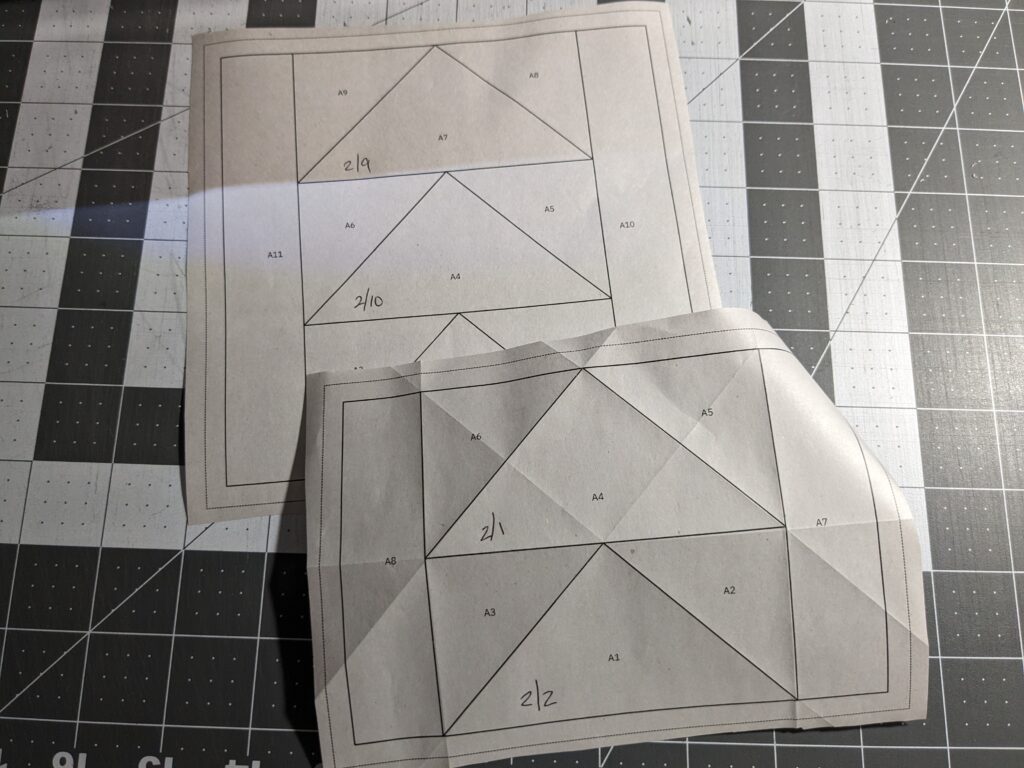
Printing Your Pattern
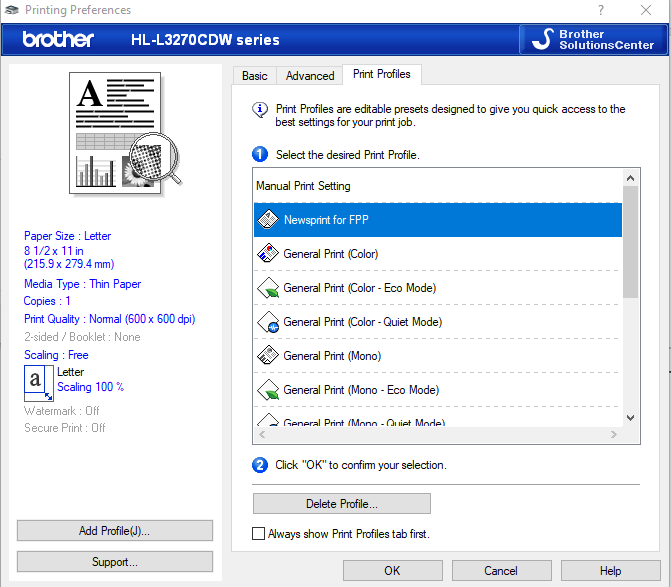
Read the instructions on the pattern you are using, but almost always (and in the case of my flying geese) you want to print it out at 100%. Don’t choose the “full page” option as that doesn’t always print at 100%. I have purchased newsprint paper for my FPP projects, so I also set my printer to manual feed so I can feed the newsprint into the printer a sheet at a time. I actually created a profile for it on my printer so I don’t have to change the printer settings individually every time I print a new project.

Preparing the FPP Pattern
Once you print the pattern, roughly cut out the pattern. Meaning, cut it so you don’t have to work with the bulky full 8.5 x 11 paper. I don’t cut it right on the seam allowance line as that’s for after you’ve sewn everything and are properly trimming the block.
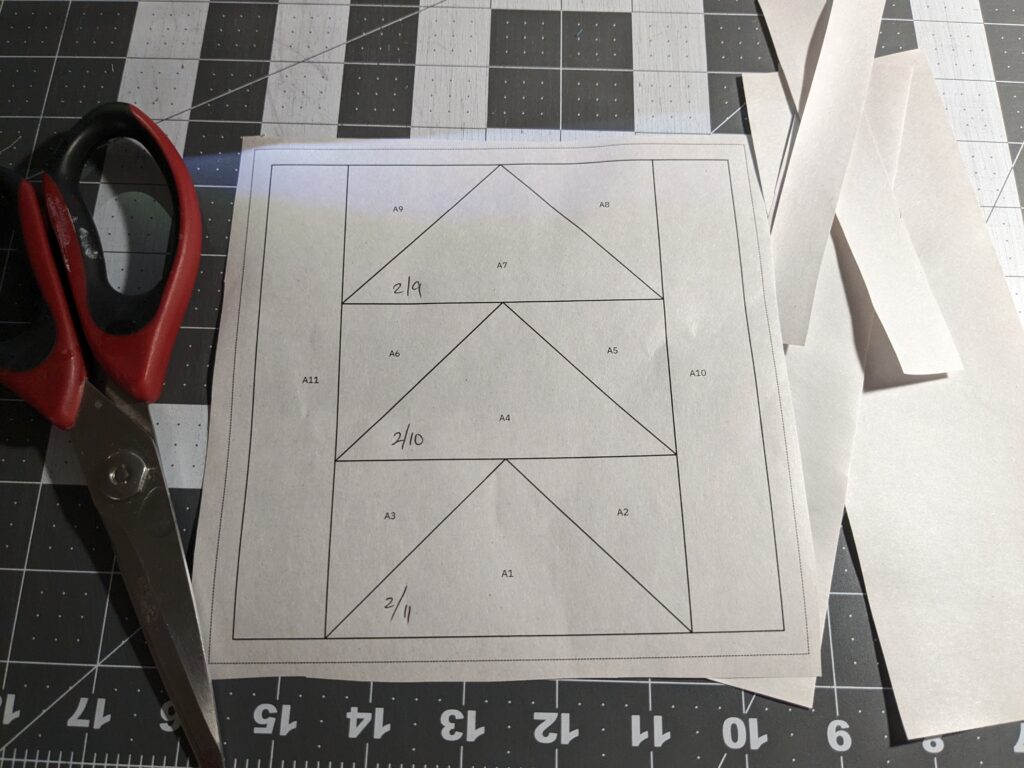
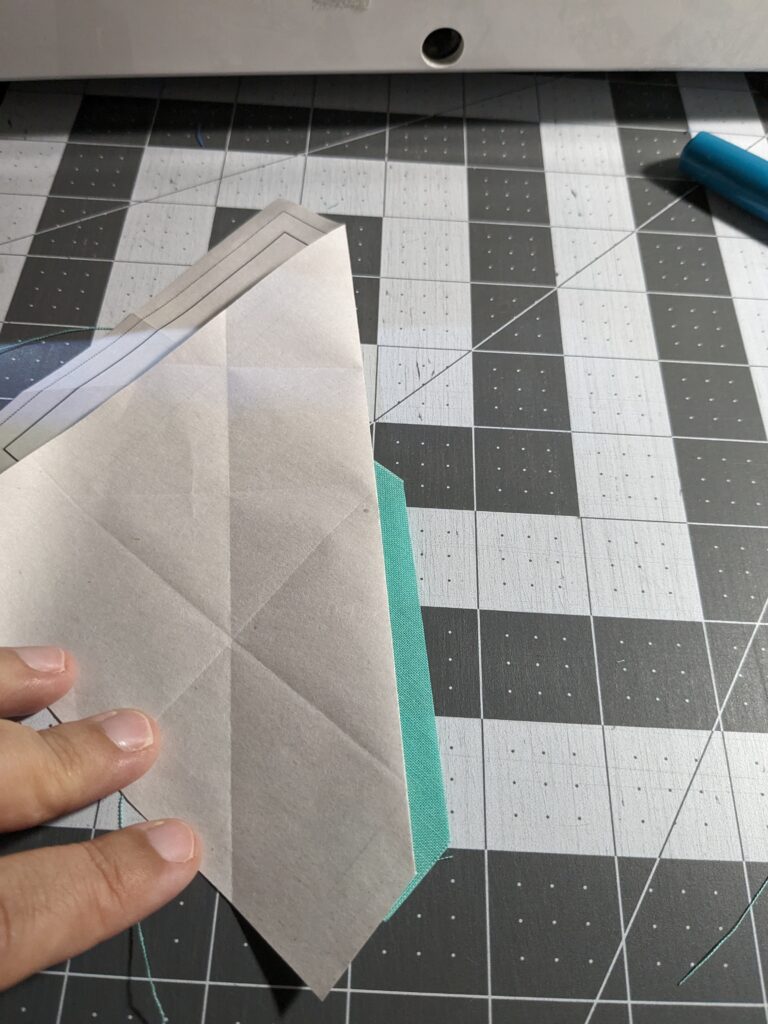
The next thing I do is fold the paper at every line. You do not have to do this, but with smaller, less complicated patterns (like these flying geese), I like to pre-fold the lines. I feel like it especially helps me to center the first fabric into the section.
Attaching the First Fabric
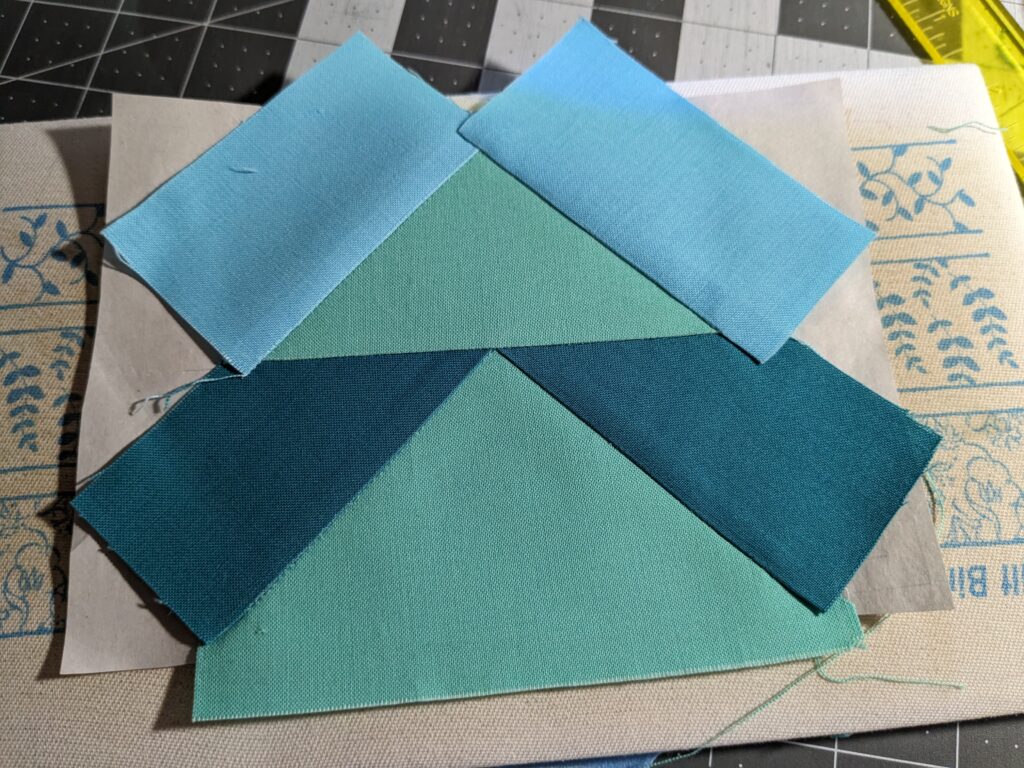
Next I attach the fabric for A1 using a glue stick. I also do EPP projects, so I have this glue stick for EPP that I use to attach the first piece to a pattern. It still allows the paper to come off easily when done, and if it still sticks at the end, a little bit of water helps to get the paper off. I just put a small line of glue in the middle of section A1 (the first section) and then place the fabric centered over the section.

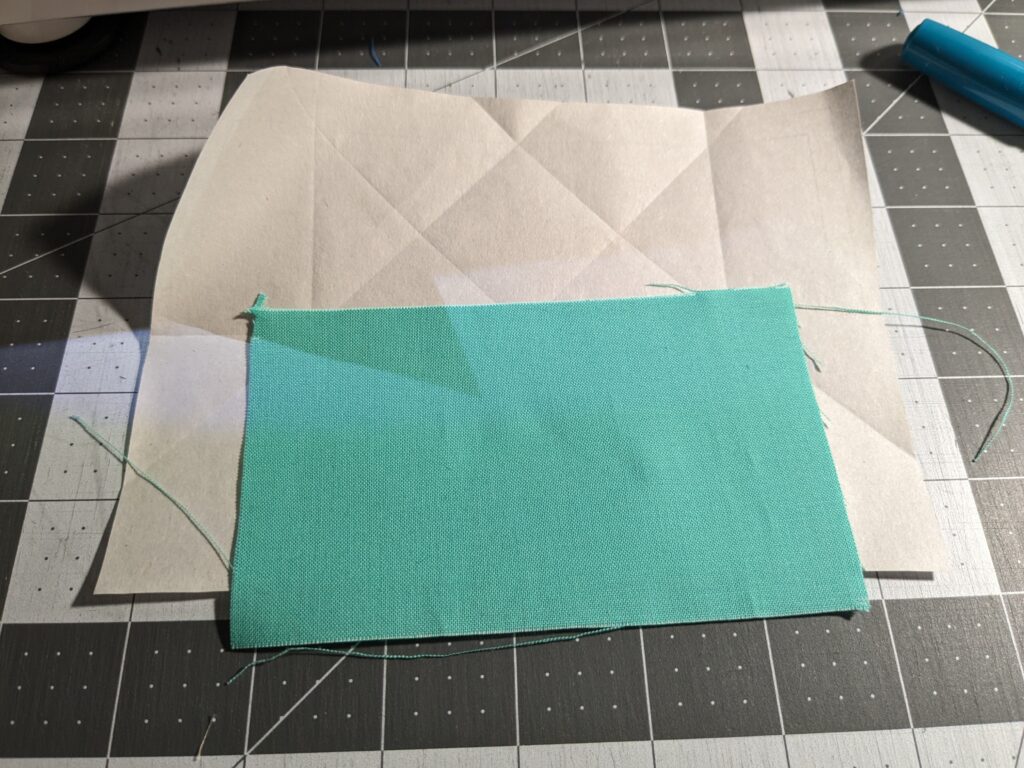
I’m using solids for this project that don’t have a right side and wrong side. If you are using something that does, make sure that the wrong side is glued to the paper, and the right side is facing up when you look at the fabric side like the picture above.

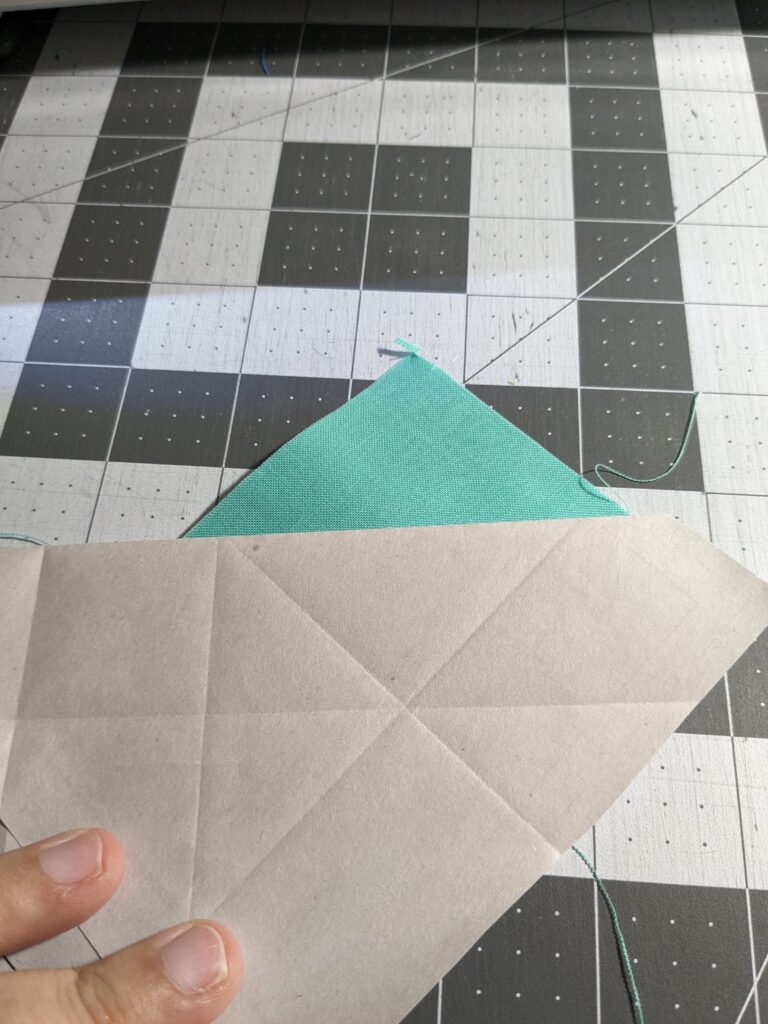
Trimming the Fabric
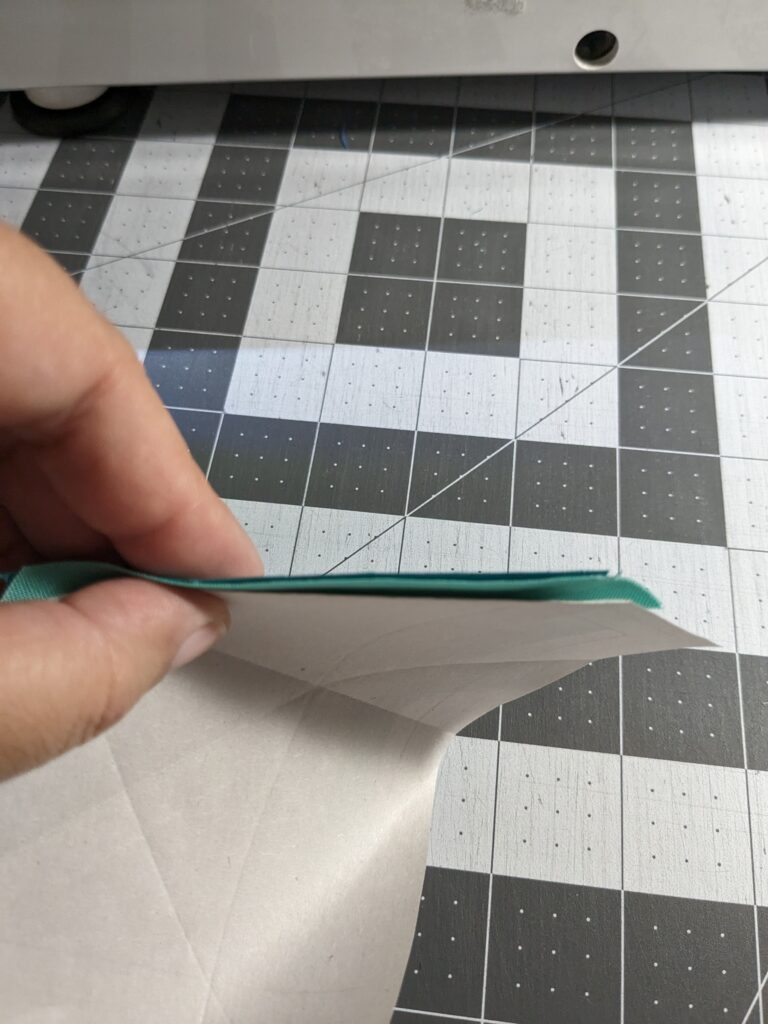
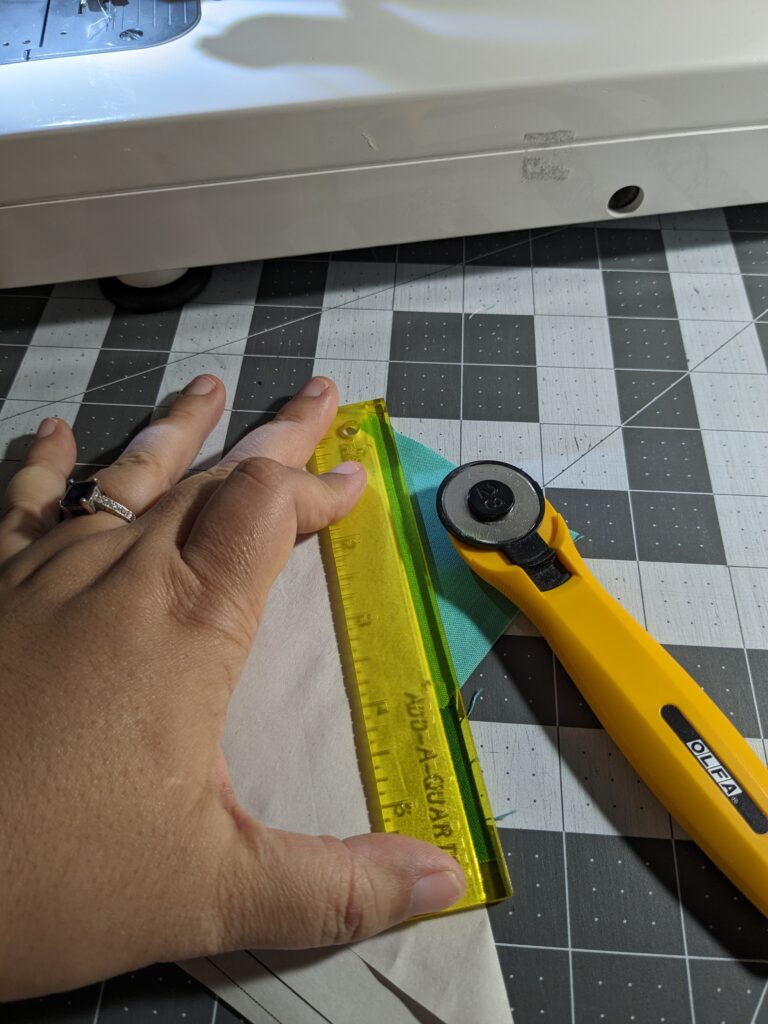
I saw this trick on a tutorial on YouTube and it was like a light bulb went off! I never thought of doing this, and now I do it with every FPP project I make, I pre-trim the fabric before I add the next piece. First, after attaching fabric 1 to the paper, fold the paper down over to show the excess.
Then, using your add-a-quarter ruler (or a regular ruler measuring the 1/4″ seam allowance) trim the excess fabric.
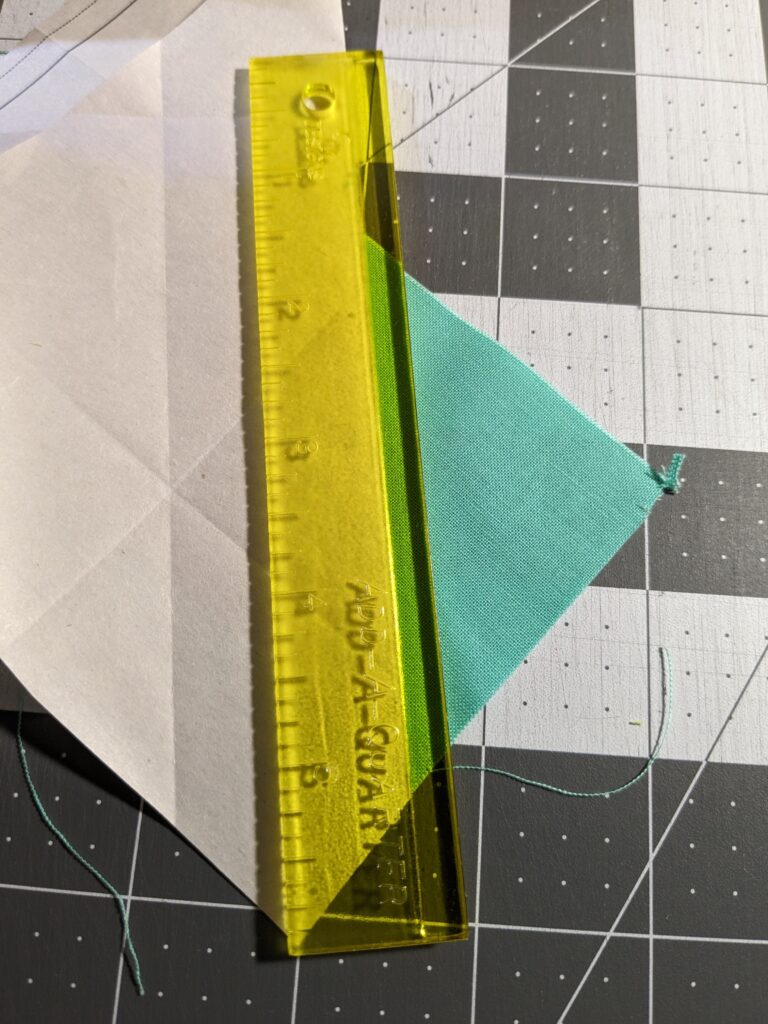
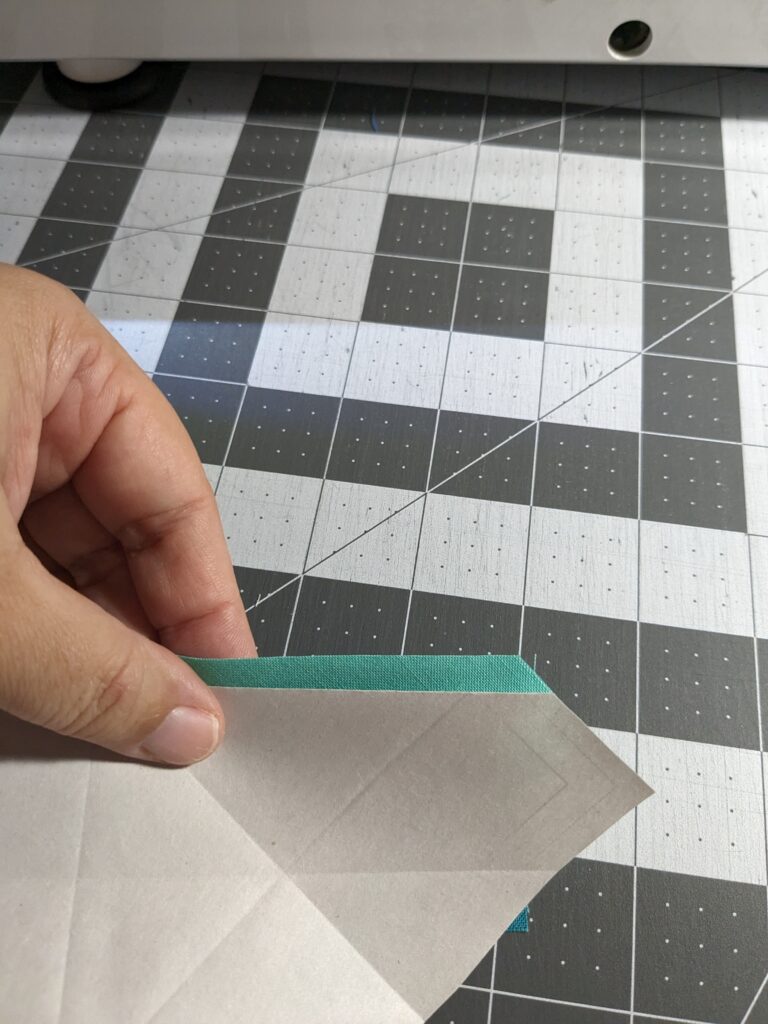
I found that this helps line up the next fabric so easily, so I don’t end up with not enough fabric covering the section. When I pre-trim, I don’t have to trim the seam allowance after I sew the line.
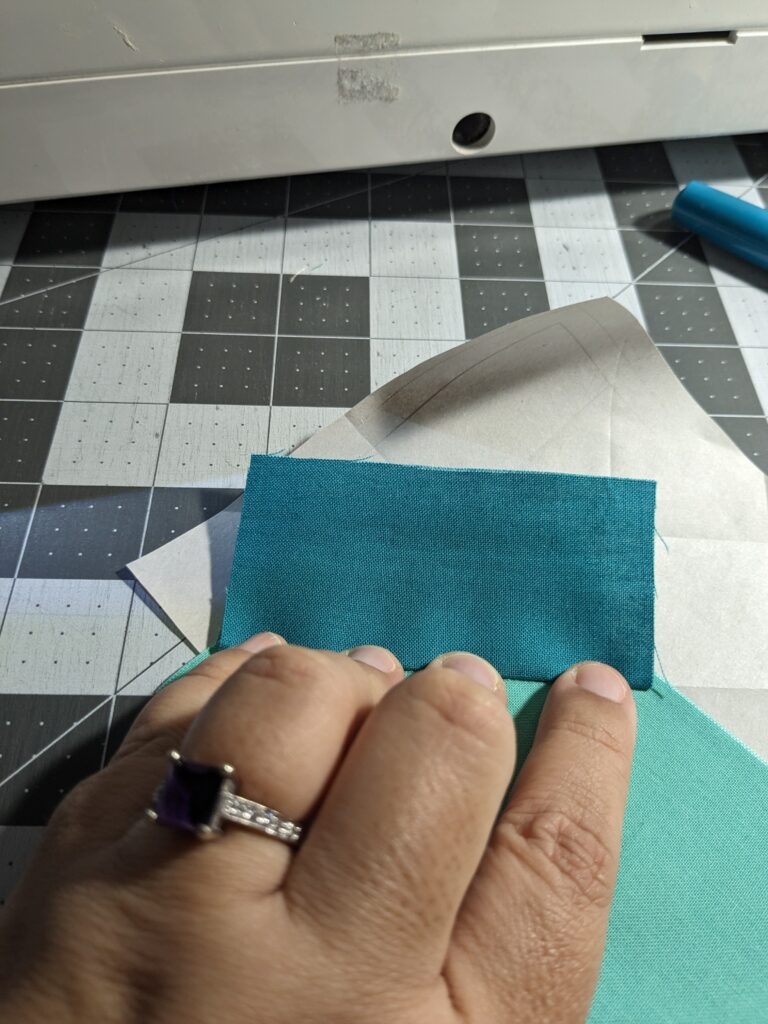
When you are using fabrics that aren’t the same on both sides, make sure that the fabric for section two is facing up when you line it up with section one.
Sewing Section 1 to Section 2
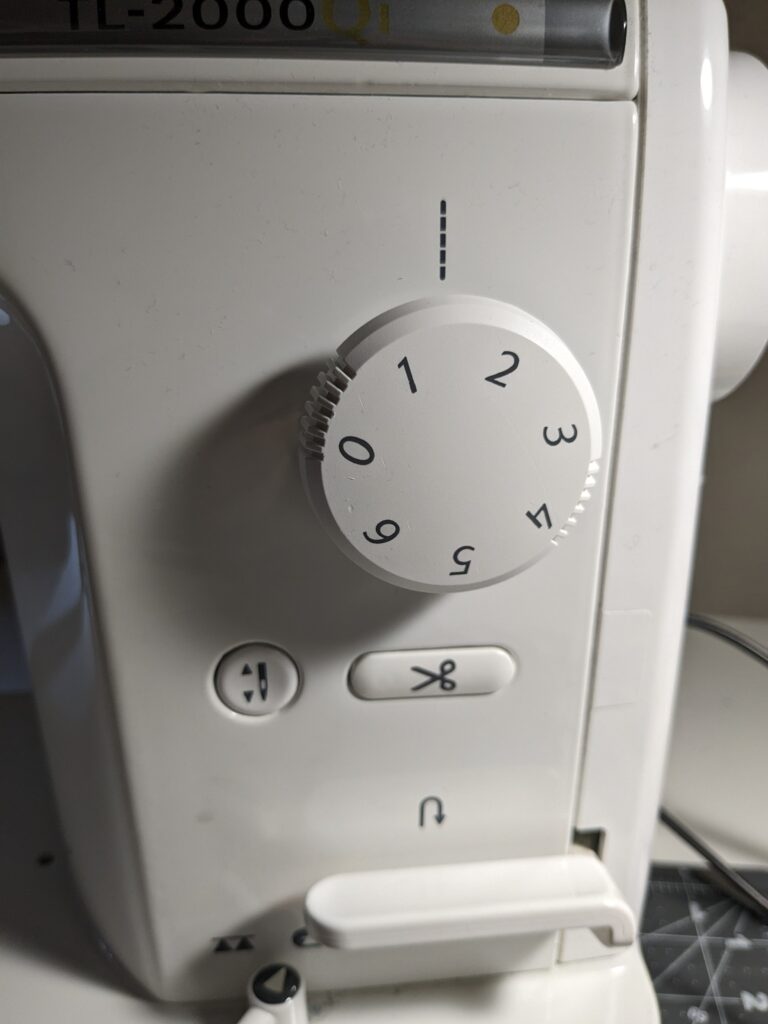
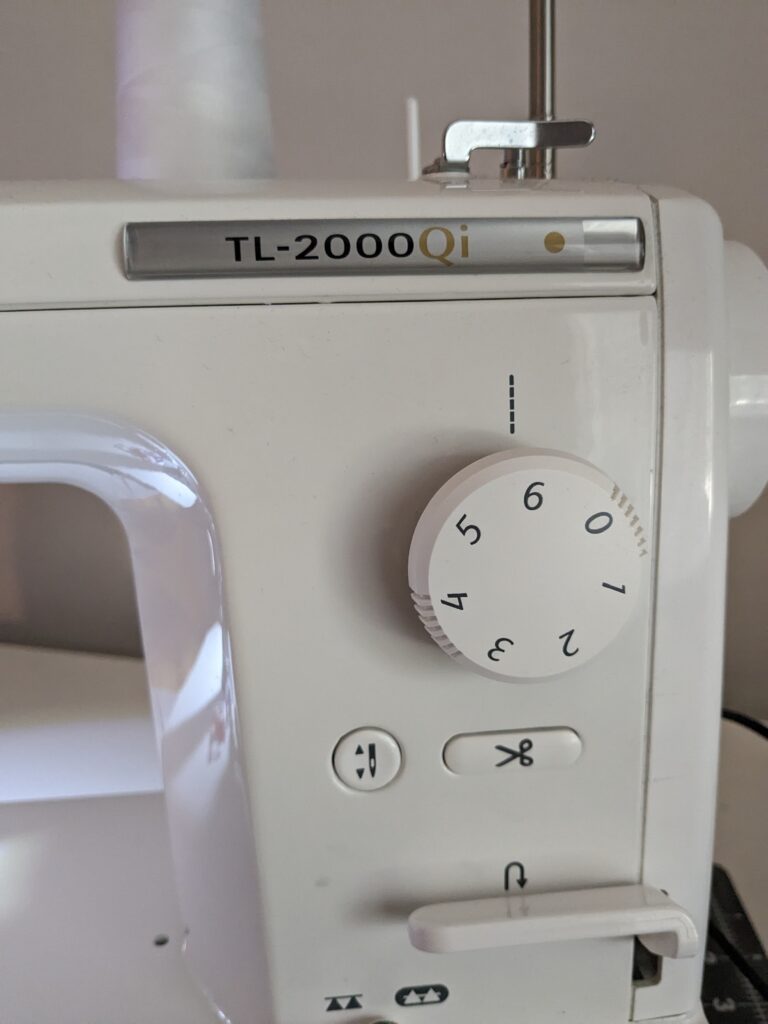
Set your sewing machine to a very small stitch. Most people recommend 1.2 or 1.5. My Juki TL2000Qi doesn’t have exact measurements in between the numbers, so I just go down very close to the number 1 position.
Sew on the line. And yes, I know I took this picture and it doesn’t seem I am exactly on the line. But that’s okay. Nothing is 100% perfect!
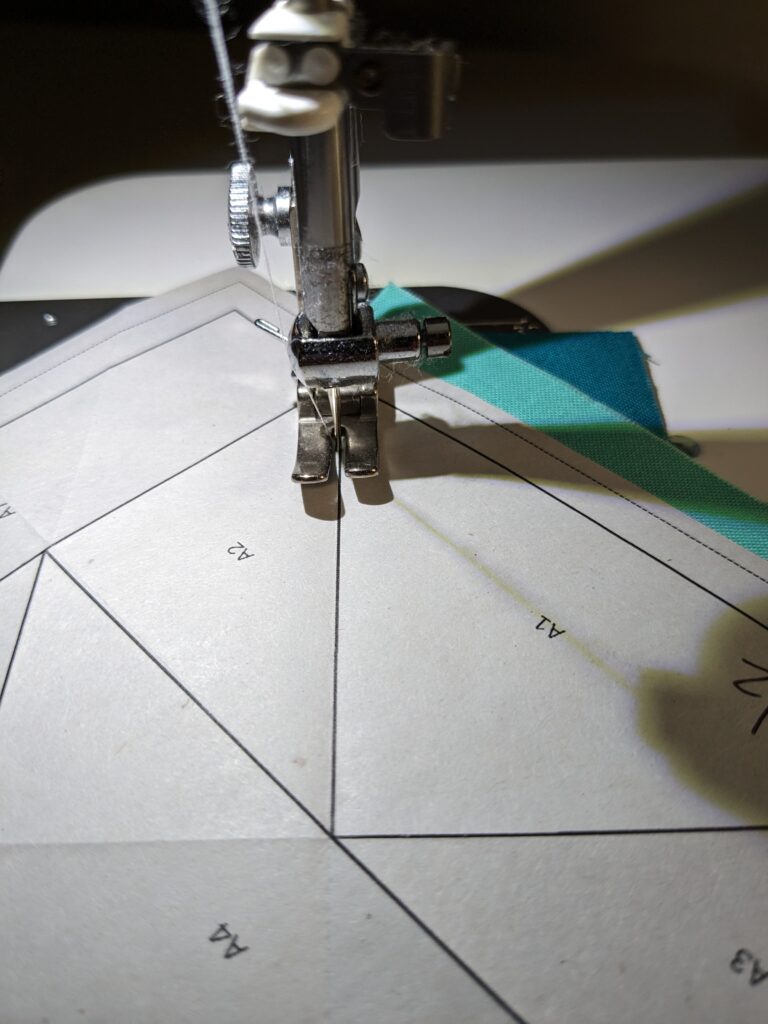
I usually sew a little bit before and after the line, just to make sure my seams are secure. Here’s the piece after sewing sections 1 and 2 together.
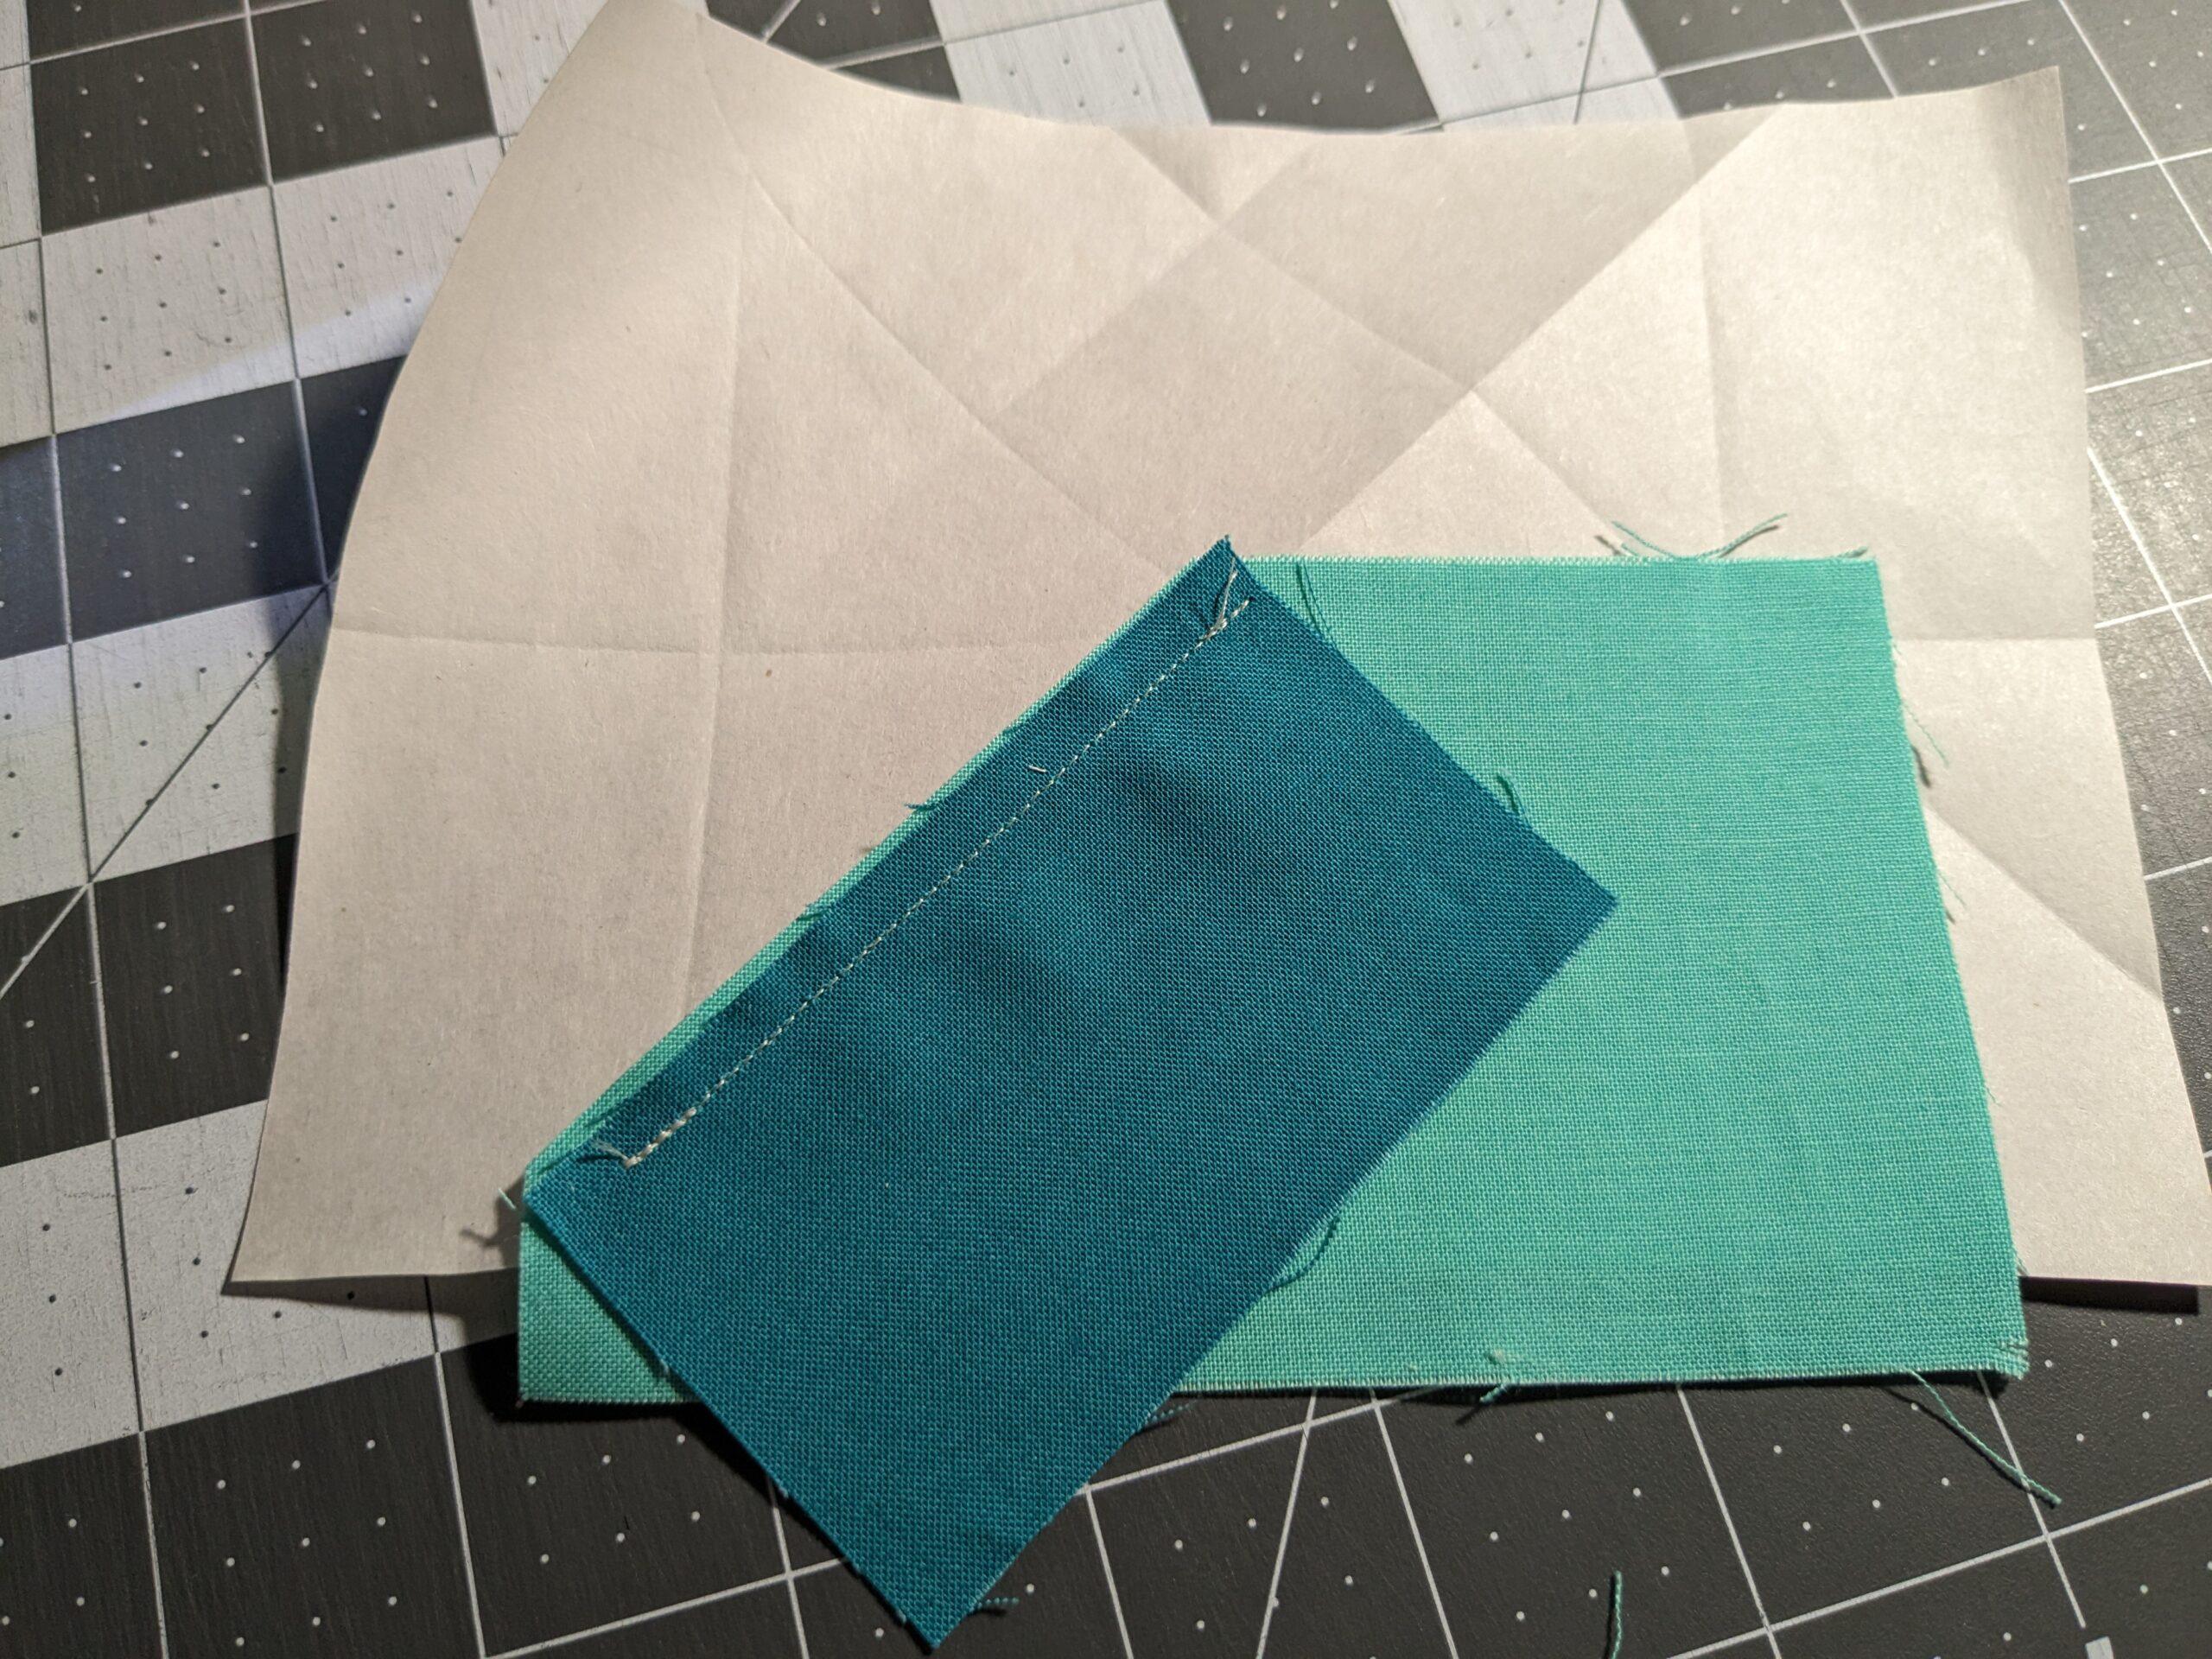
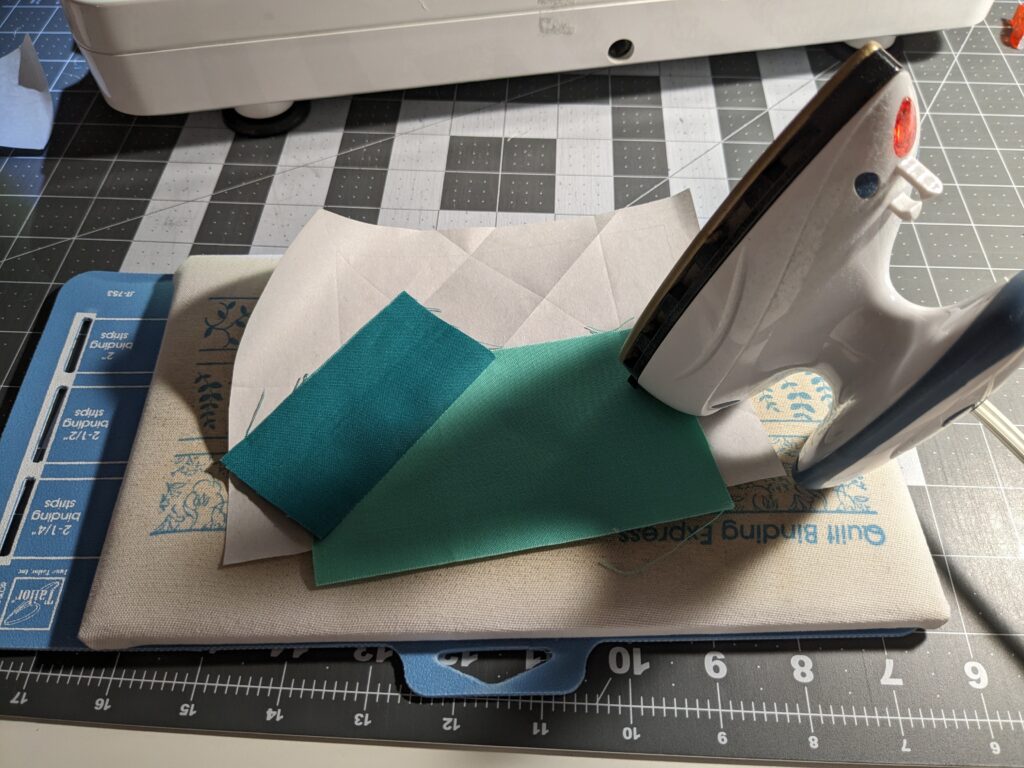
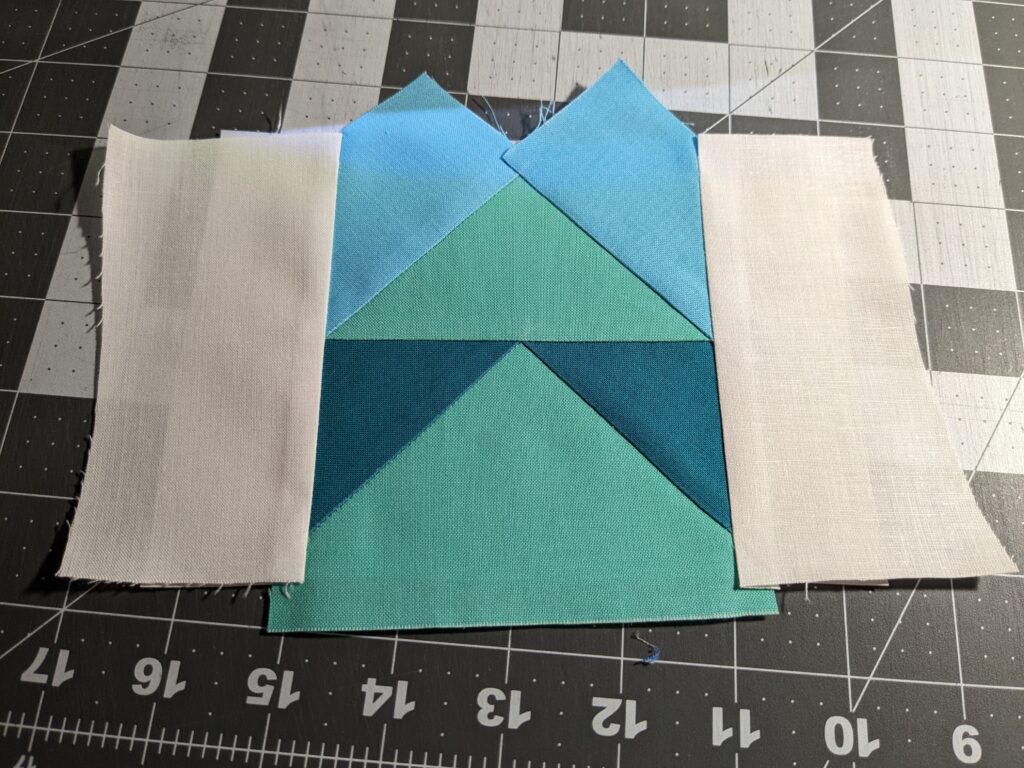
Since I pre-trimmed the first fabric, and lined up the second fabric, there’s no need to trim after sewing them together. The photo below is a bit wonky but that’s because I was trying to take the picture and finger press at the same time! Finger press the seam really well, and then press it.
When I’m making FPP blocks, I always have this little iron and Quilt Binding Express mat nearby. I put it right in front of my sewing machine when I press seams. I’ll admit I press the seams to death! I like to make sure I get really crisp seams. Sometimes I will put my small wool mat on top of the Quilt Binding Express.

Rinse and Repeat
Once the seam is pressed and set, it’s time to pre-trim and get ready to sew section 3 onto the paper. At this point you are just following the same steps over and over to it’s basically “rinse & repeat”. Line up the fabric (right side up), sew on the line, finger press, press with a hot iron.
Finishing Up the FPP Block
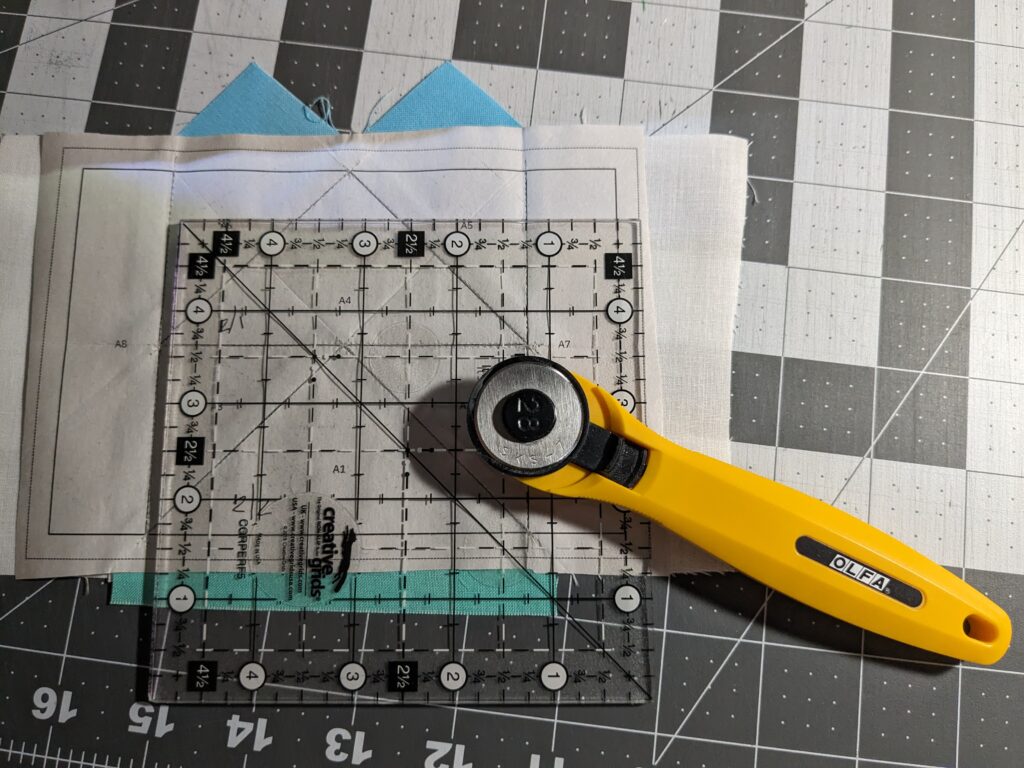
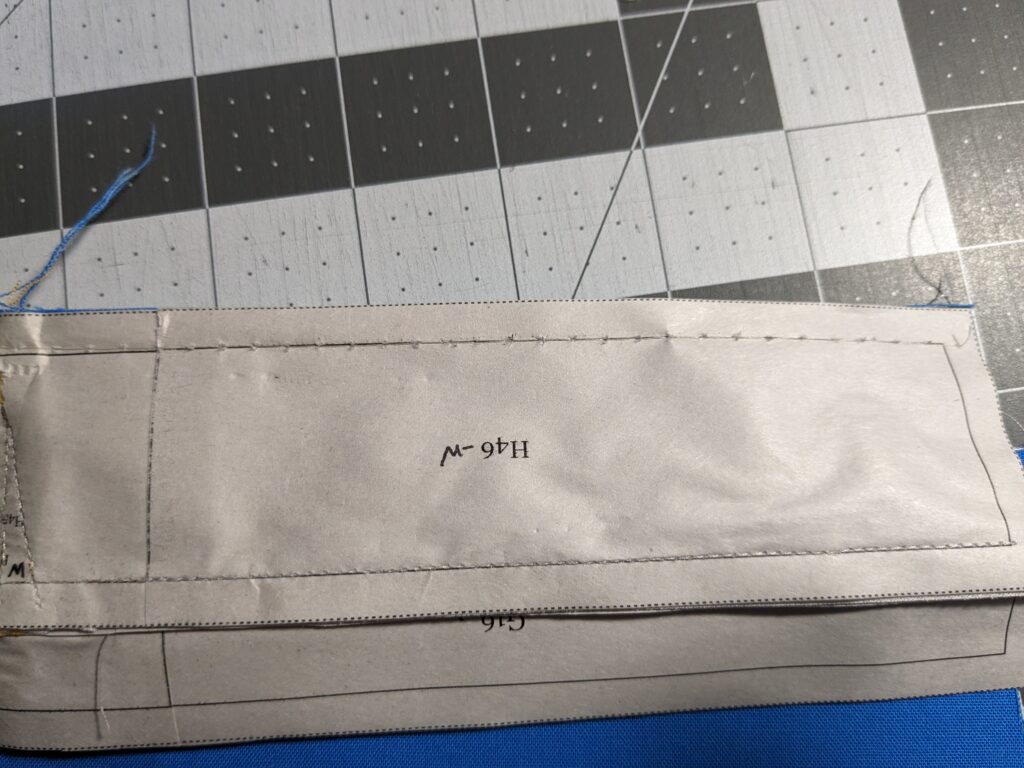
Once all the sections are sewn to the paper, it’s time to trim it down!
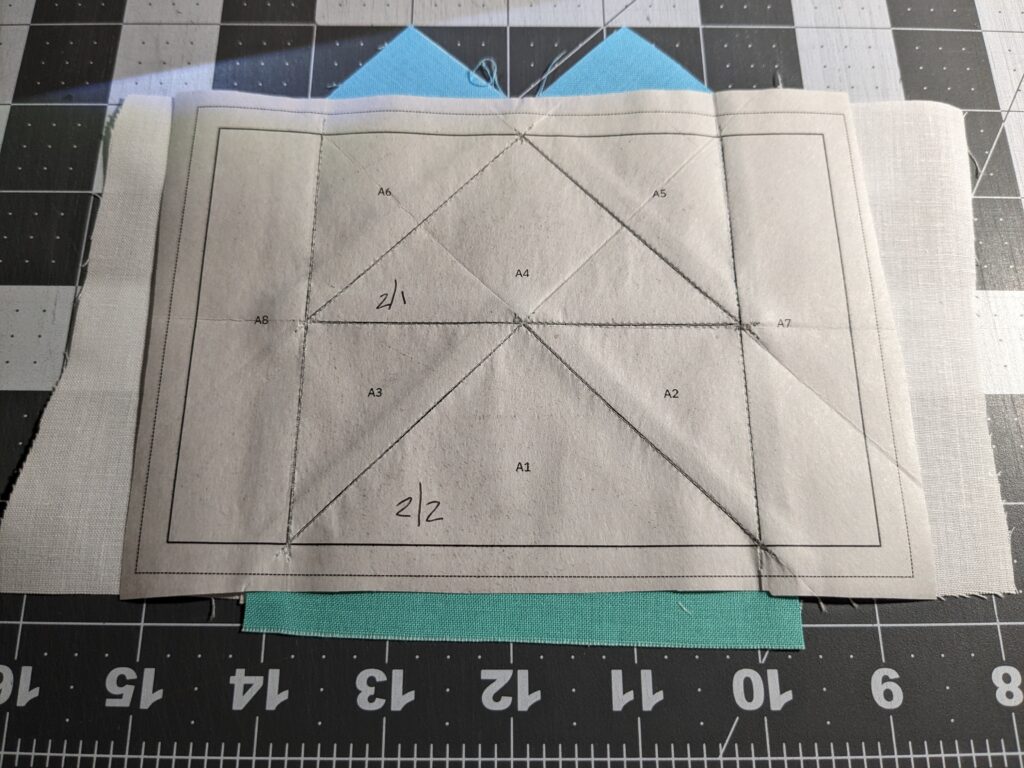
Line up a ruler to the solid line, using the 1/4″ line on the ruler. This then brings the outer edge of the ruler to the 1/4″ seam allowance line. I use my small 5″ x 5″ ruler when trimming, even with larger FPP blocks. That way I can be exact with my measuring the 1/4″ seam allowance. If the ruler is too small to line up the entire line, I just trim a portion of the block, then meticulously line up the ruler again to trim more of the block.

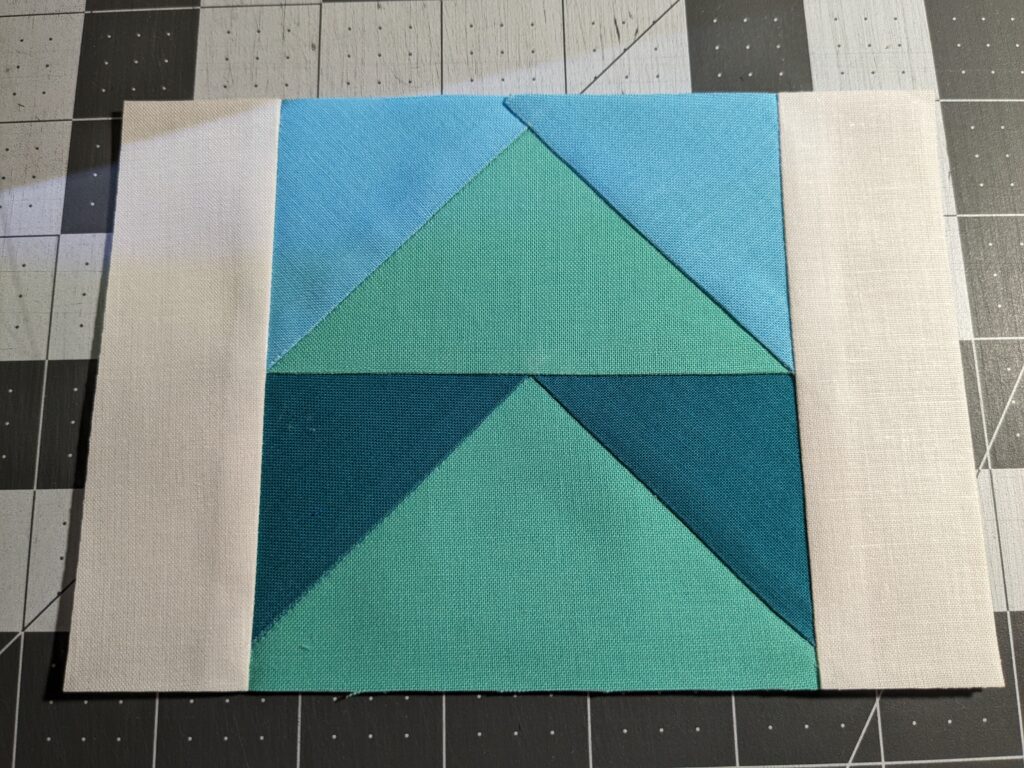
It’s done!

Attaching the Blocks Together
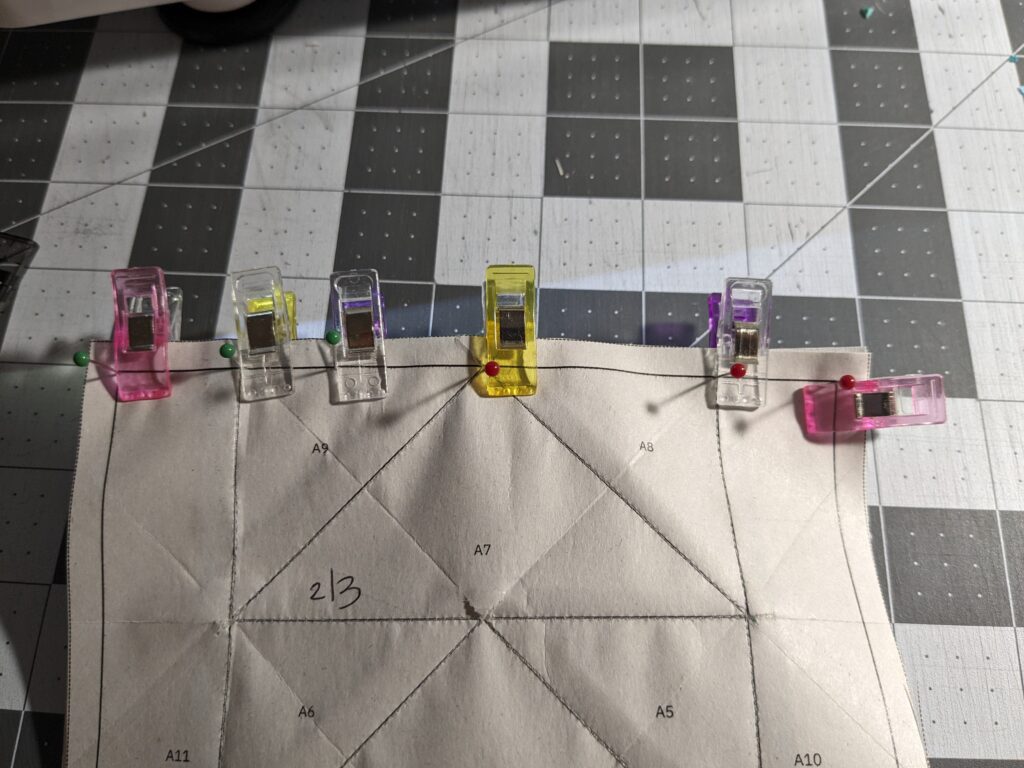
When attaching blocks together, place the blocks fabric side to fabric side. You’ll want to line up the sewing lines as best as possible. I use pins to ensure the lines are perfectly lined up.
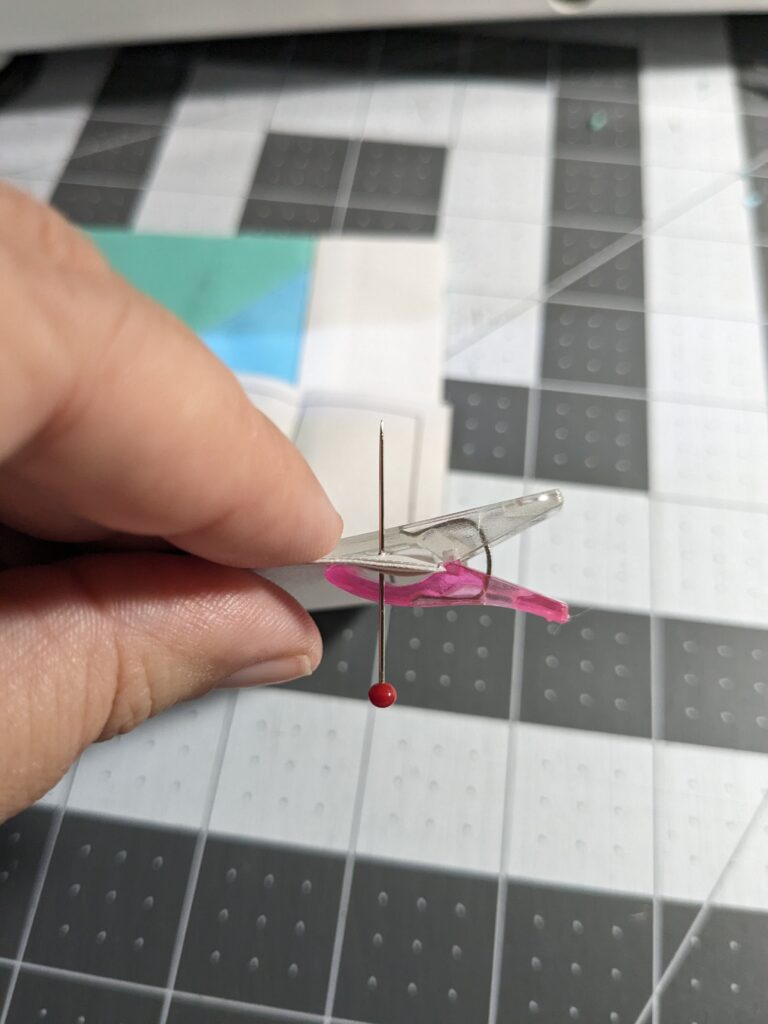
Then I use binding clips to keep the blocks from moving. I’m not a fan of pins, and honestly, I only use the pins to line up the blocks. Pins are not my friend, I always get stuck with them!
Basting Stitch to Check Placement
Depending on the complexity of the blocks I’m putting together, I have used a basting stitch to check my positioning before I use a regular stitch. To make a basting stitch, I just change my stitch length to the largest available on my machine.
Once I sew the blocks together with a basting stitch, I check the placement of my fabric to ensure it is correct. Then I move the stitch length dial back to an FPP stitch length and sew the pieces together.
Then I press my seam and it’s done! It’s up to you if you want to press your seams open or not. If the pattern you are using recommends it, then I would do it as it probably will help to reduce bulk. This Flying Geese pattern is pretty simple, so there’s really no need to, unless you want to.
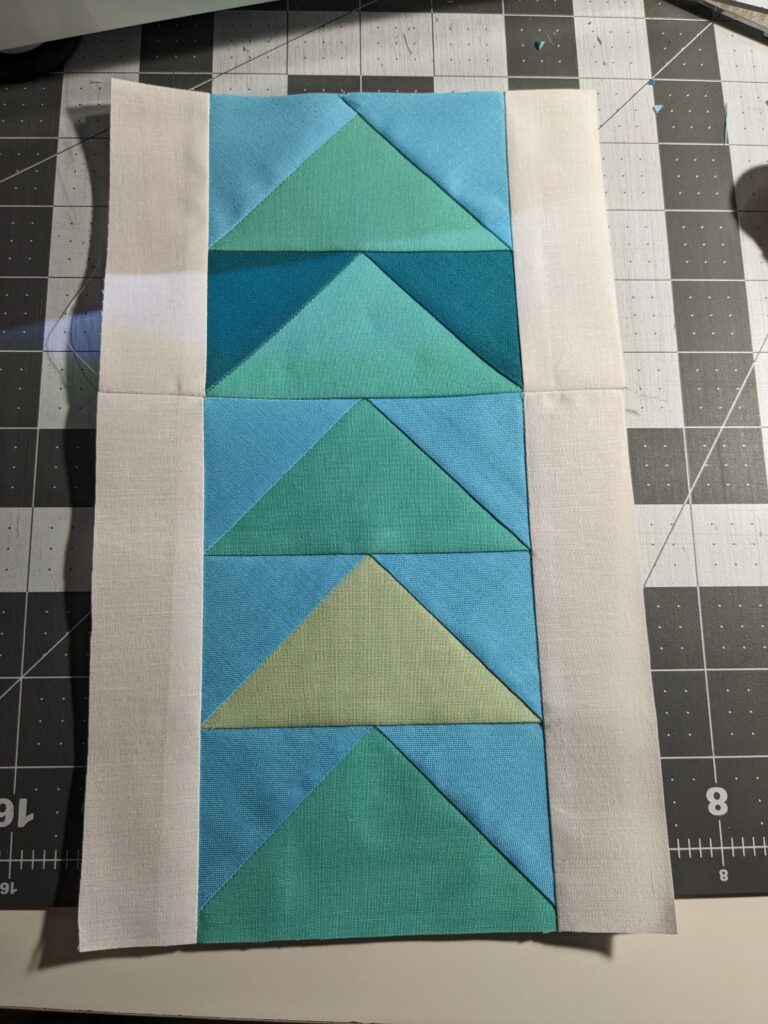
Here’s my finished blocks put together!
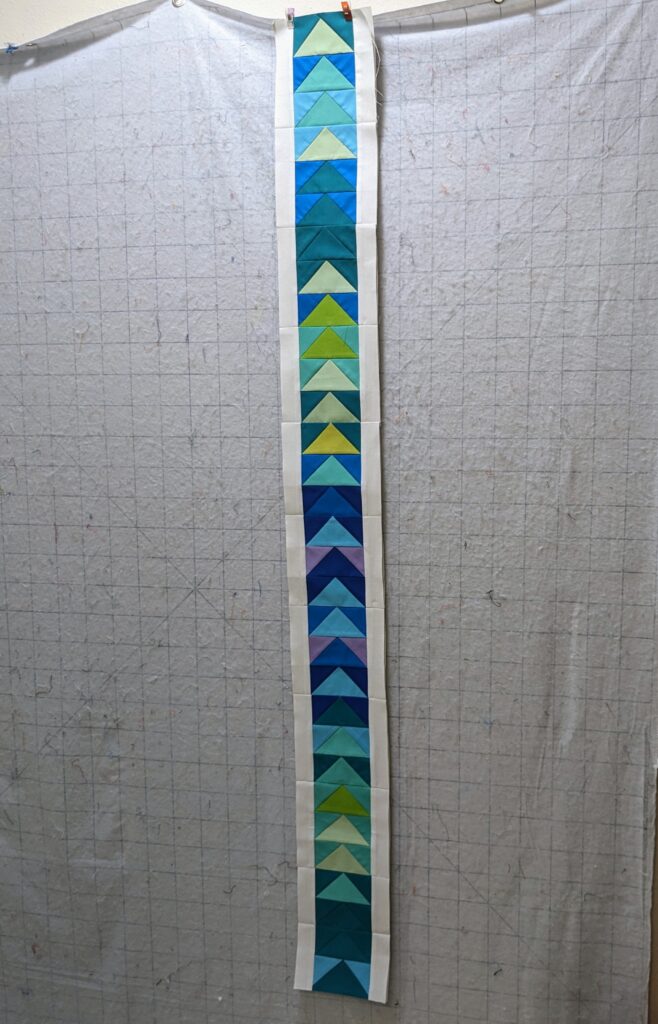
Here’s all of January 2024 put together! I’m really excited with how this temperature quilt is coming out!
I hope this detailed step by step was helpful! If you would like to join me in doing the 2024 Temperature Quilt Along, here’s a list of all the blog posts about the 2024 QAL. There’s still plenty of time to start!
Thank you for reading this post! Happy Quilting!