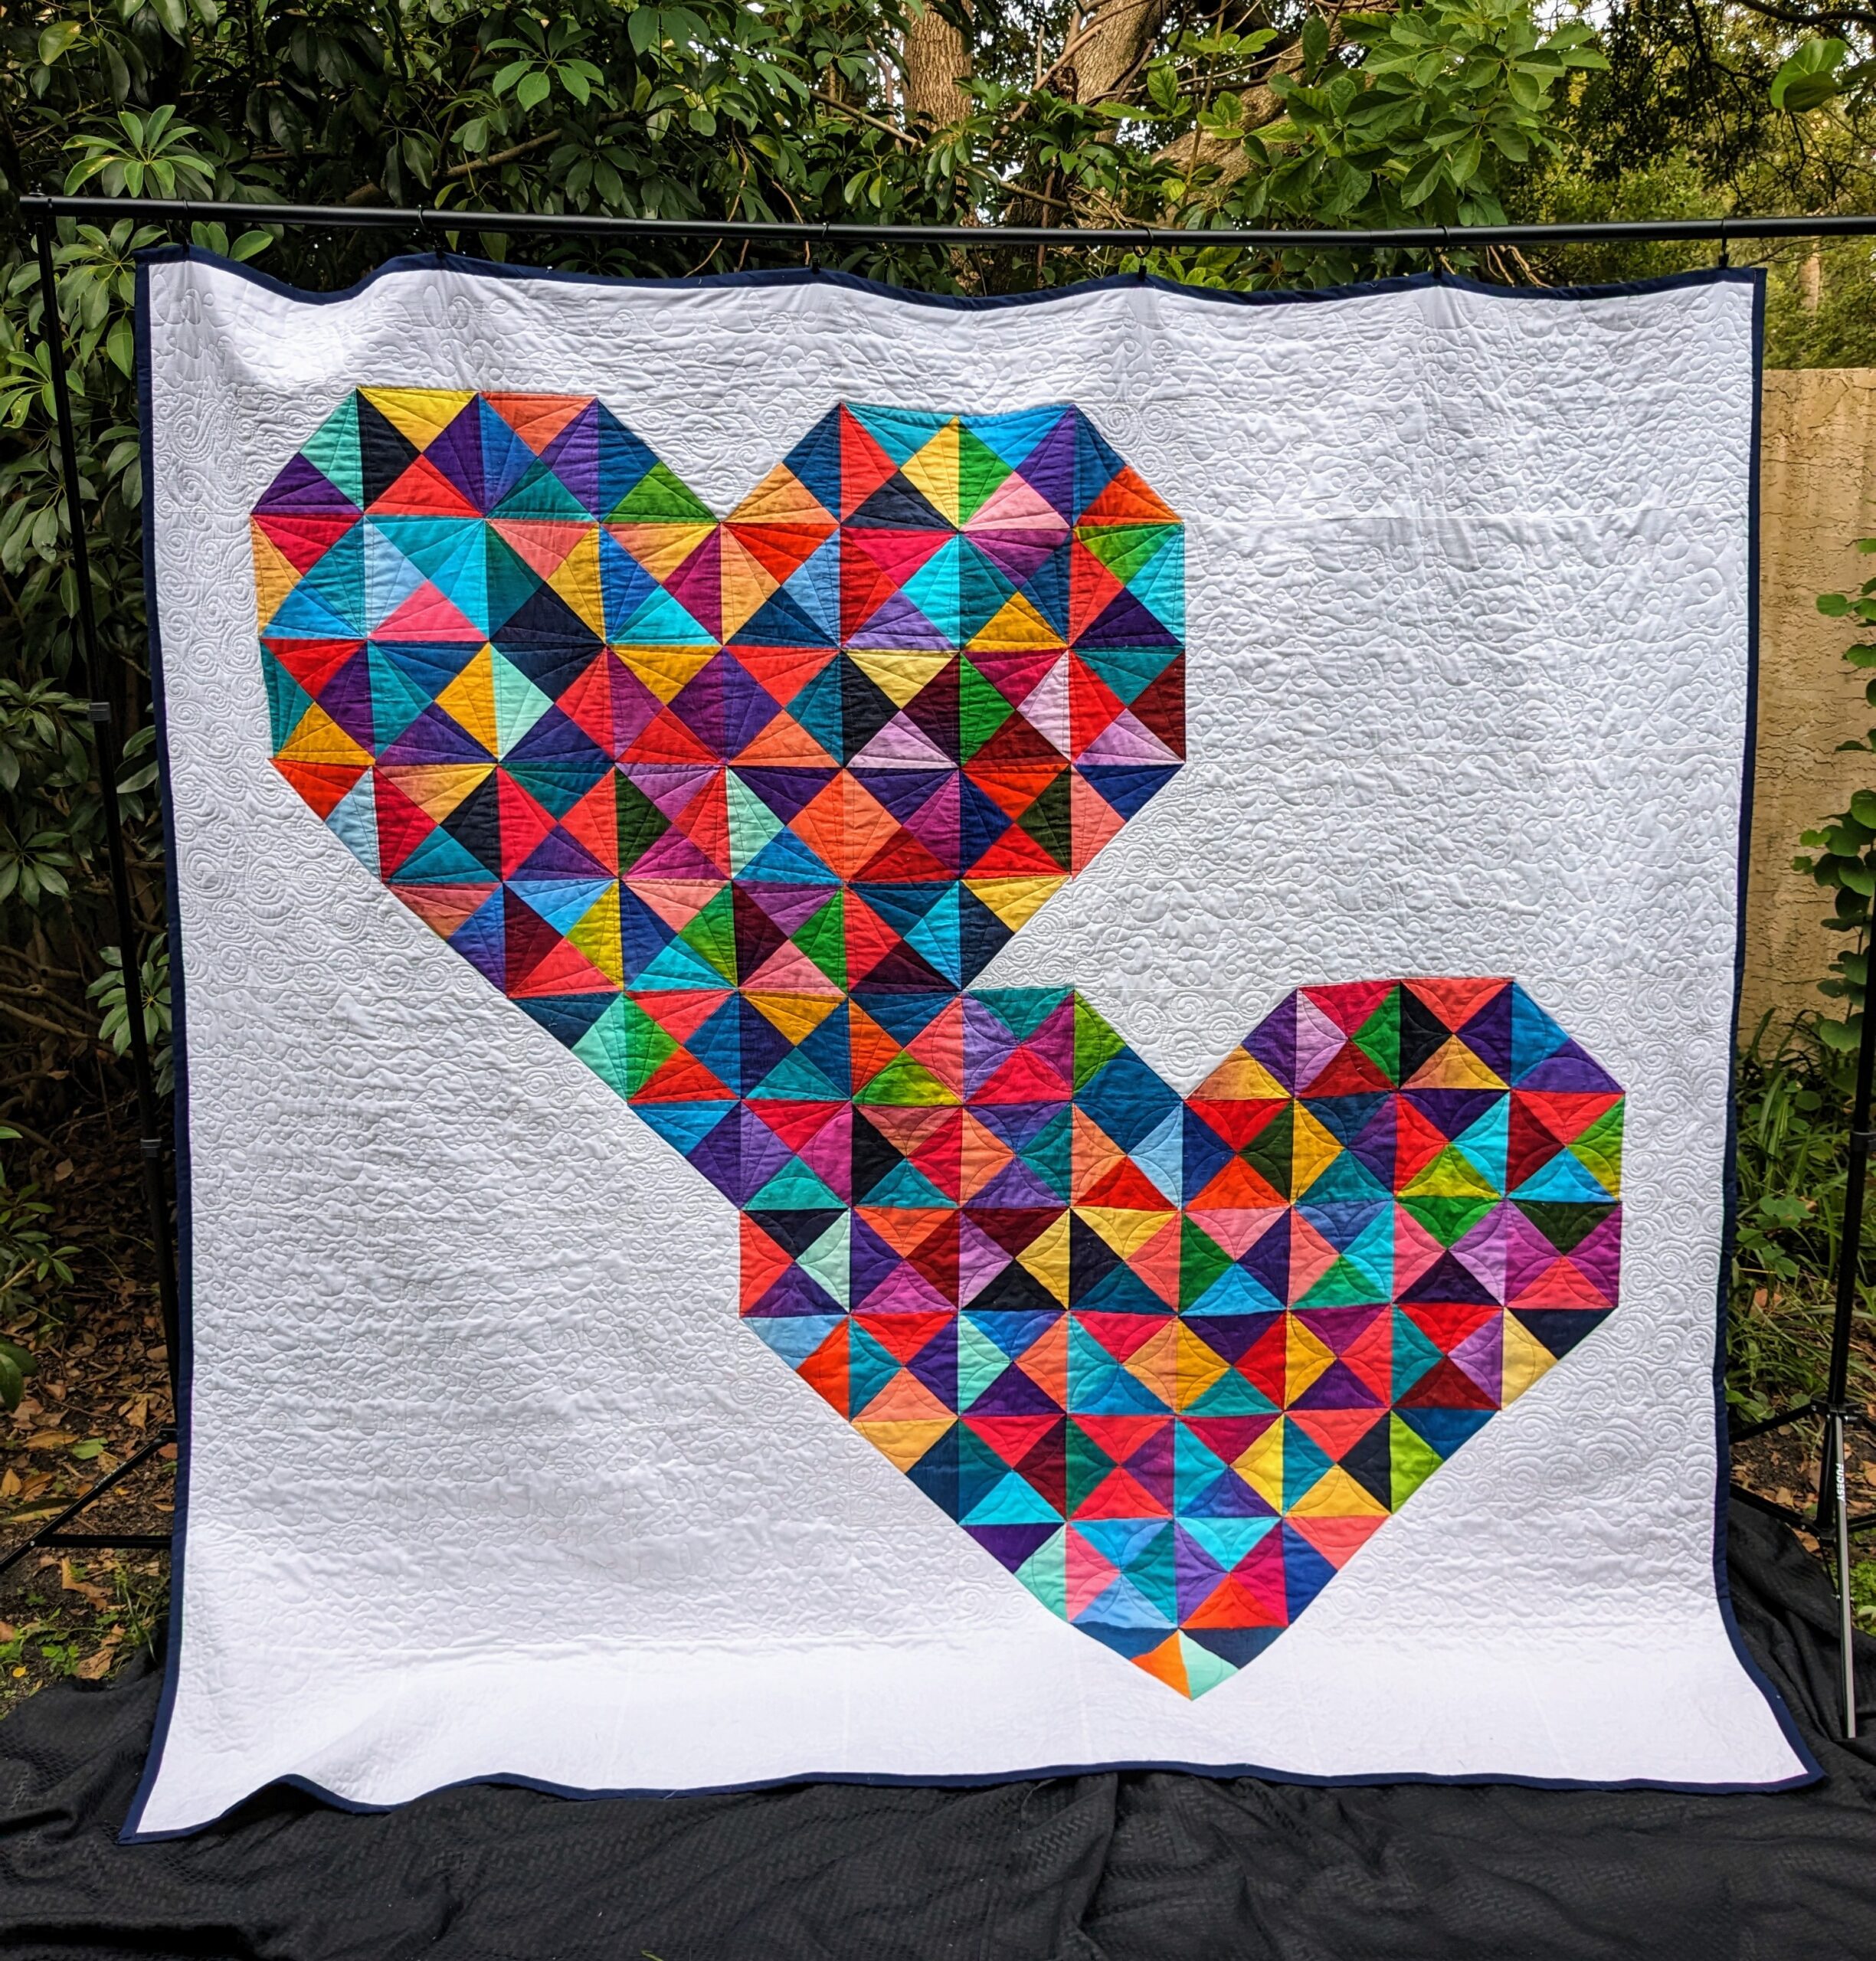
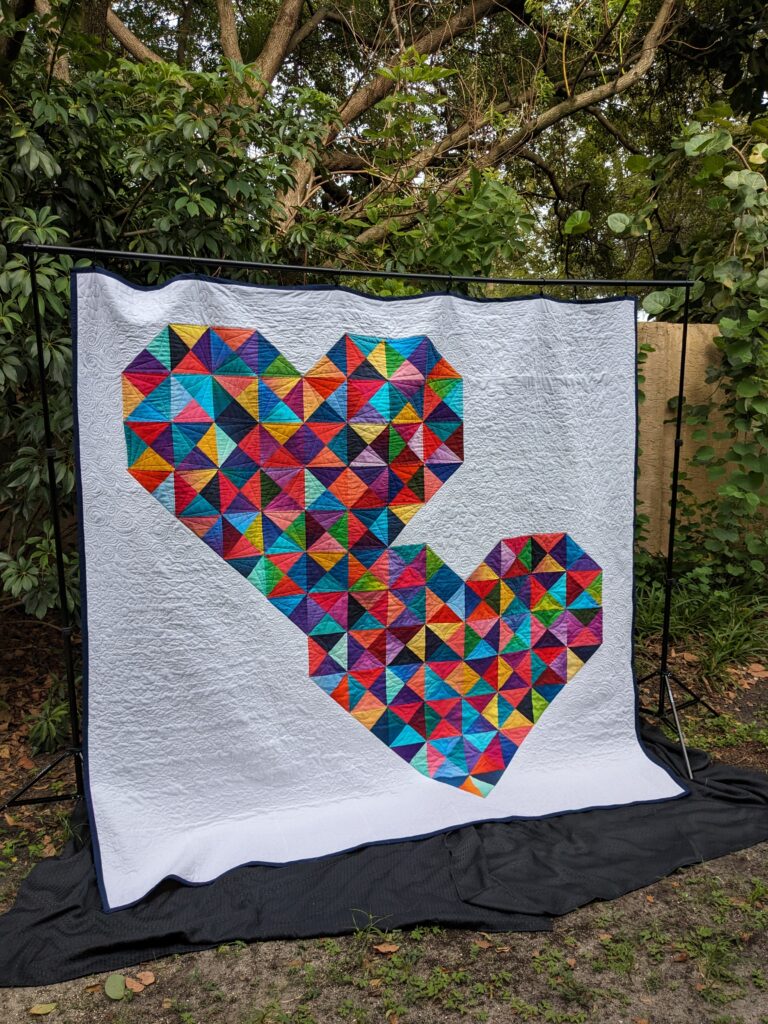
This weekend is Come Out with Pride Orlando! In honor of the event, I’m sharing my Love is Love quilt! This is also a free pattern available for download here.
My childhood friend, Laura, was getting married in 2018. I couldn’t make it to the wedding, but I was so excited for her! We’ve known each other since we were 5 years old, as we met in kindergarten. I wanted to make her something that showed her how much her friendship meant to me, and how excited I was that she finally found her true love. Love is love was the theme that I decided to go with for the present.
The first attempt at a wedding gift
This was before I started quilting, so I designed a crochet blanket that I thought would be perfect! And then I actually started making it. I realized it was going to be very very large, and much too hard to finish. I unraveled all that yarn and redesigned it so it would be smaller and started over. My second attempt wasn’t any better!
I did what I think most of us would do, I put it in my UFO (unfinished objects) pile and worried about what I was going to do next. It sat in that pile, and in my mind, for about 2 years. Then I started quilting, and I decided I would try to make it into a quilt instead!
Making it into a quilt
It was only the second quilt I attempted to make, and I will say that there was a lot of fabric wasted while I tried to learn and figure out how to make my vision into a quilt. I researched how to applique names onto a quilt top. I decided to make the hearts more colorful and not just red after a failed attempt at red hearts.
There was an actual finished quilt top that I attempted to quilt, but as I started quilting it I realized two things. One, the quilt top looked very childish and I hated the applique and two, I had no way to quilt this HUGE quilt top on my little tiny Janome even if I did like the finished quilt top!


This quilt top ended up in my UFO pile. It actually is still there and eventually I’ll cut it up to use as scrap fabric in some other projects.
Finally making the gift!
This year was their 5 year wedding anniversary, plus Laura and I turned 50 this year. Laura’s birthday is at the end of August and I wanted to get a completed quilt to them for their 5th year anniversary, but definitely before her 50th birthday. I purchased more of the fabric I used for the hearts that I loved and redesigned the quilt top.
It had been 3 years since I started the original quilt top, and in that short period of time I have learned a lot about quilts! I knew that I didn’t want to do the applique lettering, since my applique skills still aren’t where I want them or need them to be. I wanted a cleaner, more modern looking quilt.
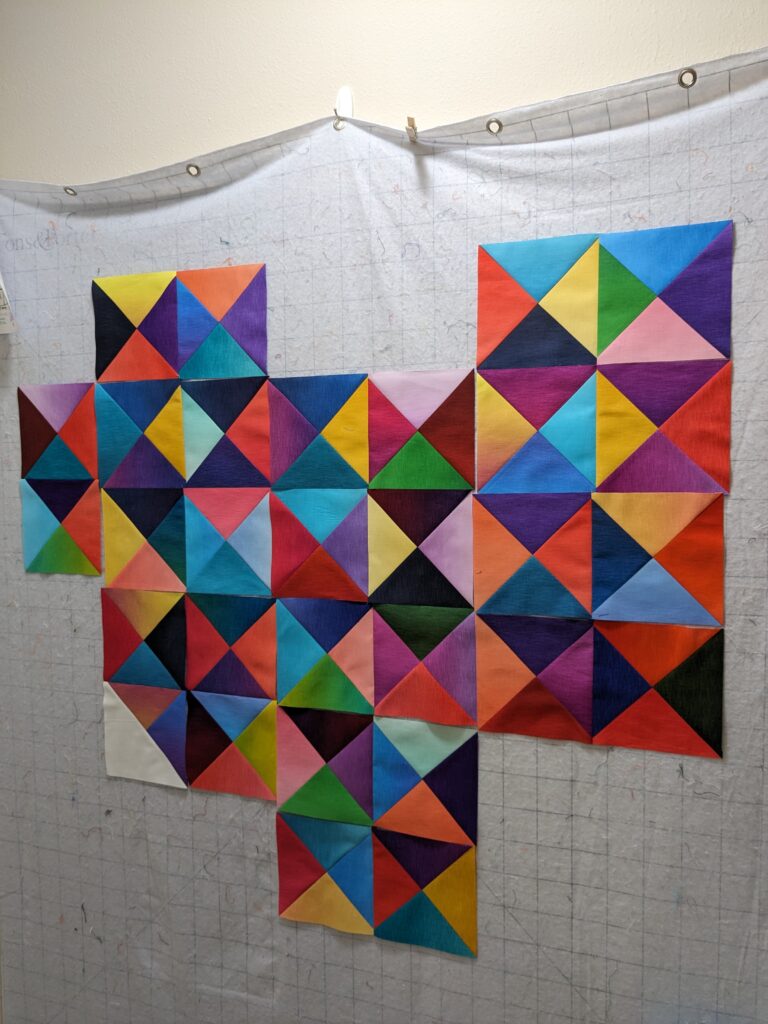
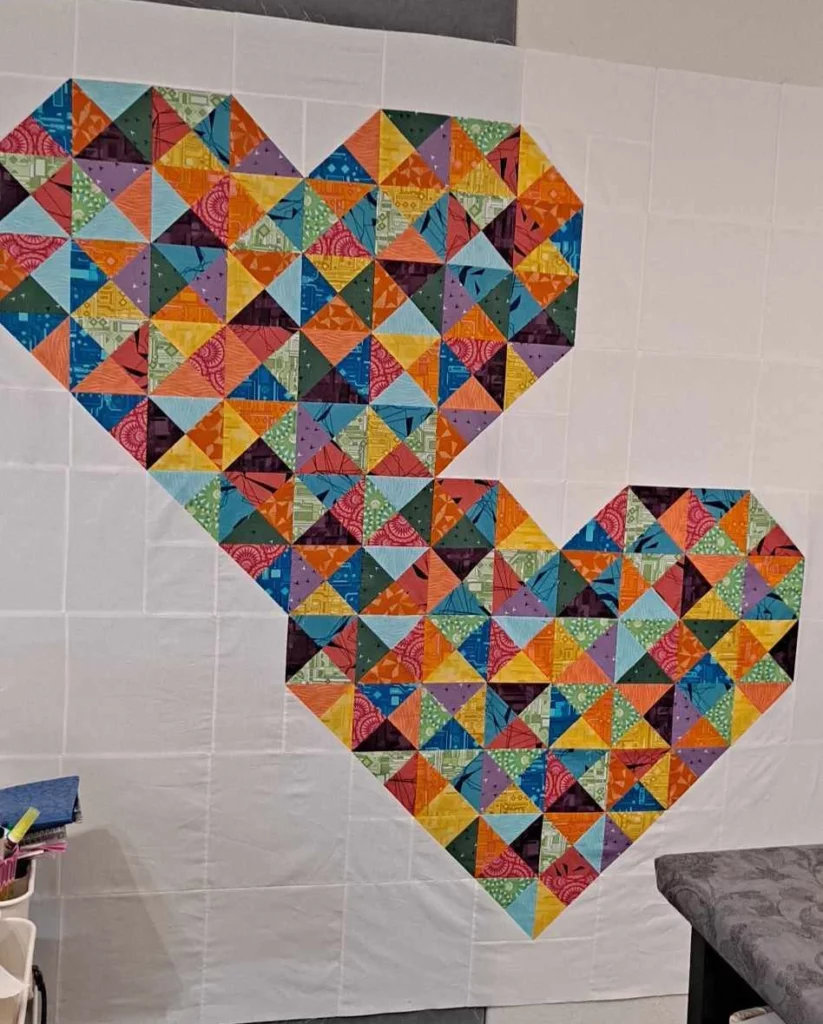
The quilt was going to be just white background and then the QSTs (quarter square triangles) for the hearts.
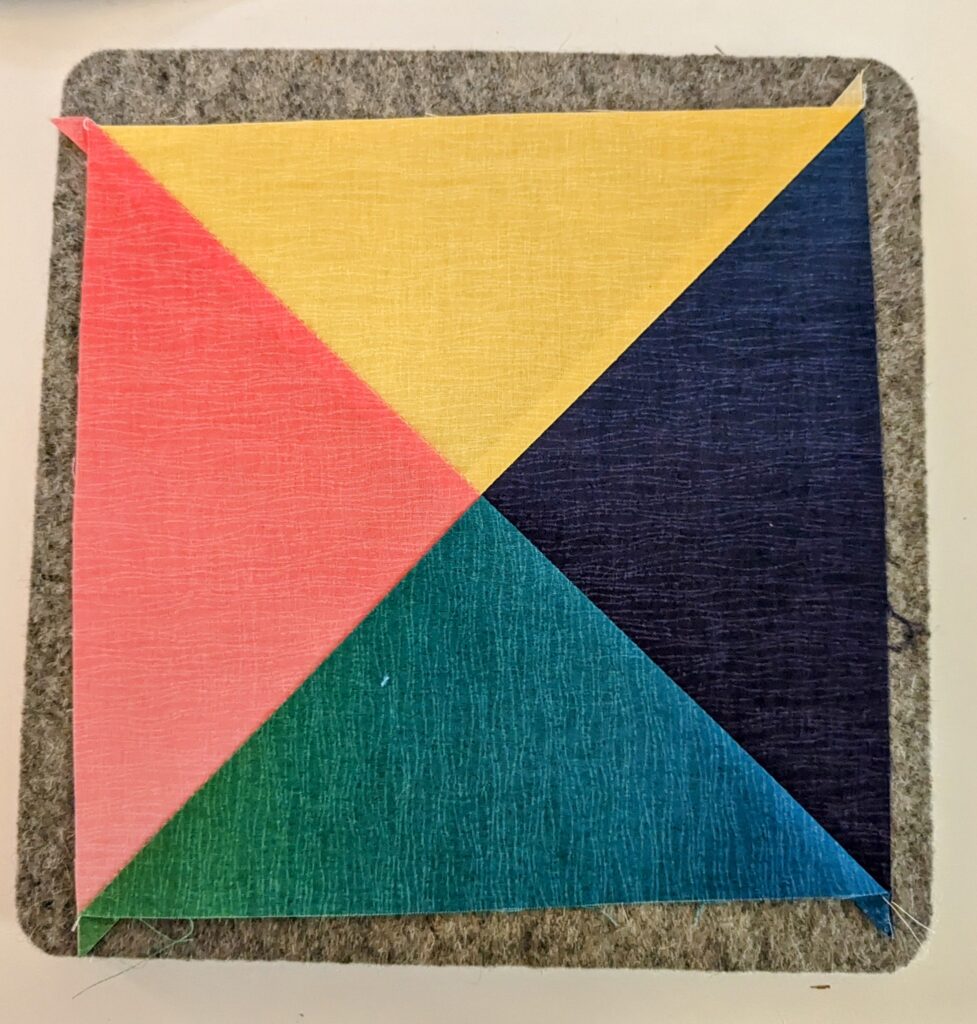
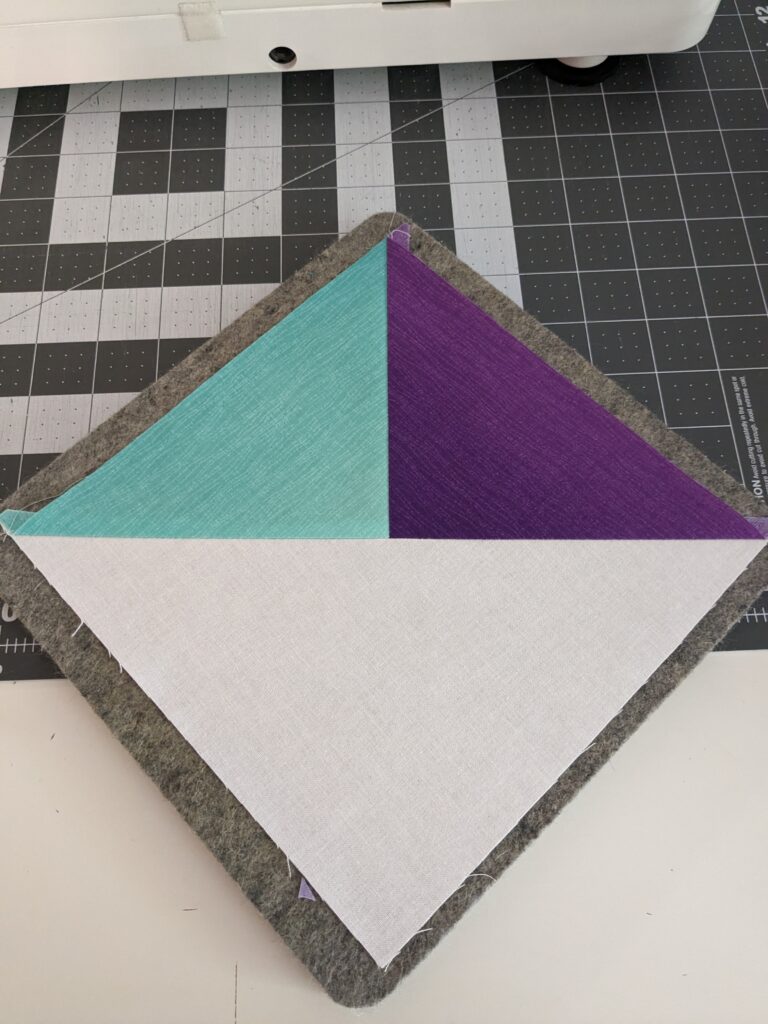
I made all the QSTs and Split QSTs first and then put them on my design wall to decide color placement. I’ll tell you that trying to make the color placement seem random, while still looking good is hard! I must have moved the blocks around for two to three days before I finally was happy with the placement.
Preparing for the Quilting
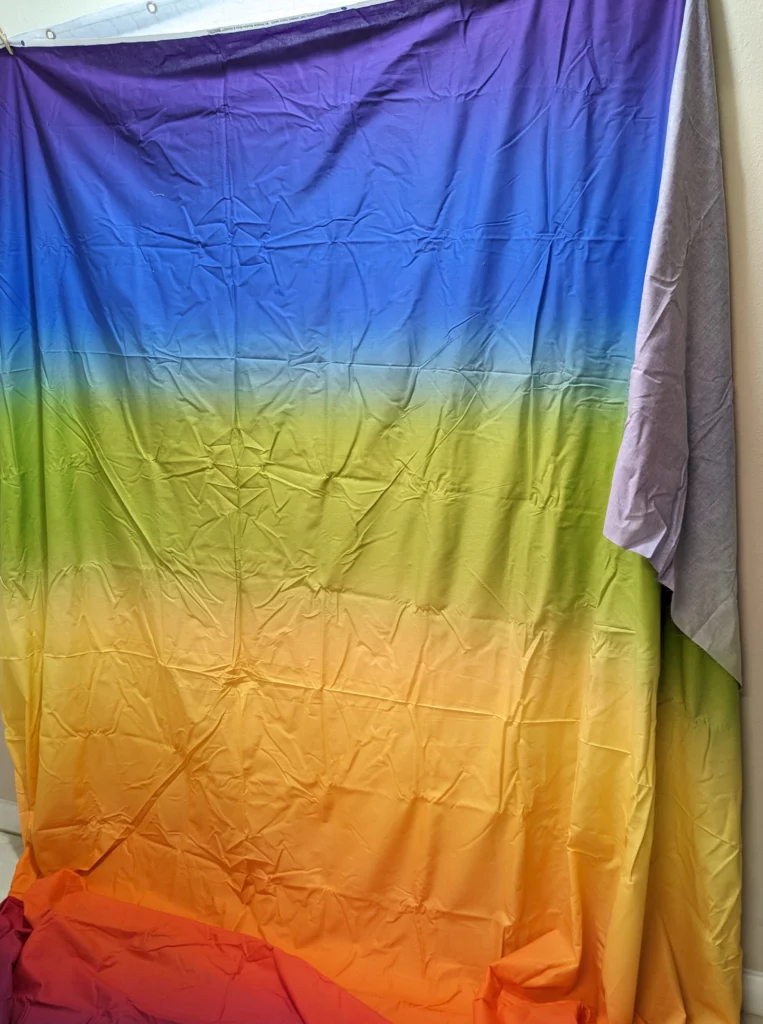
After finishing the top, it was time to move on to getting it ready for quilting, which includes getting a backing together. I love using 108″ width fabrics for backing on my quilts. There’s no piecing or worrying about a pieced backing not being quite big enough. I found this beautiful rainbow ombre backing fabric from Windham Fabrics for the backing and knew it would be perfect! It matched the colorful hearts on the front and went well with the Love is Love theme!
Playing with Rulers
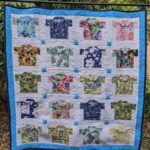
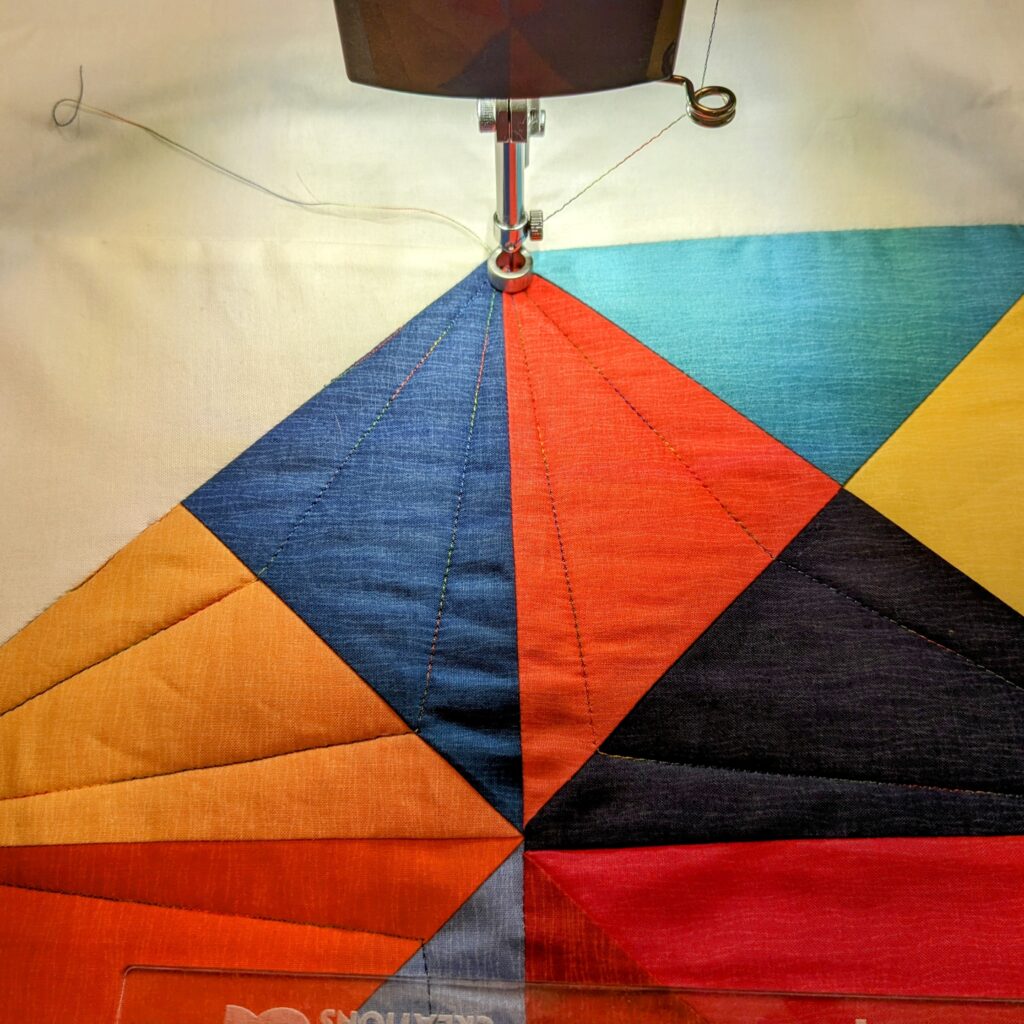
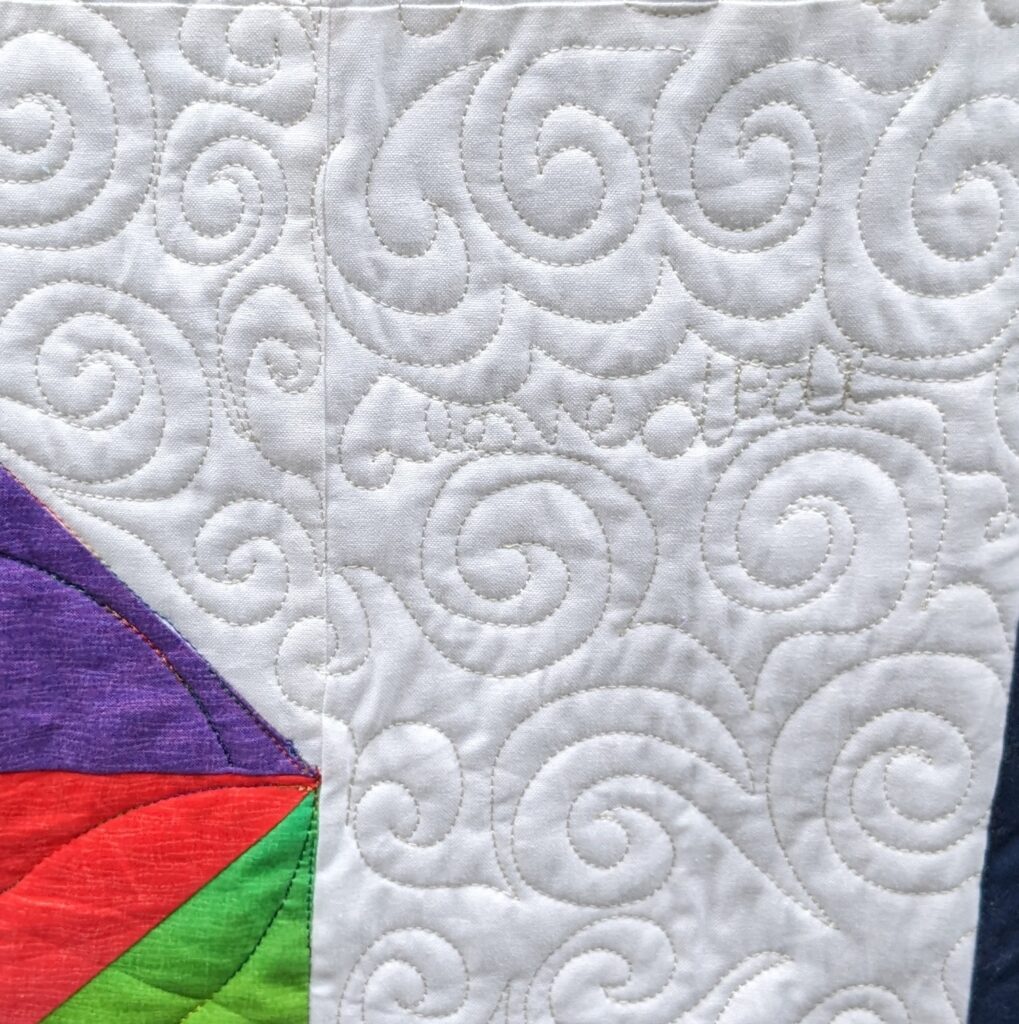
I knew that I wanted to do two different types of patterns in the hearts. One heart was going to be quilted with straight lines and the second heart was going to have curved lines. I wanted it to represent two separate personalities coming together, just like in marriage! I had played with rulers on the Hawaiian shirt quilt, specifically to practice for quilting this one. This was quilted on my Cutie frame with my 19x Elite, this was prior to getting the Cutie Breeze!
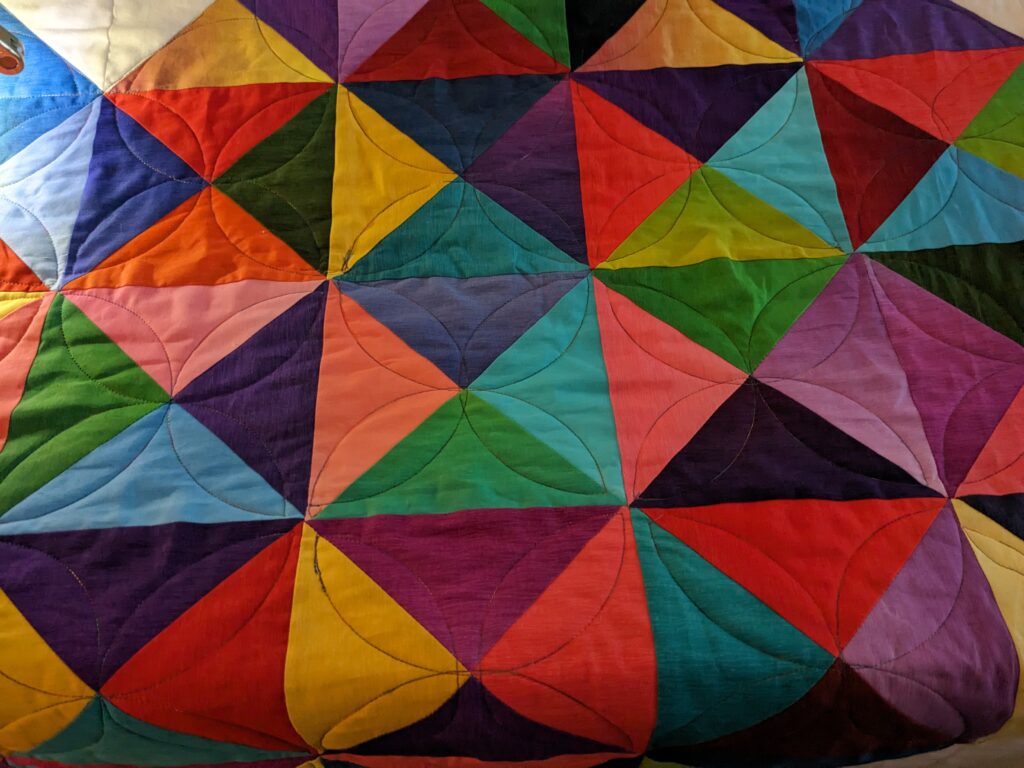
Here’s the curved heart after quilting.

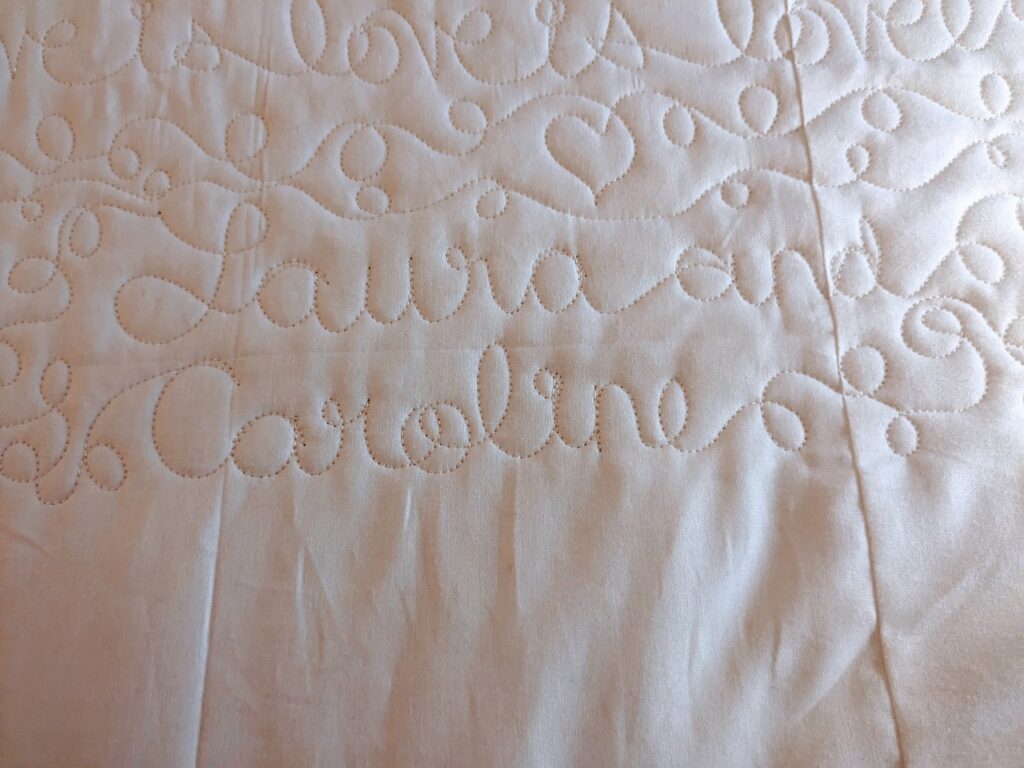
In the background, I quilted a loopy meander with hearts, ‘love is love’ and I added their names and the date of the wedding in one section of the background.
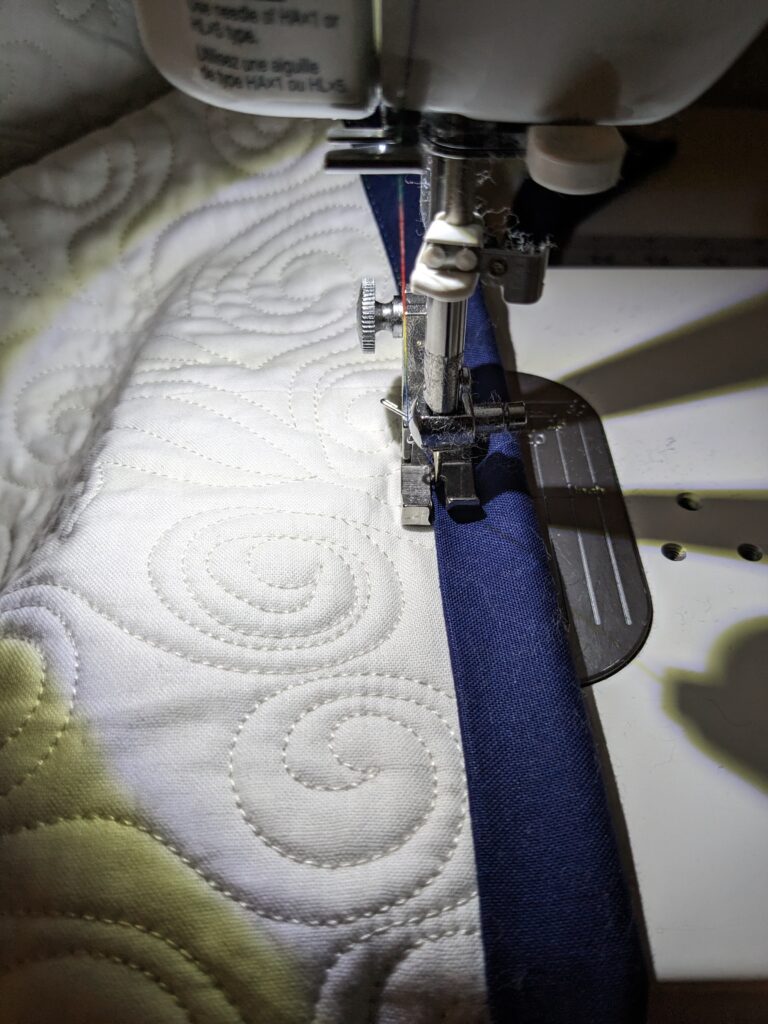
Once it was all quilted, it’s time for the binding! I am not a fan of hand sewing, unless it is English Paper Piecing, so I machine sew my binding on. I sew the binding onto the back of the quilt, and then use my 1/16″ compensating foot to sew the binding onto the front. Since getting the compensating foot, sewing bindings onto the front is so easy!!
All done!!
I was so excited to have this quilt completed and sent to Laura & Caroline before the end of August! It was so satisfying to finally have this gift done!! It was made with so much love, that I had to add a bit of it into the quilt!
Here’s a picture I received from Elizabeth, one of the amazing quilters who agreed to be a pattern tester, with her version of the quilt!
I never would have even dreamed of designing my own quilt, let alone finishing it from beginning to end, without the Grace Company! I have learned so much since getting my original Cutie frame, and am hoping to continue to learn more as I start using the Cutie Breeze! Here are my favorite Grace products, and some that are on my wish list too!

If you would like to make a Love is Love quilt for yourself, the pattern is available as a free PDf download here. If you make your own Love is Love quilt, please tag me on Instagram or Facebook @LoveFromOrlando and show it off!!
Thanks for reading my blog post!! I look forward to seeing your quilts! Happy Quilting!